Lucky St. Patrick's Gnome
A lucky St. Patrick’s Day gnome in shades of green — a flat ornament joined with reverse single crochet.
Hi, my fellow crocheters! I hope your holidays were awesome!
I so much liked one of my latest patterns so I decided to remake it a little. And here we go! Meet the new gnome in the collection - St. Patrick version.
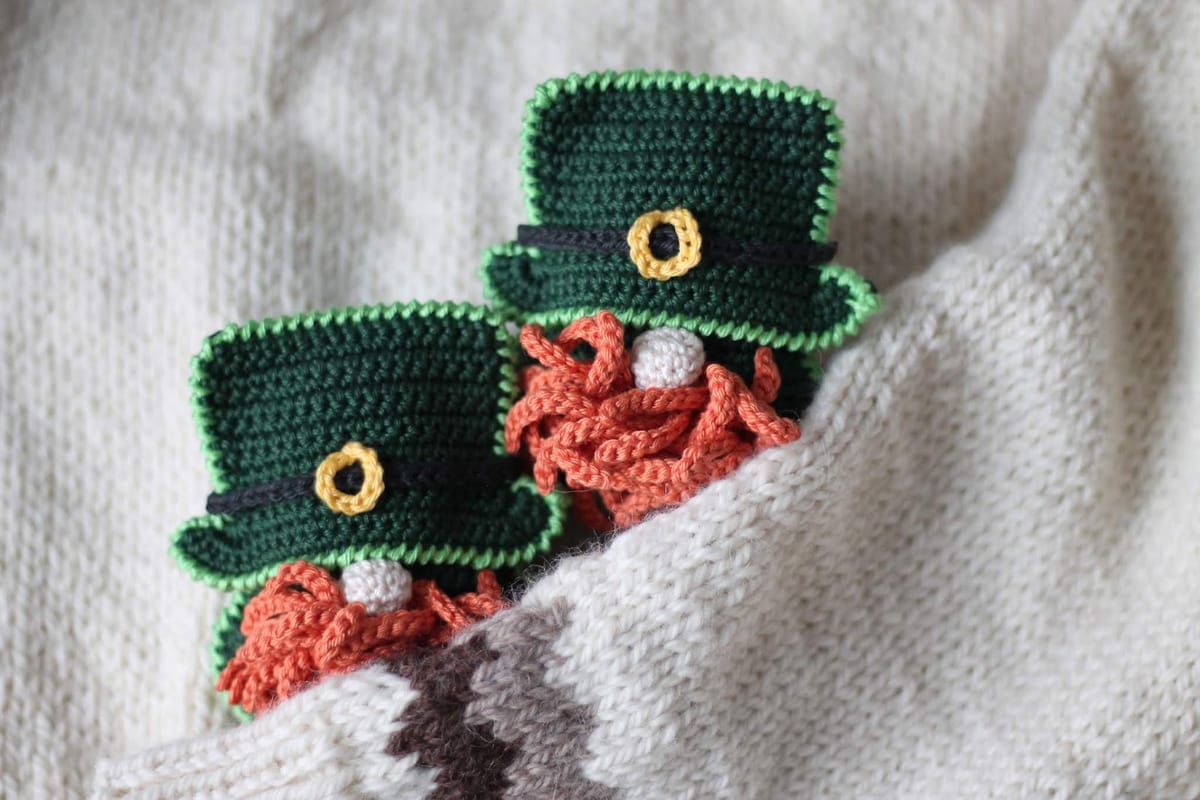
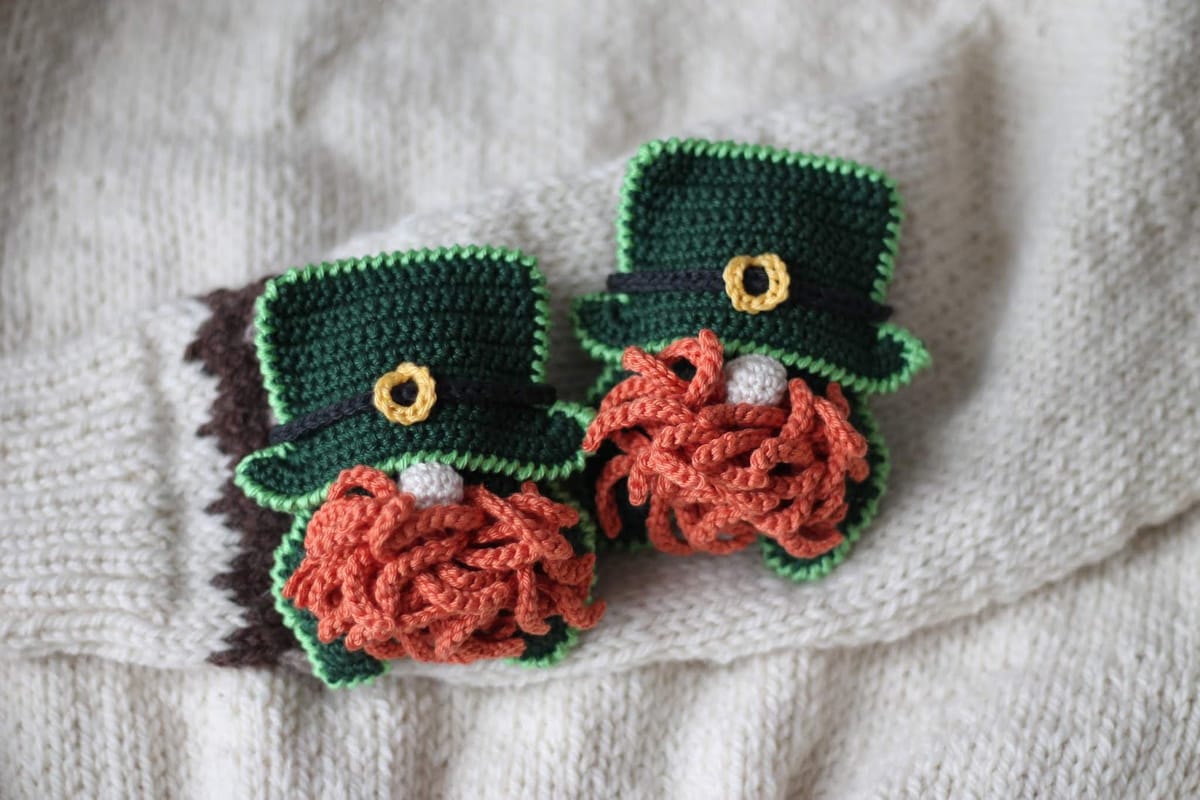
ABBREVIATIONS
The pattern is written in English, using US terminology.
ch - chain
sc - single crochet
inc - increase
dec - decrease
sl st - slip stitch
rsc - reverse single crochet
You should know how to crochet: chain, slip stitch, single crochet, increase, decrease, reverse single crochet, crochet in rows and rounds.
Happy crocheting!
Body
Crochet in dark green yarn.
Ch 9.
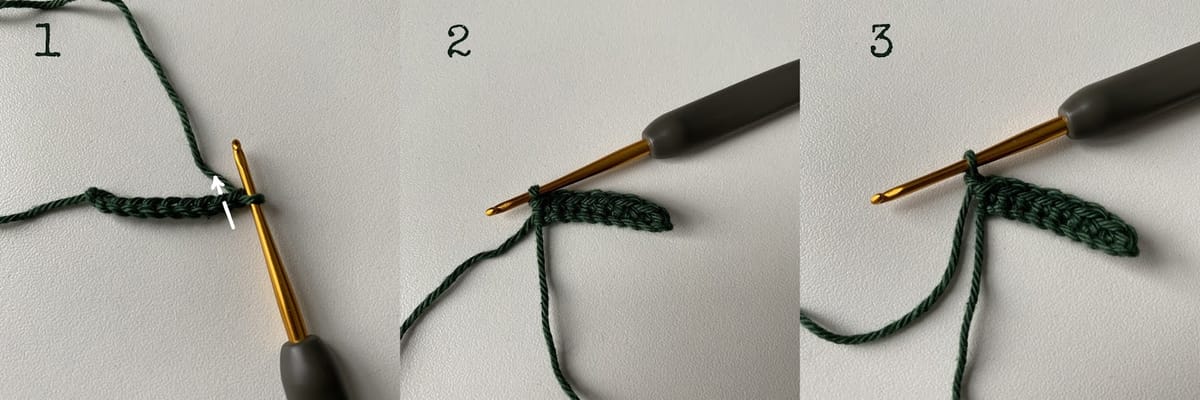
ROW 1: start crochet in a second ch from a hook (pic.1), sc in next 8 ch [8] (pic.2)
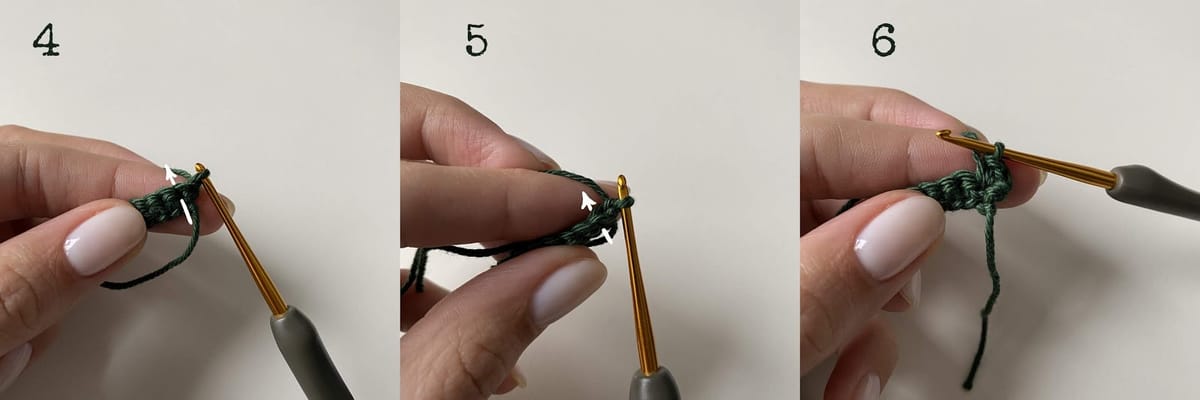
ROW 2: ch 1 (pic.3), turn the detail, inc in next st (pic.4-6), sc in next 6 st, inc in next st [10]
ROW 3: ch 1, turn the detail, sc in next 10 st [10] (pic.7)
ROW 4: ch 1, turn the detail, inc in next st, sc in next 8 st, inc in next st [12] (pic.8)
ROW 5: ch 1, turn the detail, sc in next 12 st [12]
ROW 6: ch 1, turn the detail, inc in next st, sc in next 10 st, inc in next st [14]
ROW 7-8: ch 1, turn the detail, sc in next 14 st [14] - 2 rows
ROW 9: ch 1, turn the detail, inc in next st, sc in next 12 st, inc in next st [16]
ROW 10-11: ch 1, turn the detail, sc in next 16 st [16] - 2 rows
ROW 12: ch 1, turn the detail, inc in next st, sc in next 14 st, inc in next st [18]
ROW 13: ch 1, turn the detail, sc in next 18 st [18]
ROW 14: ch 1, turn the detail, inc in next st, sc in next 16 st, inc in next st [20]
ROW 15: ch 1, turn the detail, sc in next 20 st [20]
ROW 16: ch 1, turn the detail, inc in next st, sc in next 18 st, inc in next st [22]
ROW 17-19: ch 1, turn the detail, sc in next 22 st [22] - 3 rows (pic.9)
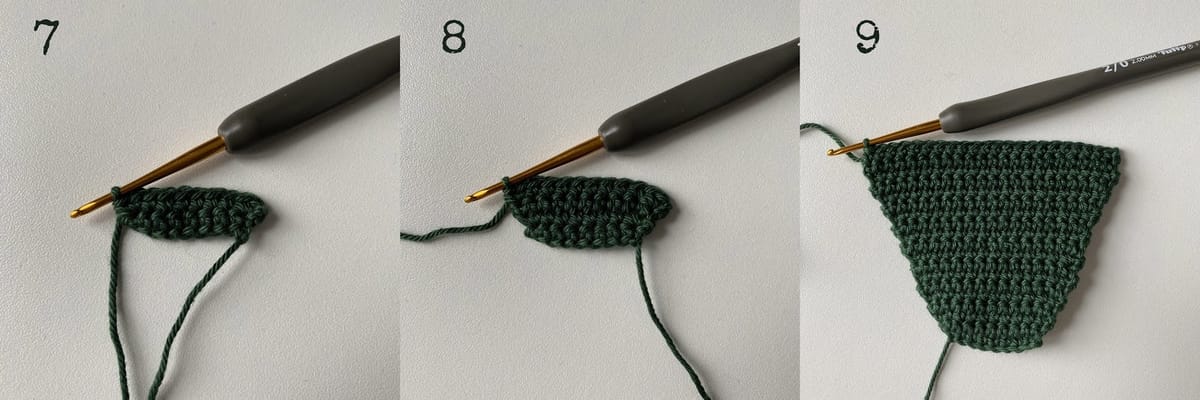
ROW 20: ch 1, turn the detail, dec (pic.10-12), sc in next 18 st, dec (pic.13-14) [20]
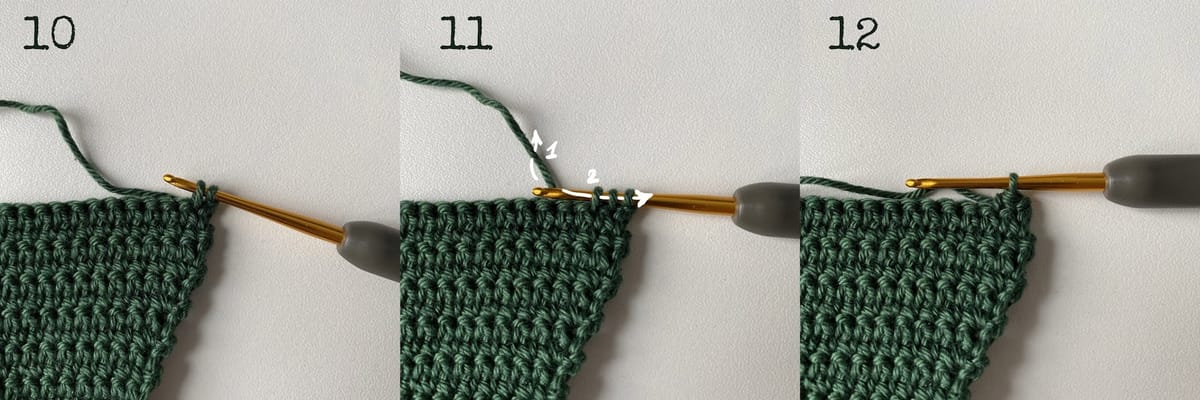
ROW 21: ch 1, turn the detail, sc in next 20 st [20] (pic.15)
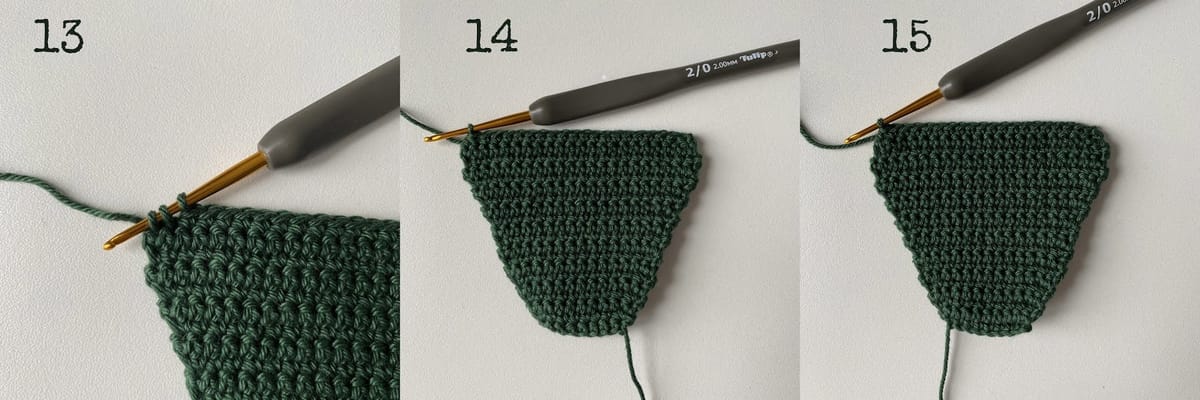
ROW 22a: ch 1, turn the detail, dec, sc in next 5 st, do not finish this row [6] (pic.16)
ROW 23a: ch 1, turn the detail (pic.17), dec, sc in next 4 st [5] (pic.18)
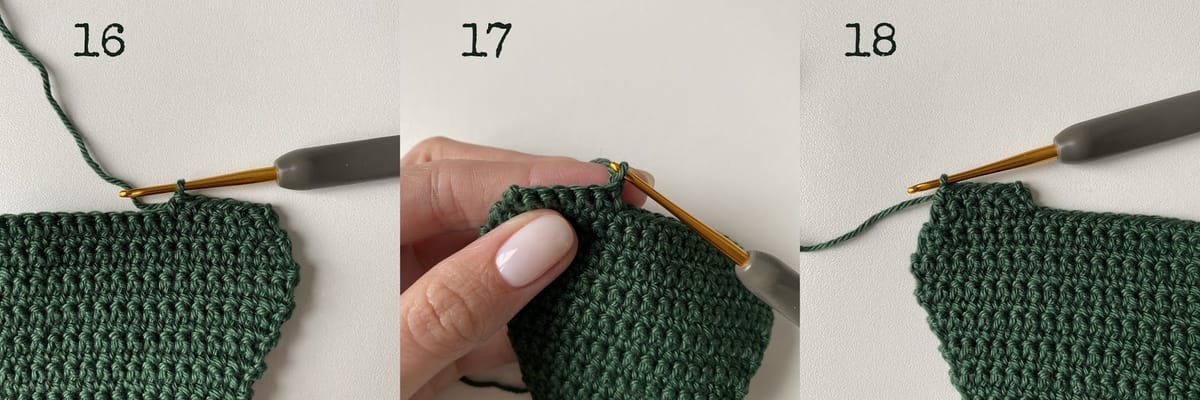
ROW 24a: ch 1, turn the detail, dec, sc in next 3 st [4]
ROW 25a: ch 1, turn the detail, dec, sc in next 2 st [3]
Fasten off. (pic.19)
Start crochet in the last stitch of row 21, it will be the first stitch now. (pic.20-21)
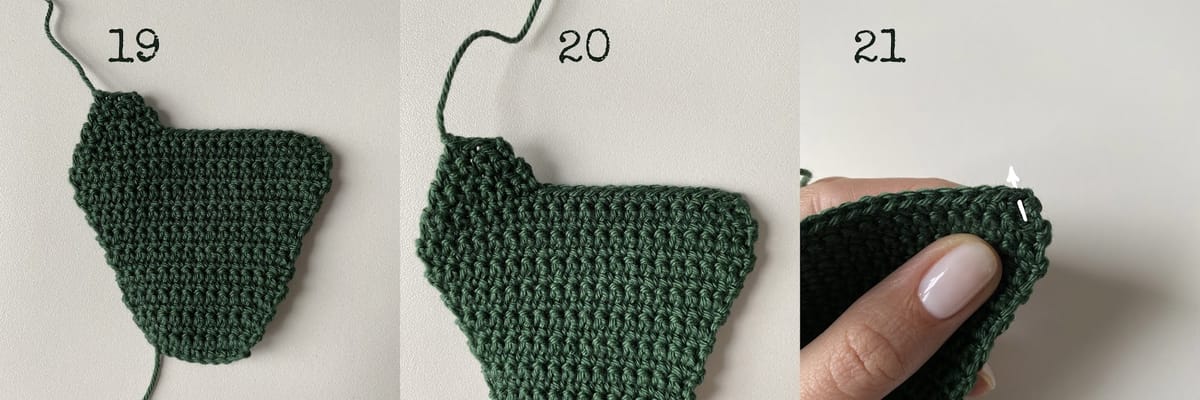
ROW 22b: dec (pic.21-23), sc in next 5 st, do not finish this row [6] (pic.24)
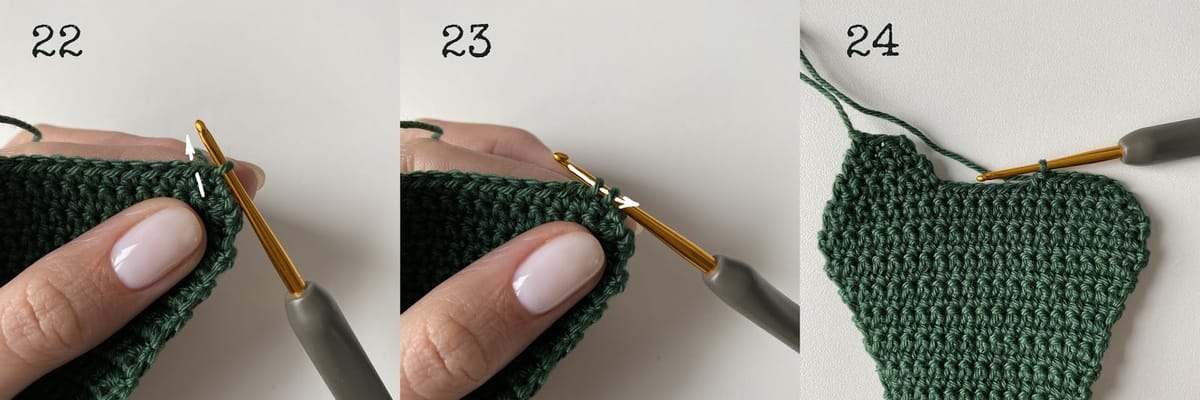
ROW 23b: ch 1, turn the detail, dec, sc in next 4 st [5]
ROW 24b: ch 1, turn the detail, dec, sc in next 3 st [4]
ROW 25b: ch 1, turn the detail, dec, sc in next 2 st [3]
Fasten off. (pic.25)
Make 2 pc. (pic.26)
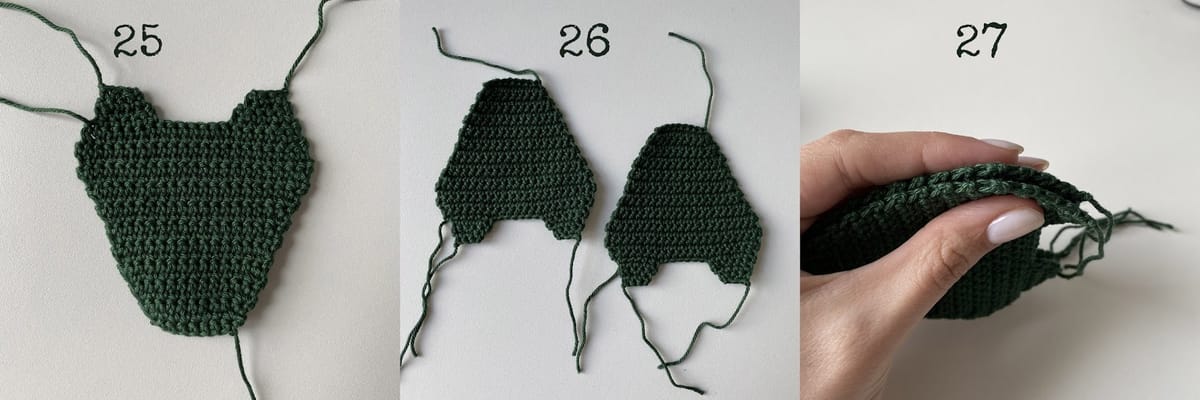
Place both details together, matching up all sides. (pic.27)
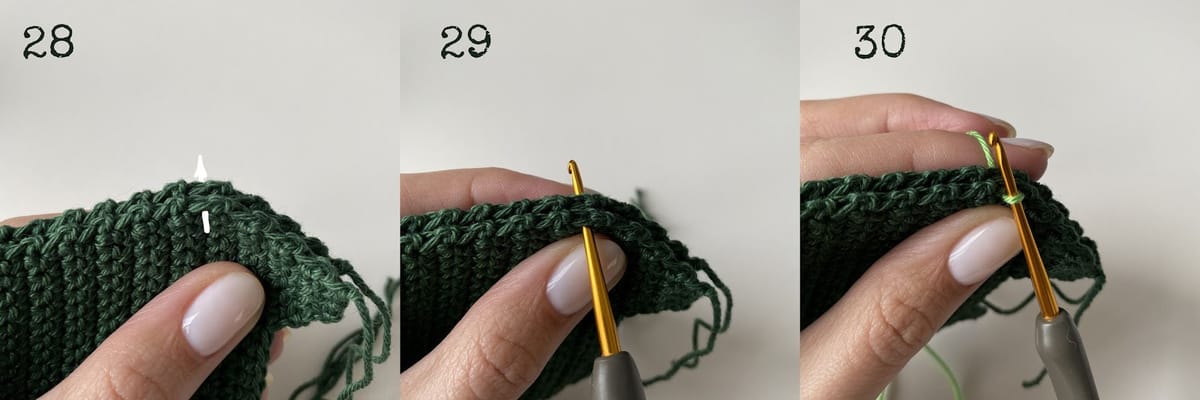
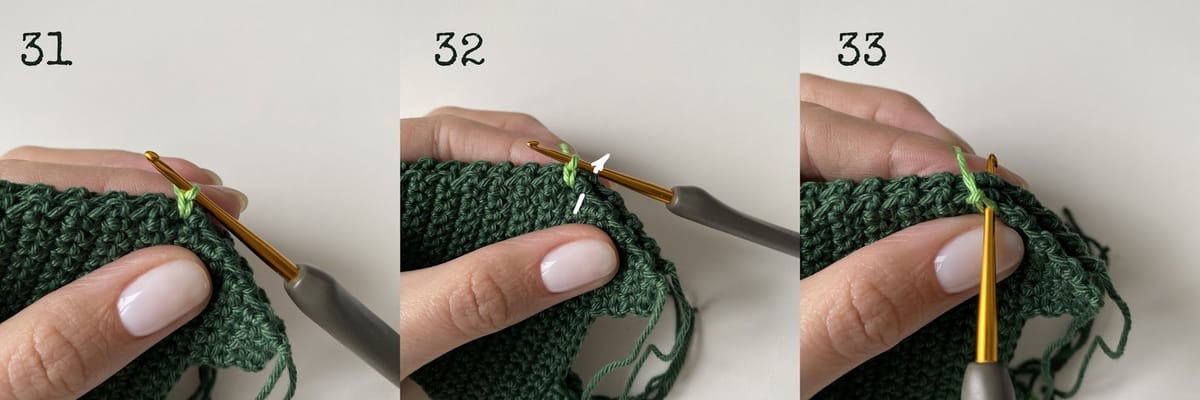
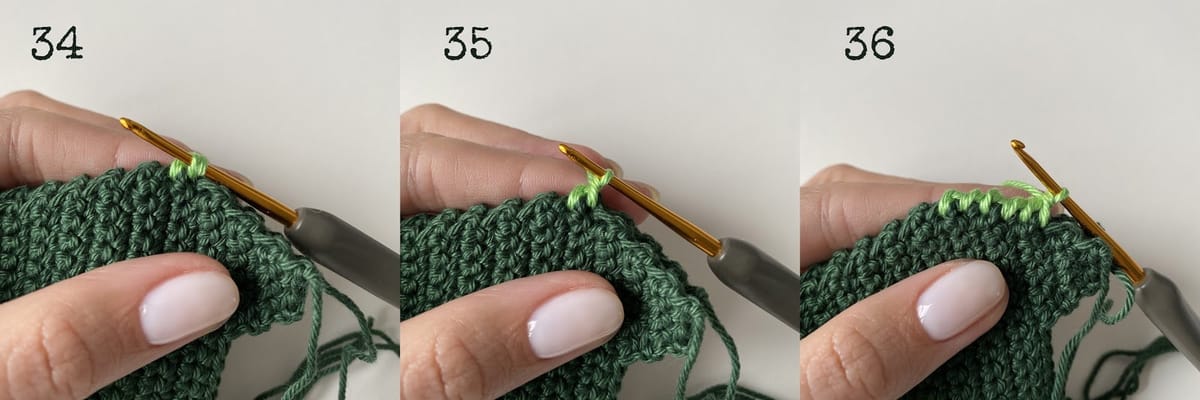
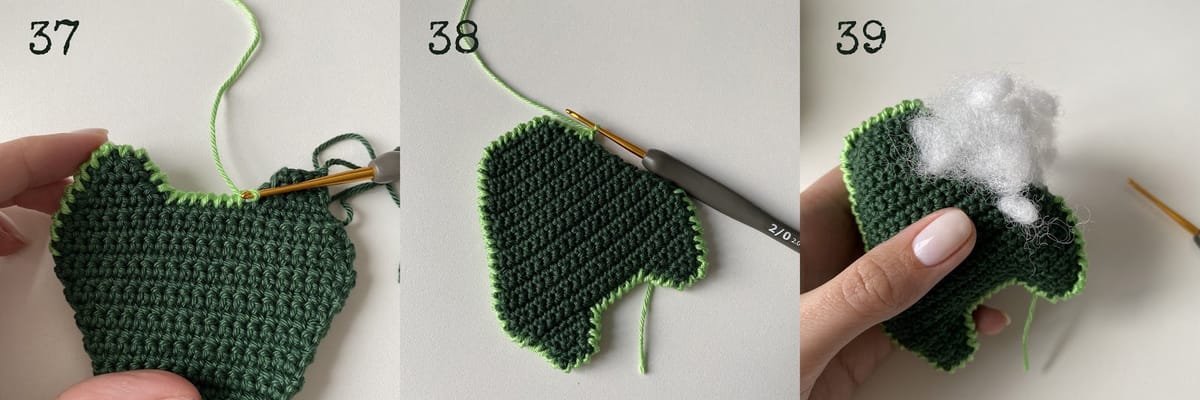
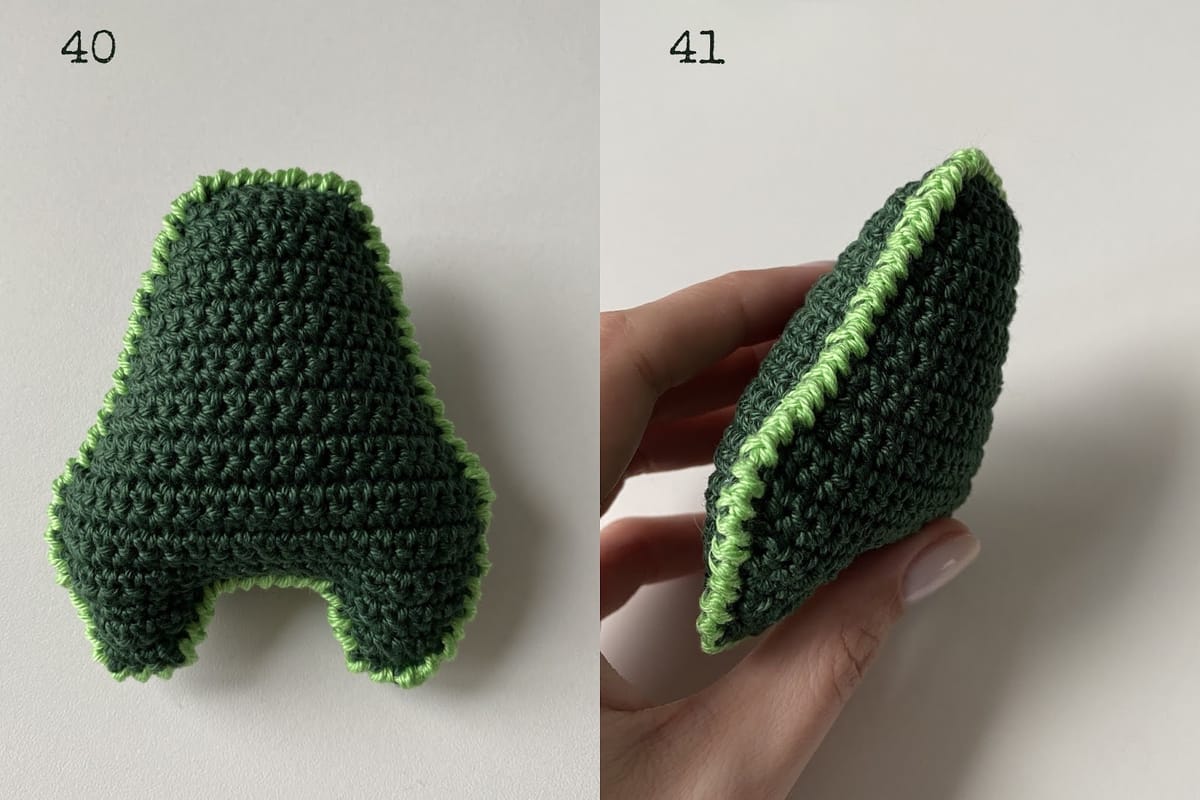
Begin attaching details together with reverse sc around, using light green color yarn.
Stop in the middle of the last side, stuff the detail. Continue crochet rsc and close with rsc in first st and fasten off, weave in yarn ends. (pic. 28-41)
Nose
Crochet with cream yarn.
Ch 4.
RND 1: start crochet in a second ch from a hook (pic.42), sc in next 2 ch, 3 sc in next ch, continue crochet on the other side of foundation chains (pic.43), sc in next st, 2 sc in next st [8] (pic.44)
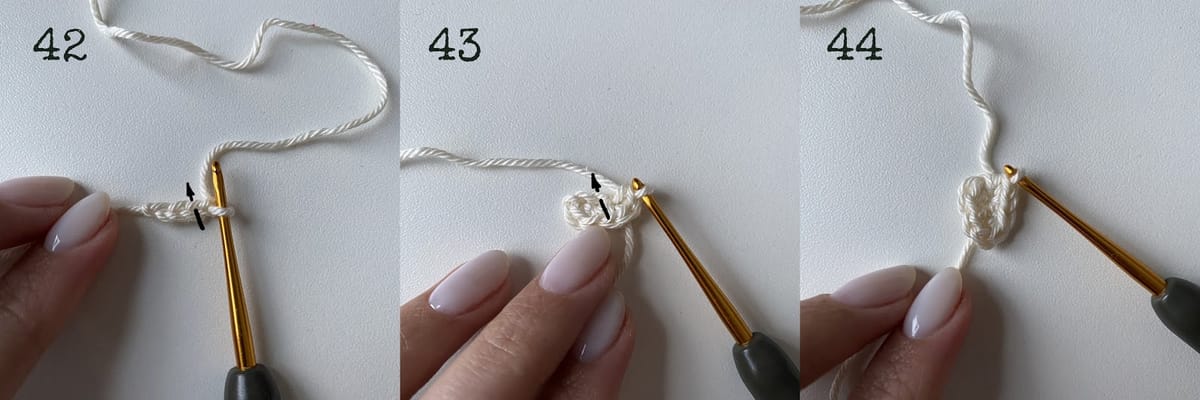
RND 2: inc in next st, sc in next 2 st, inc in next 2 st, sc in next 2 st, inc in next st [12] (pic.45)
RND 3: sc in next 12 st [12]
RND 4: dec, sc in next 2 st, dec 2 times, sc in next 2 st, dec [8]
Stuff the detail. (pic.46)
RND 5: dec 4 times [4]
Fasten off, leave a long tail for sewing. (pic.47)
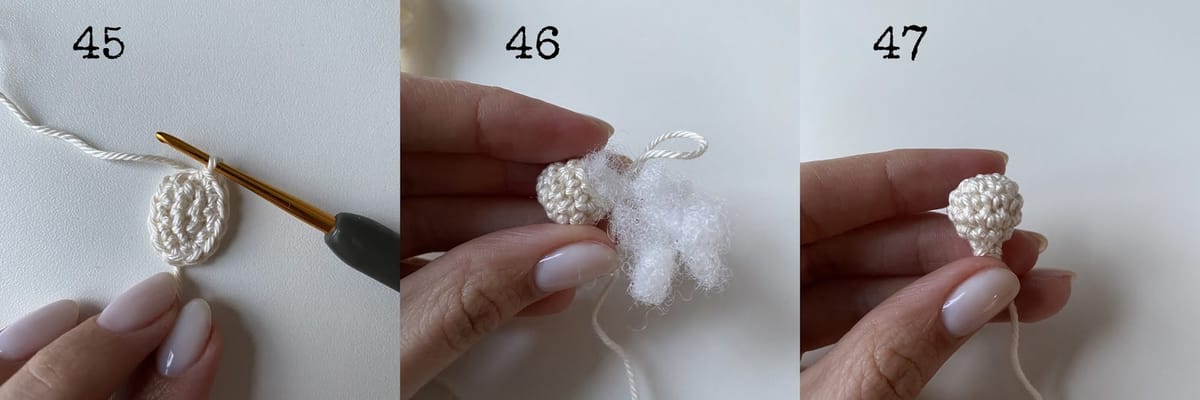
Then sew the nose between rounds 12-15 of the body.
Beard
Crochet with orange yarn.
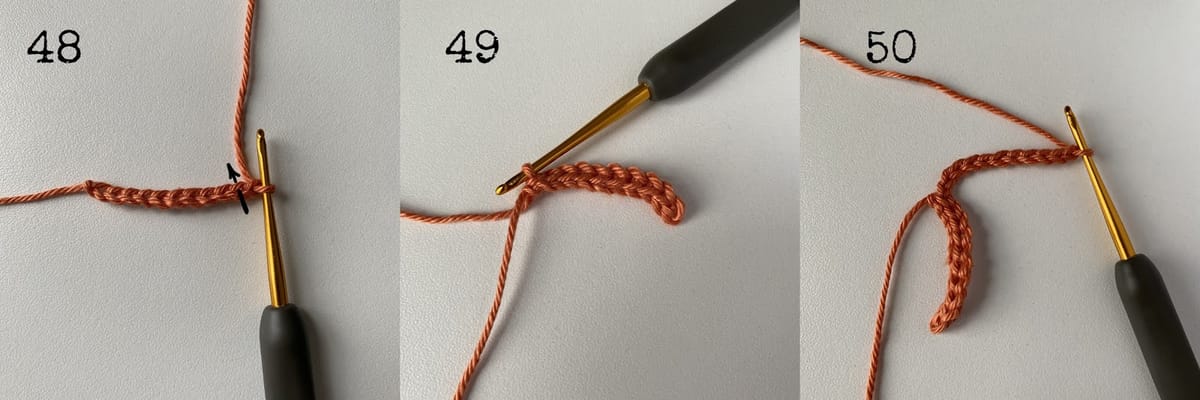
For the beard, we will be branching off in chains to create beard strands.
STRAND 1-36: ch 11, start crochet in the second ch from a hook (pic.48), sl st in next 10 ch (pic.49-53)
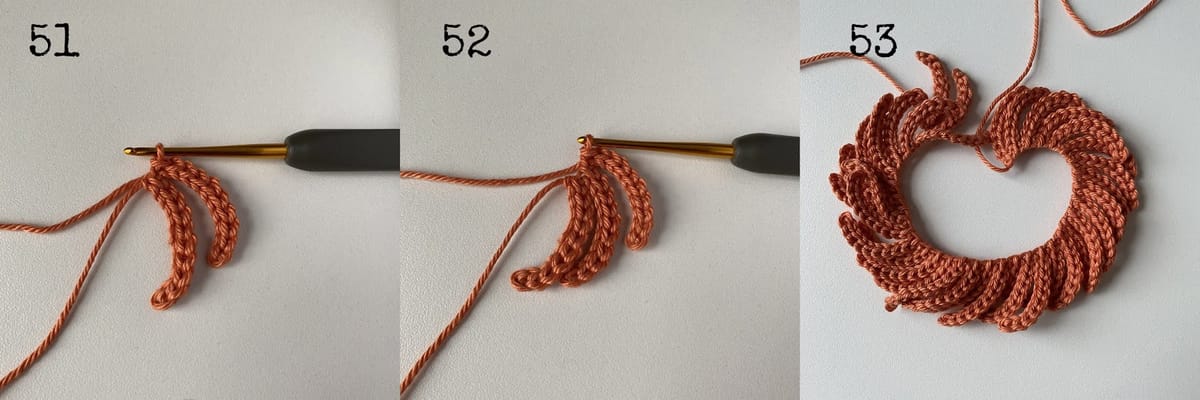
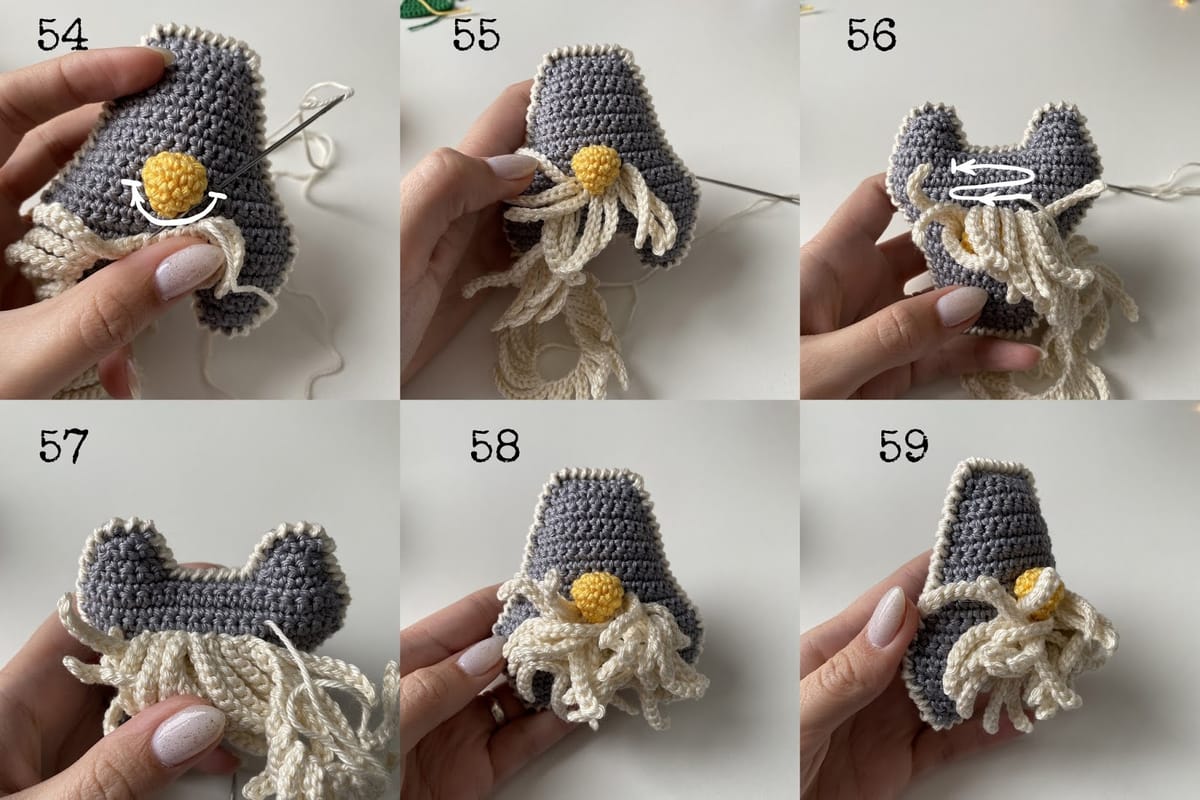
Then sew the beard to the body.(pic.54-59)
Hat
Start crochet with dark green yarn.
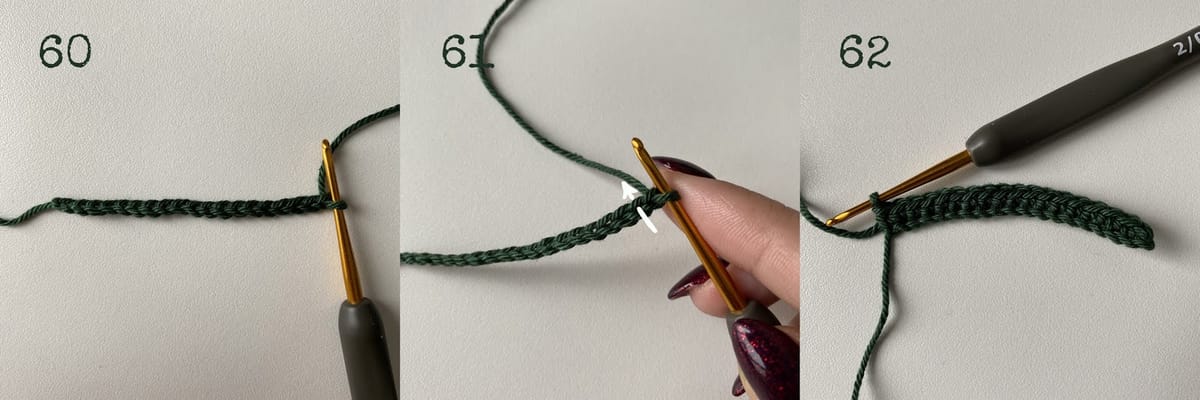
Ch 19. (pic.60)
ROW 1: start crochet in the second ch from a hook (pic.61), sc in next 18 ch [18] (pic.62)
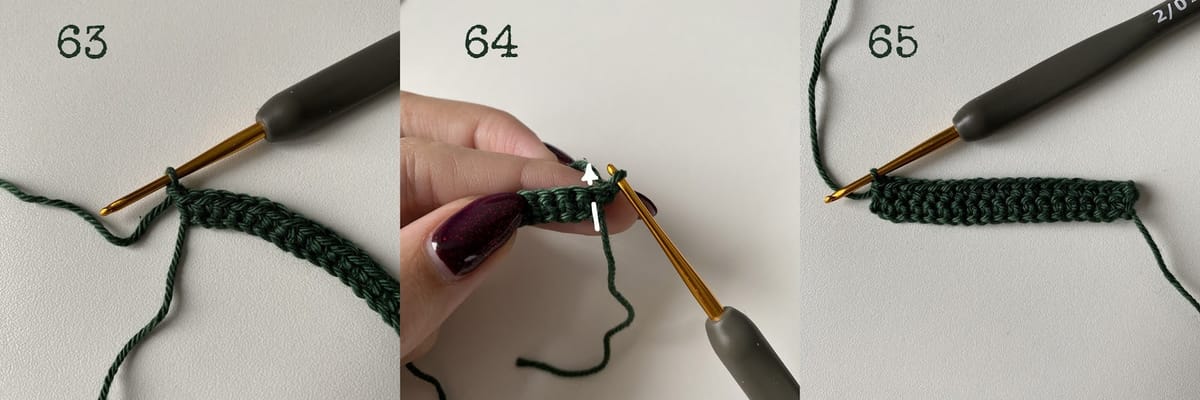
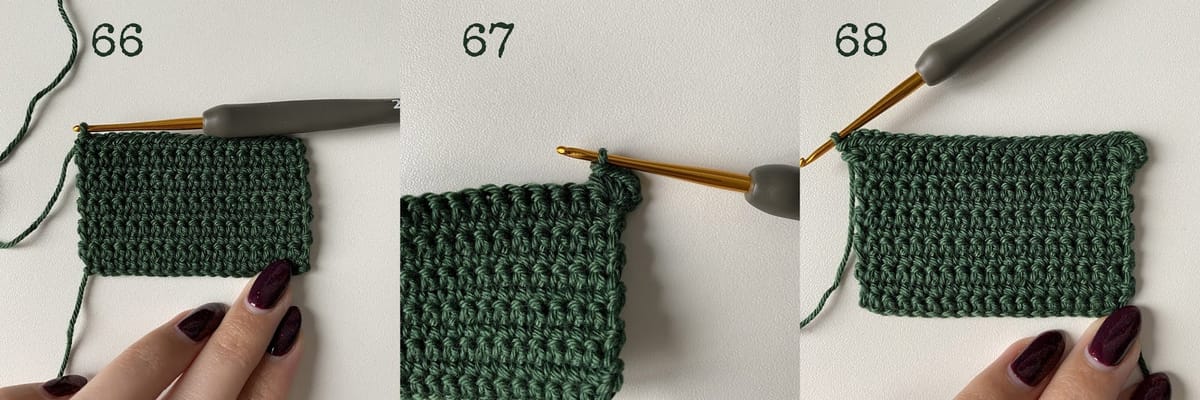
ROW 2-11: ch 1 (pic.63), turn the detail (pic.64), sc in next 18 st [18] - 10 rows (pic.65-66)
ROW 12: ch 1, turn the detail, 4 sc in next st (pic.67), sc in next 16 st, 4 sc in next st [24] (pic.68)
ROW 13: ch 1, turn the detail (pic.69), 4 sc in next st (pic.70), sc in next 22 st, 4 sc in next st [30] (pic.71)
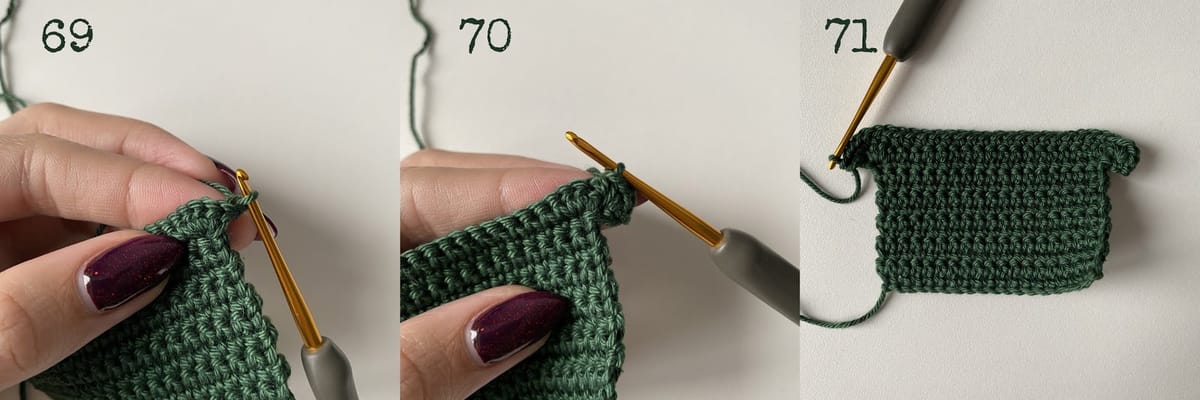
ROW 14: ch 1, turn the detail, sc in next 30 st [30]
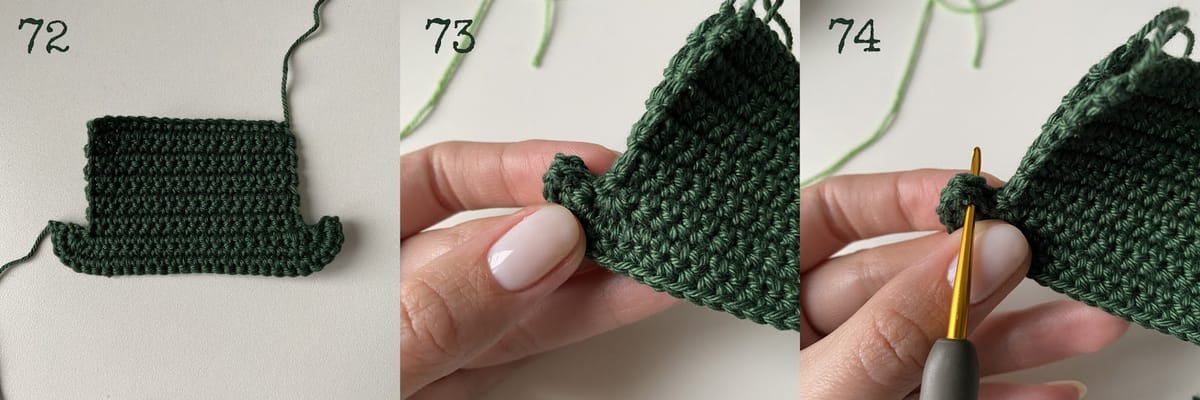
Fasten off, weave in yarn ends. (pic.72)
Make 2 pc.
Place both details together, matching up all sides. (pic.73)
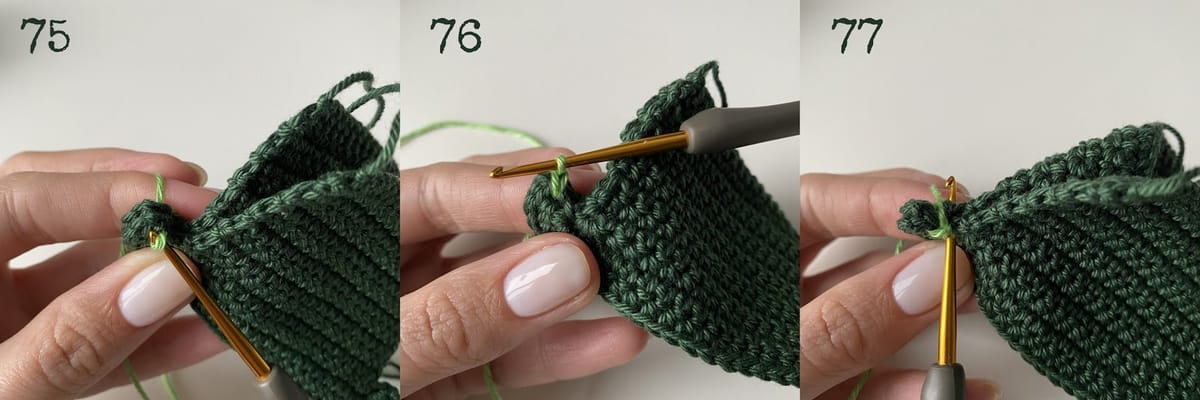
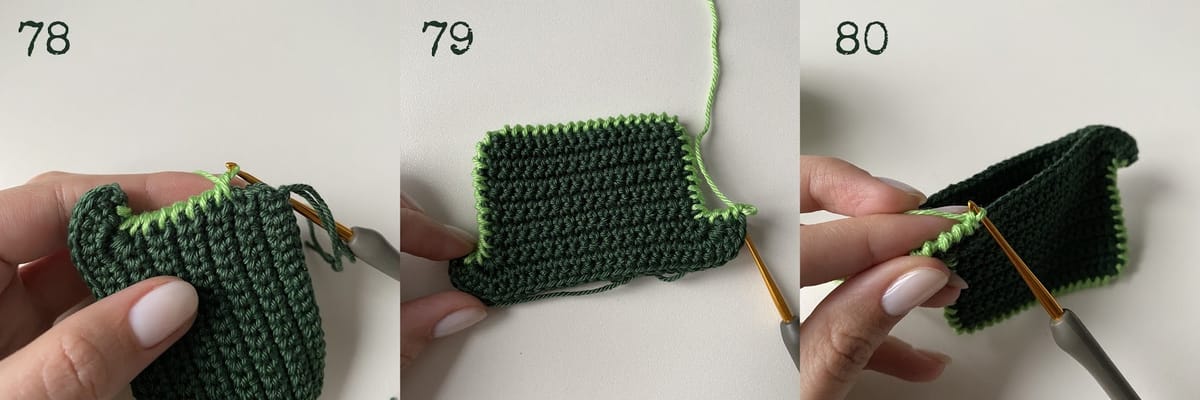
Begin attaching details together with reverse sc around, using light green color yarn. (pic.74-82)
With black yarn crochet 46 ch (pic.83), starting in a second ch from a hook, crochet sl st in next 45 ch. Close with sl st in the first stitch (pic.84). Fasten off, weave in yarn ends. Sew the detail to the hat. (pic.85)
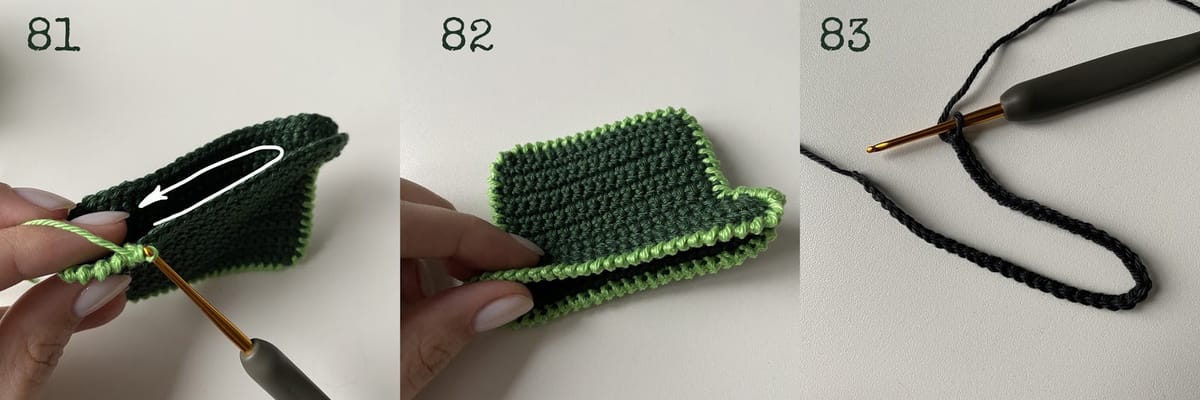
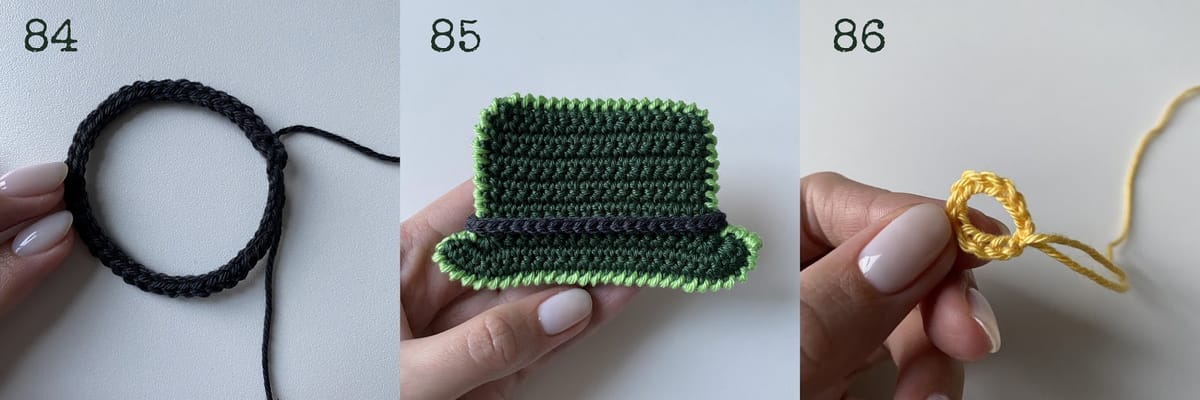
With yellow yarn crochet 11 ch, then make sl st in the first ch. Fasten off, weave in yarn ends. (pic.86) Sew to the hat.
Share your finished toys on Instagram with #knittedstorybears or tag me @knittedstorybears
If you have any questions feel free to ask in comments or contact form below.
My links:
FREE PATTERNS ↠ all free patterns
INSTAGRAM ↠ https://www.instagram.com/knittedstorybears/
FACEBOOK ↠ https://www.facebook.com/knittedstorybears
RAVELRY ↠ https://www.ravelry.com/designers/vira-velmozhna
YOUTUBE ↠ https://www.youtube.com/channel/UCVf-I2z0TVqyTv17T2XSvZw?view_as=subscriber
Comments
Your name and comment are shown publicly under this pattern. See the privacy policy.
Comments couldn't load right now. Please try again later.
1 earlier comment from the old blog
Just want to report someone is stealing your pattern
https://thecrochetspace.com/saint-paddy-crochet-gnome/