Chocolate Easter Bunny
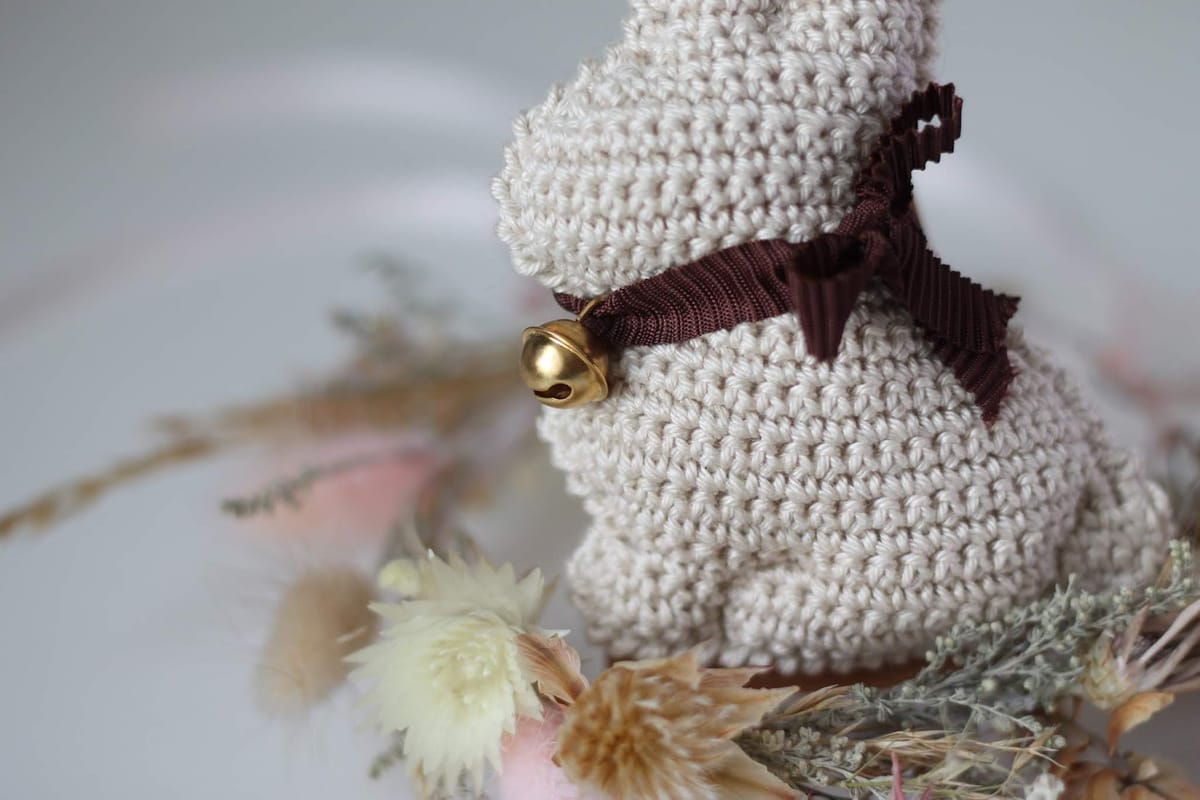
A quick and easy Easter bunny inspired by the famous chocolate rabbit — a lovely spring gift.
Hello!
Here you can find a quick and easy free crochet pattern of the Easter rabbit.
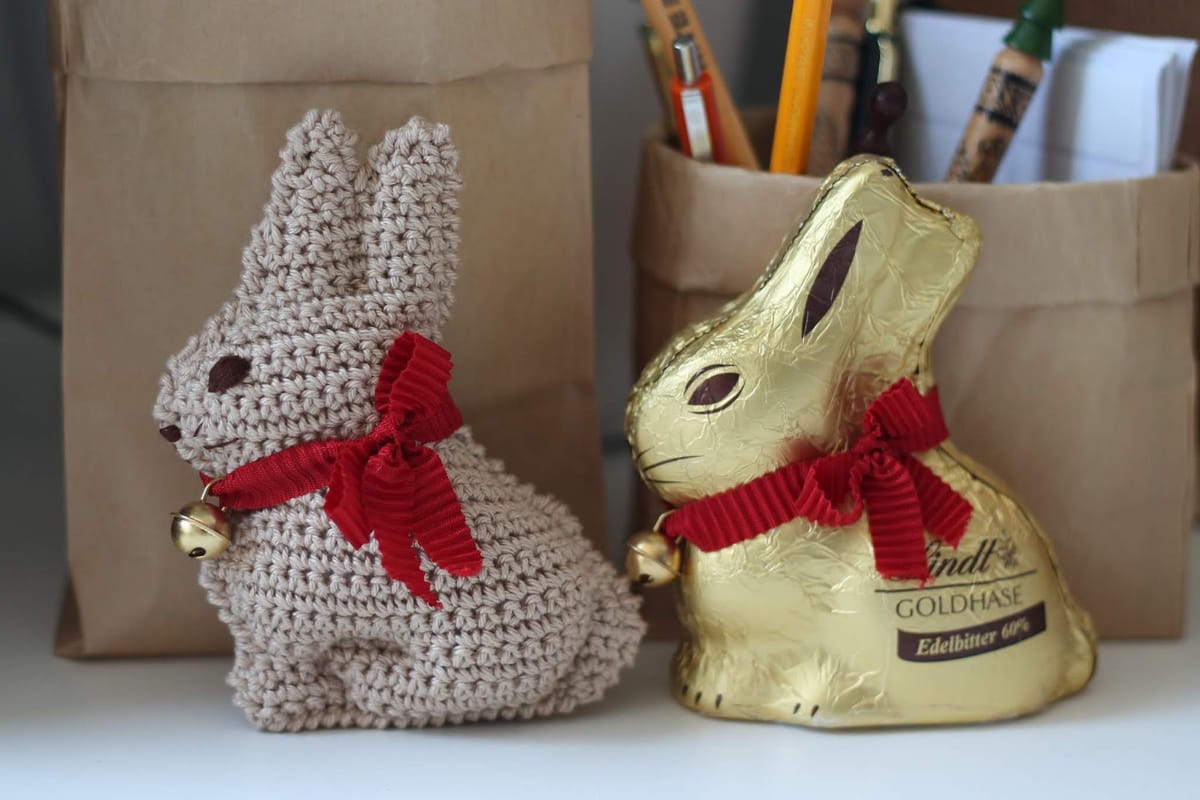
I was so inspired by the Lindt chocolate easter bunny that I decided to repeat it as a crochet toy!
I hope you will like it too!
ABBREVIATION
The pattern is written in English, using US crochet terminology.
ch - chain
sc - single crochet
inc - increase
dec - decrease
sc3tog - single crochet three together decrease
rsc - reverse single crochet
Happy crocheting!
Main detail
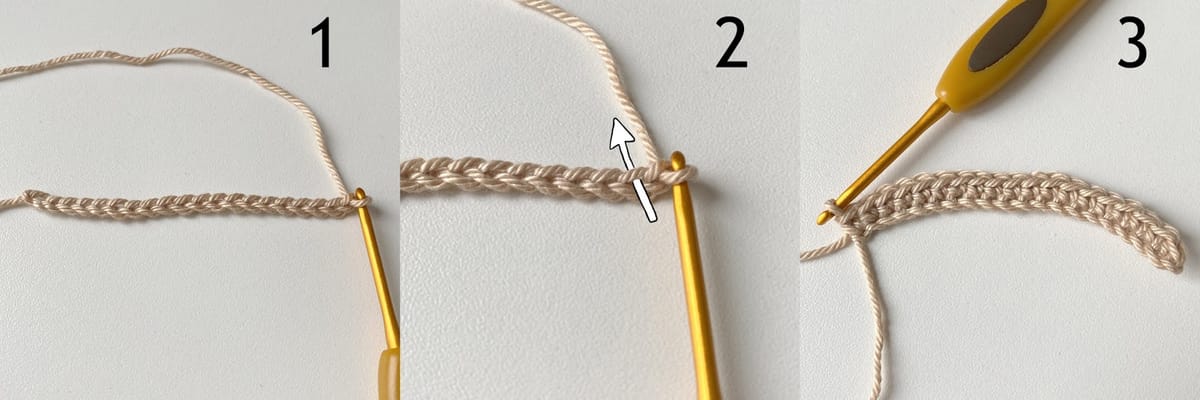
Ch 20 (pic.1).
ROW 1: start in the second ch from a hook (pic.2), sc in next 19 ch [19] (pic.3)
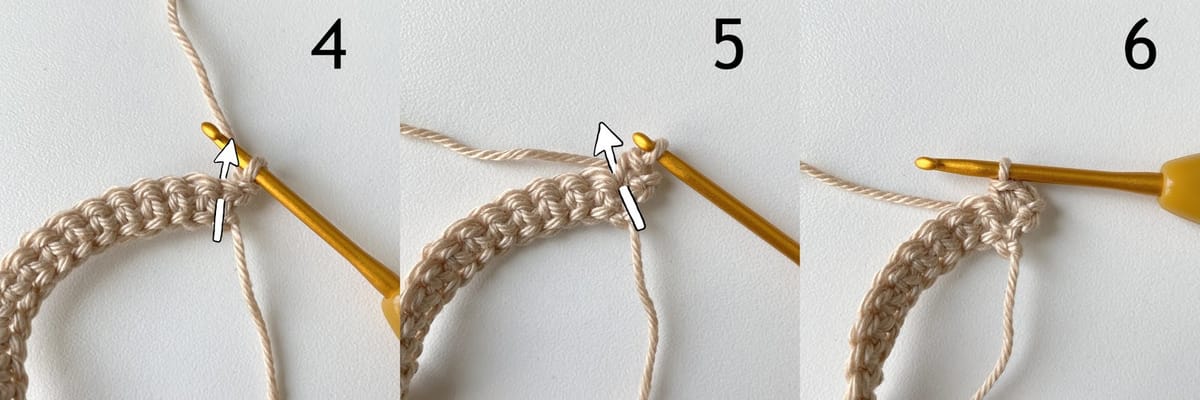
ROW 2: ch 1*(pic.7)*, turn the detail (pic.8), inc in next st (pic.4-6), sc in next 17 st, inc in next st [21] (pic.9)
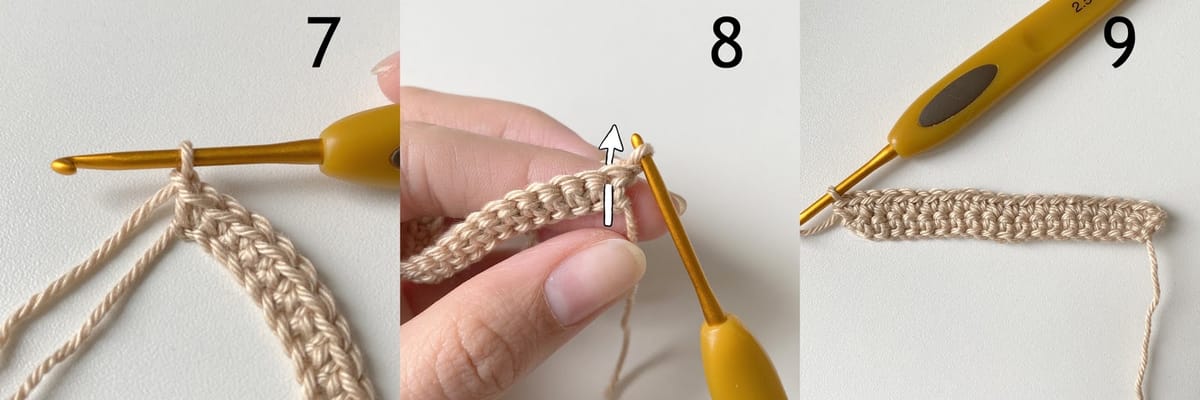
ROW 3: ch 1, turn the detail, dec (pic.10-12), sc in next 18 st, inc in next st [21] (pic.13)
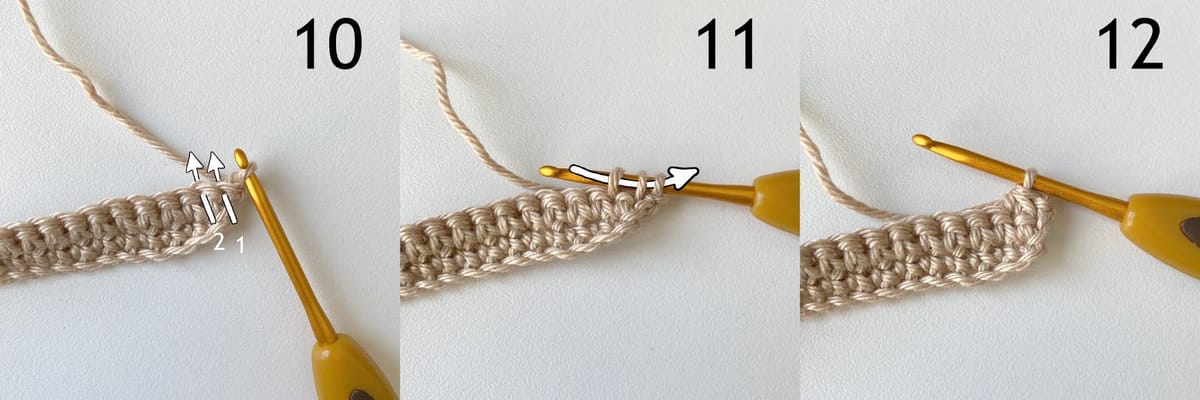
ROW 4: ch 1, turn the detail, inc in next st, sc in next 18 st, dec [21]
ROW 5: ch 1, turn the detail, inc in next st, sc in next 18 st, dec [21]
ROW 6: ch 1, turn the detail, dec, sc in next 18 st, inc in next st [21]
ROW 7: ch 1, turn the detail, inc in next st, sc in next 18 st, dec [21]
ROW 8: ch 1, turn the detail, sc in next 20 st, inc in next st [22] (pic.14)
ROW 9: ch 1, turn the detail, sc in next 22 st [22]
ROW 10: ch 1, turn the detail, dec, sc in next 18 st, dec [20]
ROW 11: ch 1, turn the detail, dec, sc in next 16 st, dec [18]
ROW 12: ch 1, turn the detail, dec, sc in next 14 st, dec [16] (pic.15)
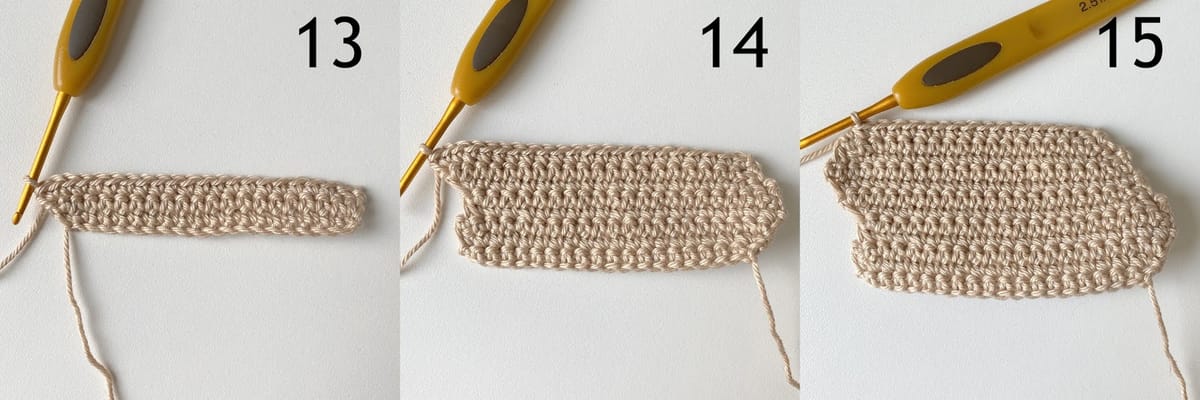
ROW 13: ch 1, turn the detail, inc in next st, sc in next 13 st, dec [16]
ROW 14: ch 1, turn the detail, dec, sc in next 13 st, inc in next st [16]
ROW 15: ch 1, turn the detail, inc in next st, sc in next 13 st, dec [16]
ROW 16: ch 1, turn the detail, dec, sc in next 13 st, inc in next st [16]
ROW 17: ch 1, turn the detail, inc in next st, sc in next 13 st, dec [16]
ROW 18: ch 1, turn the detail, dec, sc in next 14 st [15]
ROW 19-20: ch 1, turn the detail, sc in next 15 st [15] - 2 rows
ROW 21: ch 1, turn the detail, dec, sc in next 13 st [14]
ROW 22: ch 1, turn the detail, inc in next st, sc in next 10 st, sc3tog (pic.16-18) [13]
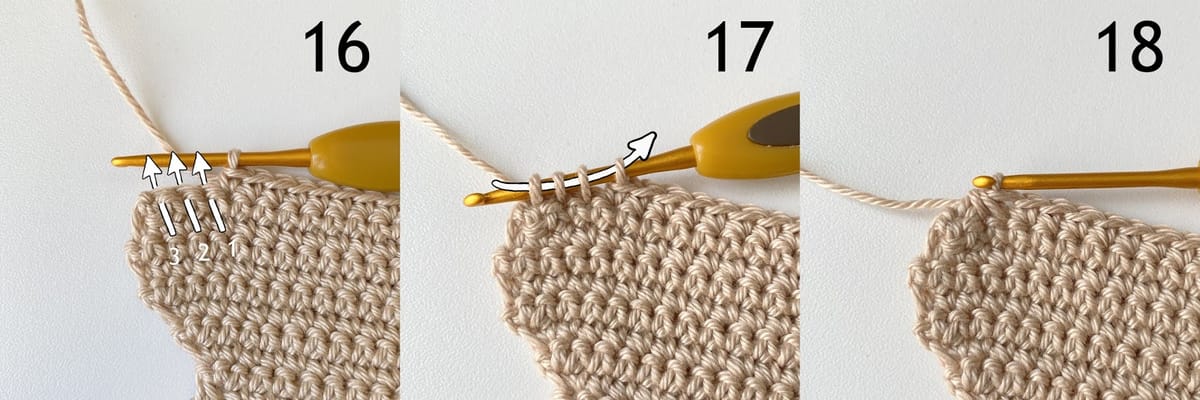
ROW 23: ch 1, turn the detail, sc3tog, sc in next 9 st, inc in next st [12]
ROW 24: ch 1, turn the detail, sc in next 10 st, dec [11] (pic.19)
ROW 25: ch 1, turn the detail, dec, sc in next 9 st [10]
ROW 26-27: ch 1, turn the detail, sc in next 10 st [10] - 2 rows
ROW 28: ch 1, turn the detail, sc in next 8 st, dec [9]
ROW 29: ch 1, turn the detail, dec, sc in next 7 st [8] (pic.20)
ROW 30a: ch 1, turn the detail, inc in next st, sc in next 3 st, don’t finish this row - skip next 4 st [5] (pic.21)
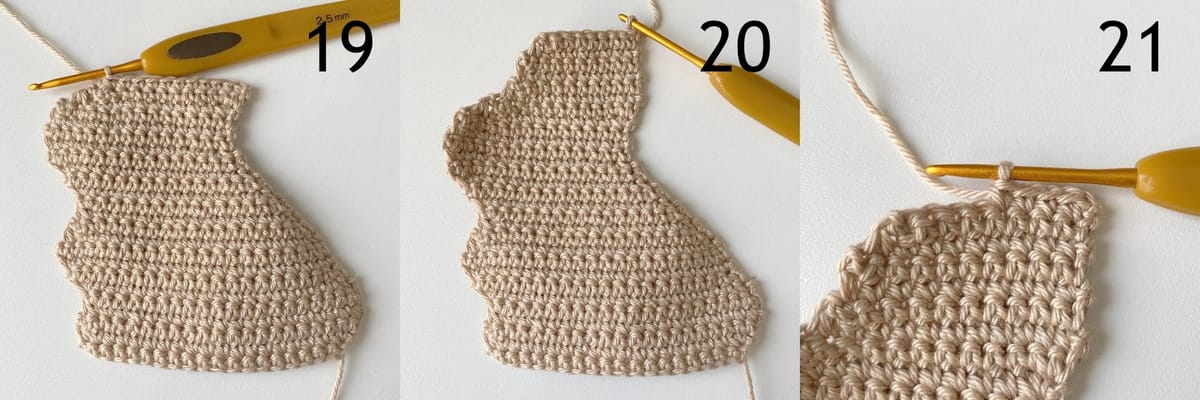
ROW 31a: ch 1, turn the detail, dec, sc in next 3 st [4] (pic.22)
ROW 32a: ch 1, turn the detail, dec 2 times [2] (pic.23)
Fasten off.
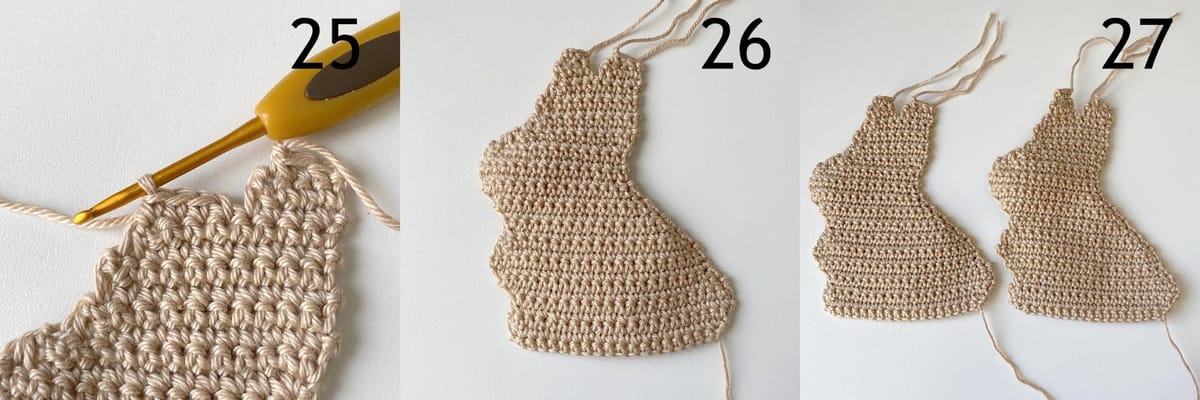
ROW 30b: start crochet in the first stitch in row 30a (pic.24), sc in next 4 st [4] (pic.25)
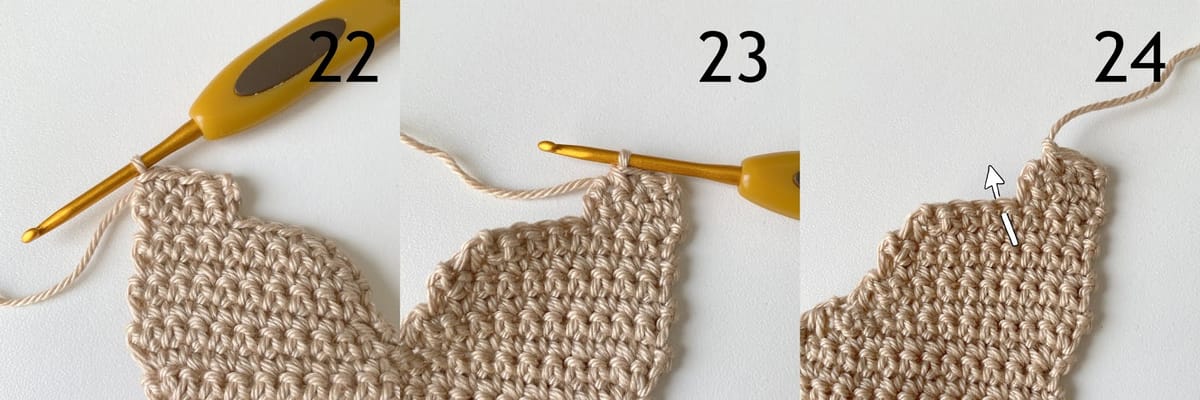
ROW 31b: ch 1, turn the detail, dec, sc in next 2 st [3]
ROW 32b: ch 1, turn the detail, dec, sc in next st [2]
ROW 33b: ch 1, turn the detail, sc in next 2 st [2]
Fasten off. (pic.26)
Joining the pieces
Make 2 main details. (pic.27)
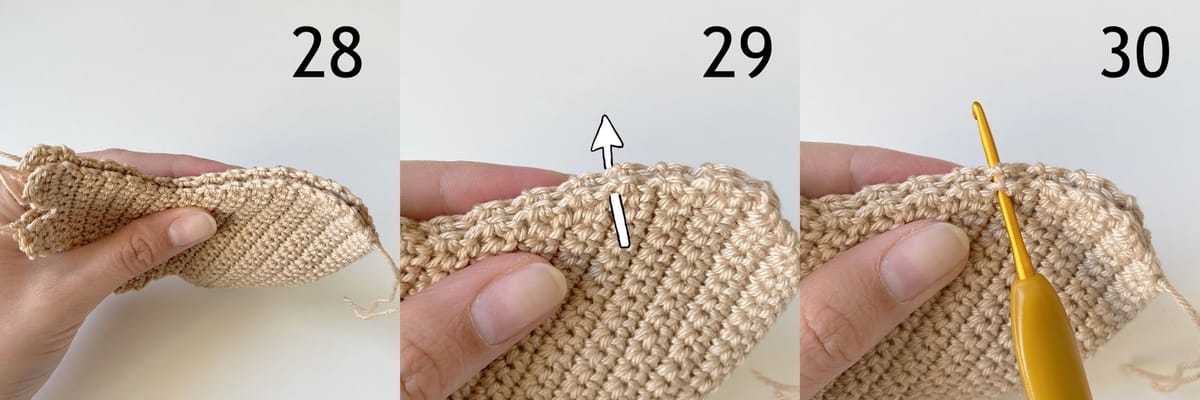
Place both details together, matching up all sides. (pic.28)
Begin attaching details together with reverse sc around. (pic.29-36)
How to crochet reverse single crochet stitch https://youtu.be/RLr4eIkrJzg
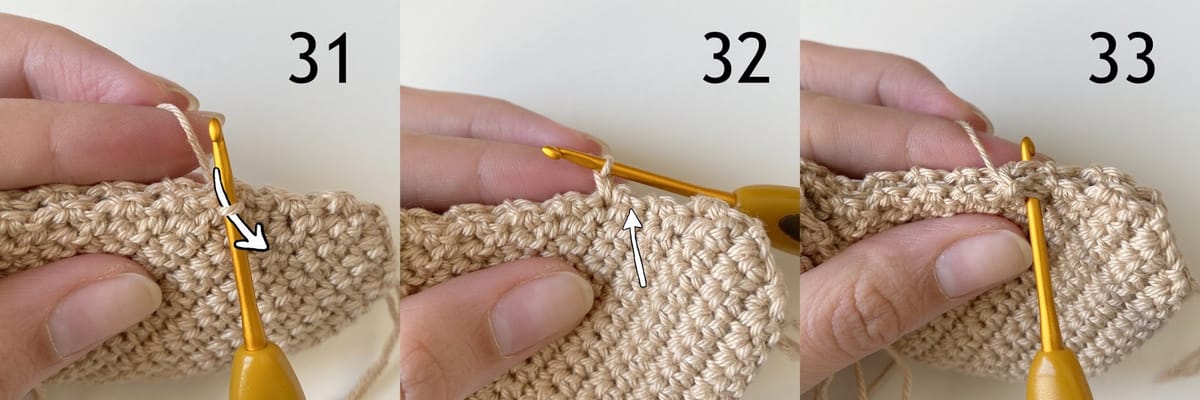
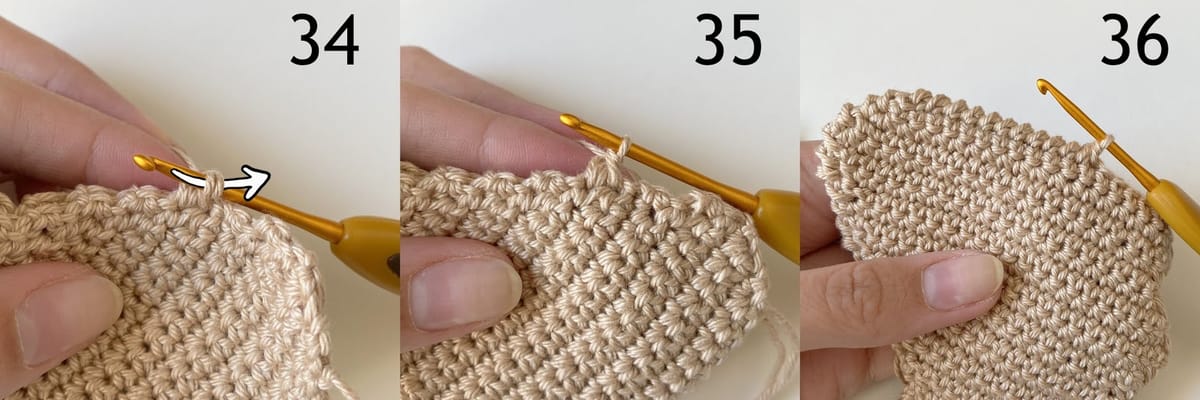
Stop in the middle of the last side, stuff the detail (pic.37-38). Stuff slightly.
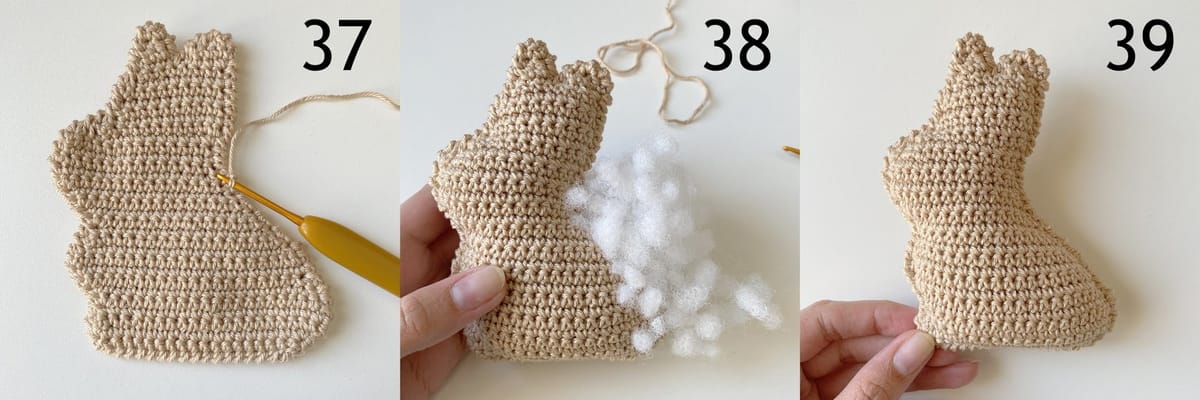
Continue crochet rsc and close with rsc in first st and fasten off, weave in yarn ends. (pic.39)
Shaping the paws, tail and ears
Now the most important part!
Highlight the legs, tail, ears, and head.
We need a needle and a piece of additional thread (see in “you will need”).
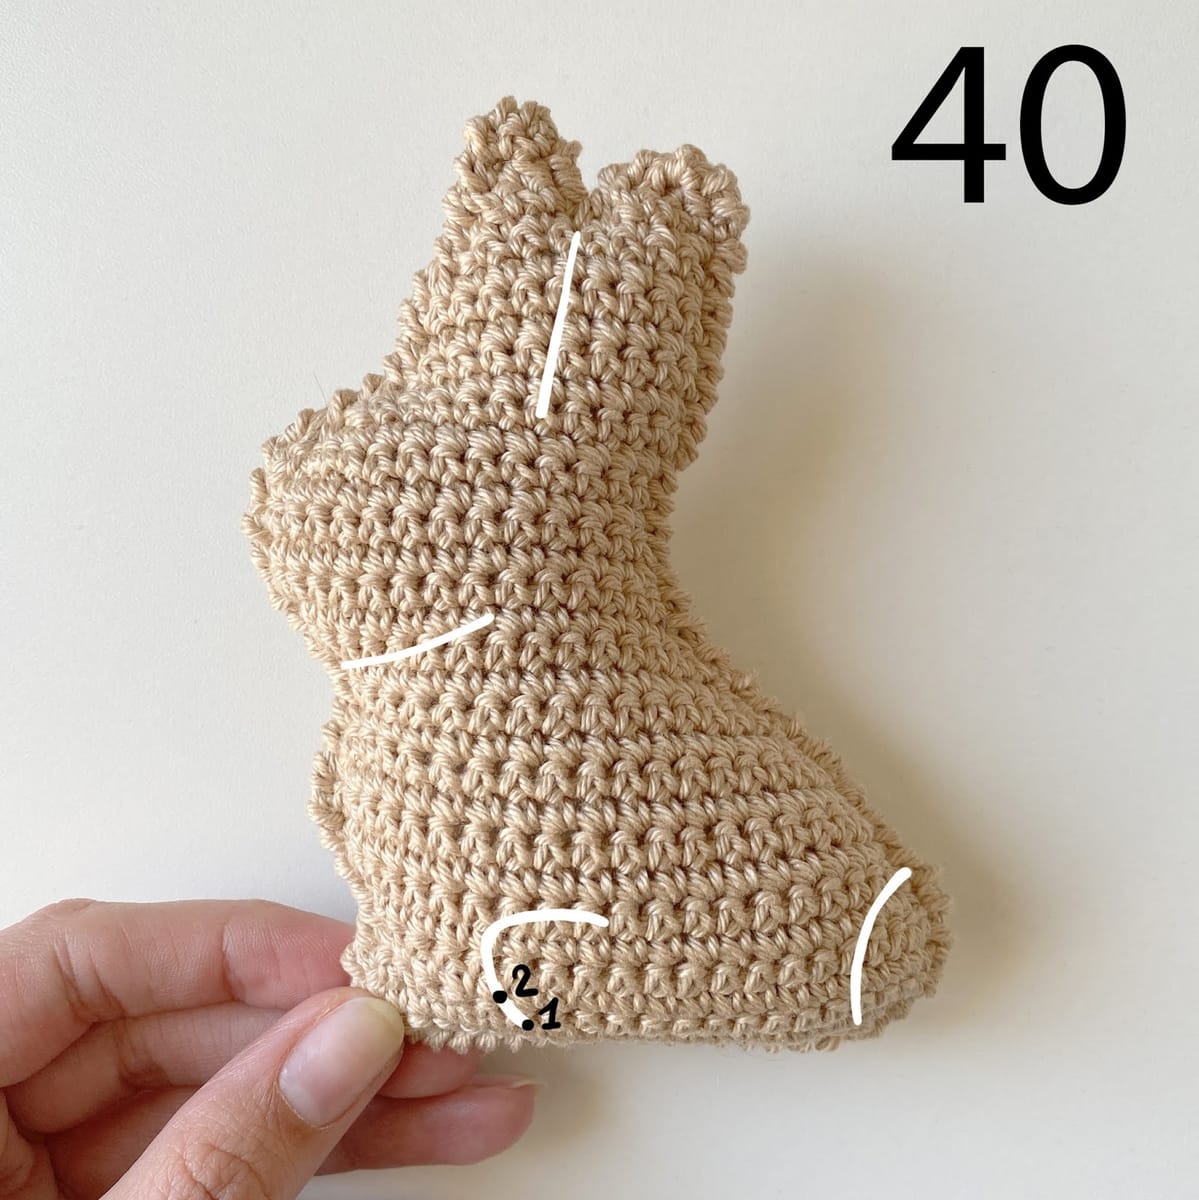
Make a knot at the end of the thread. Insert the needle from the back and draw it up in point 1 (pic.40,41).
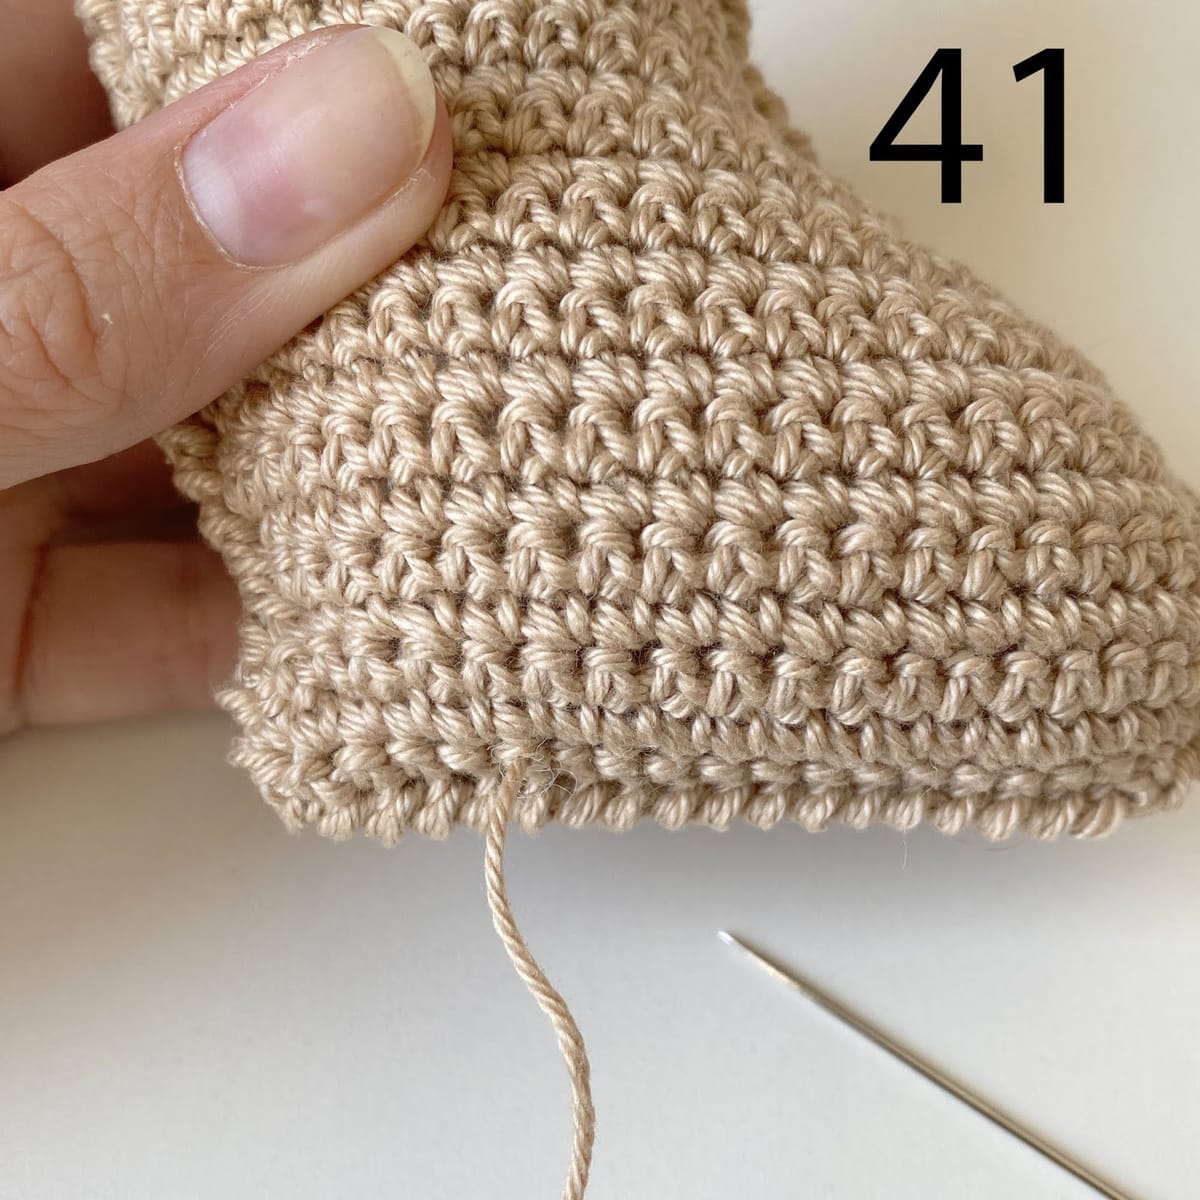
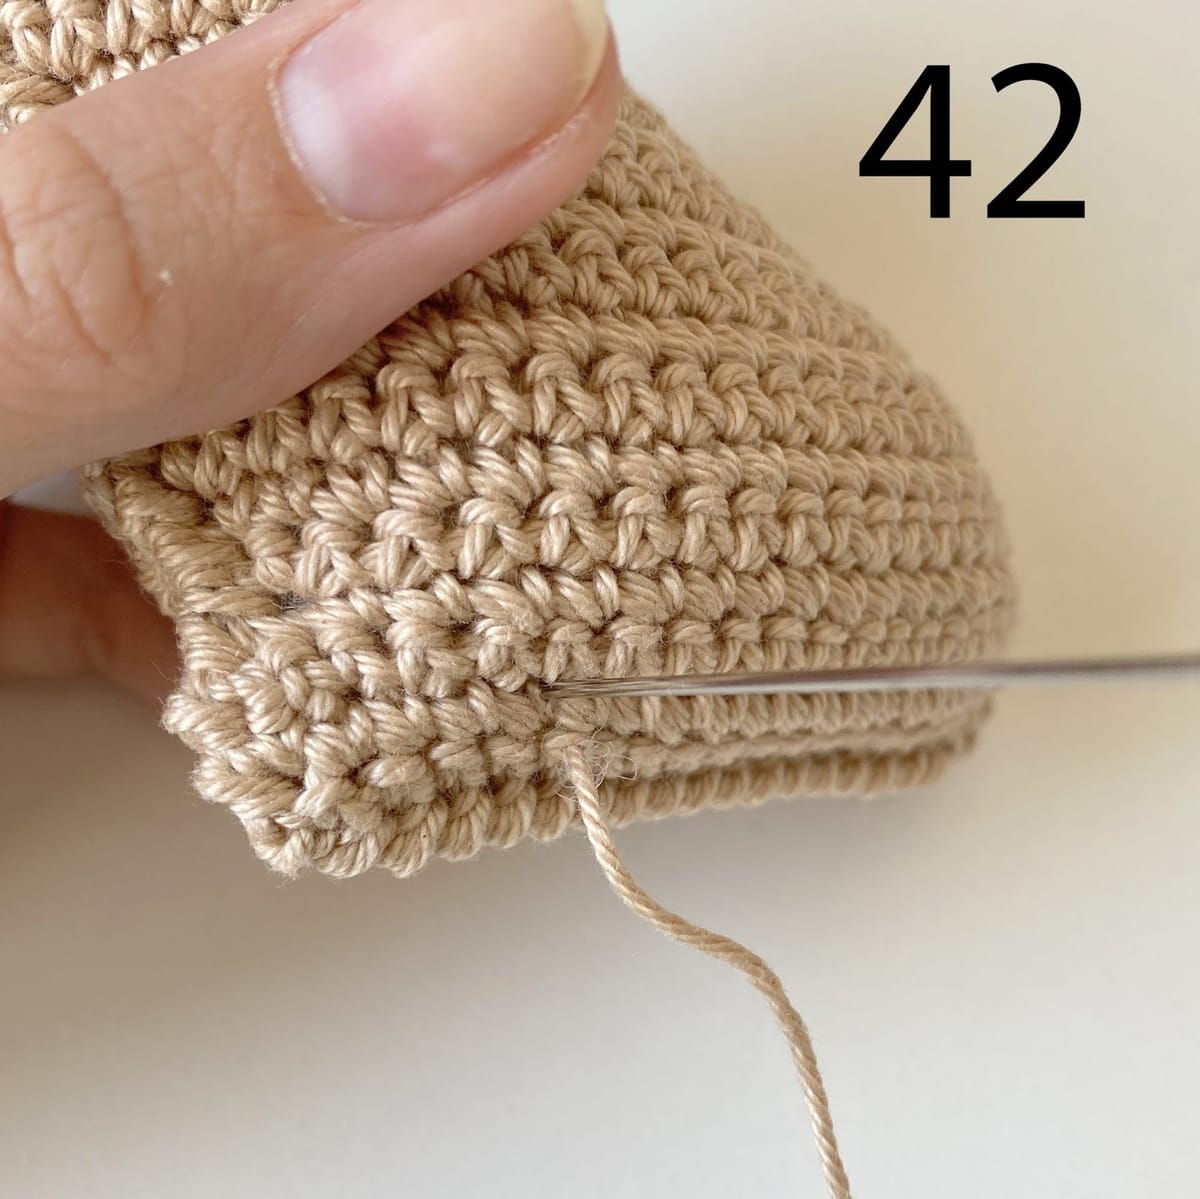
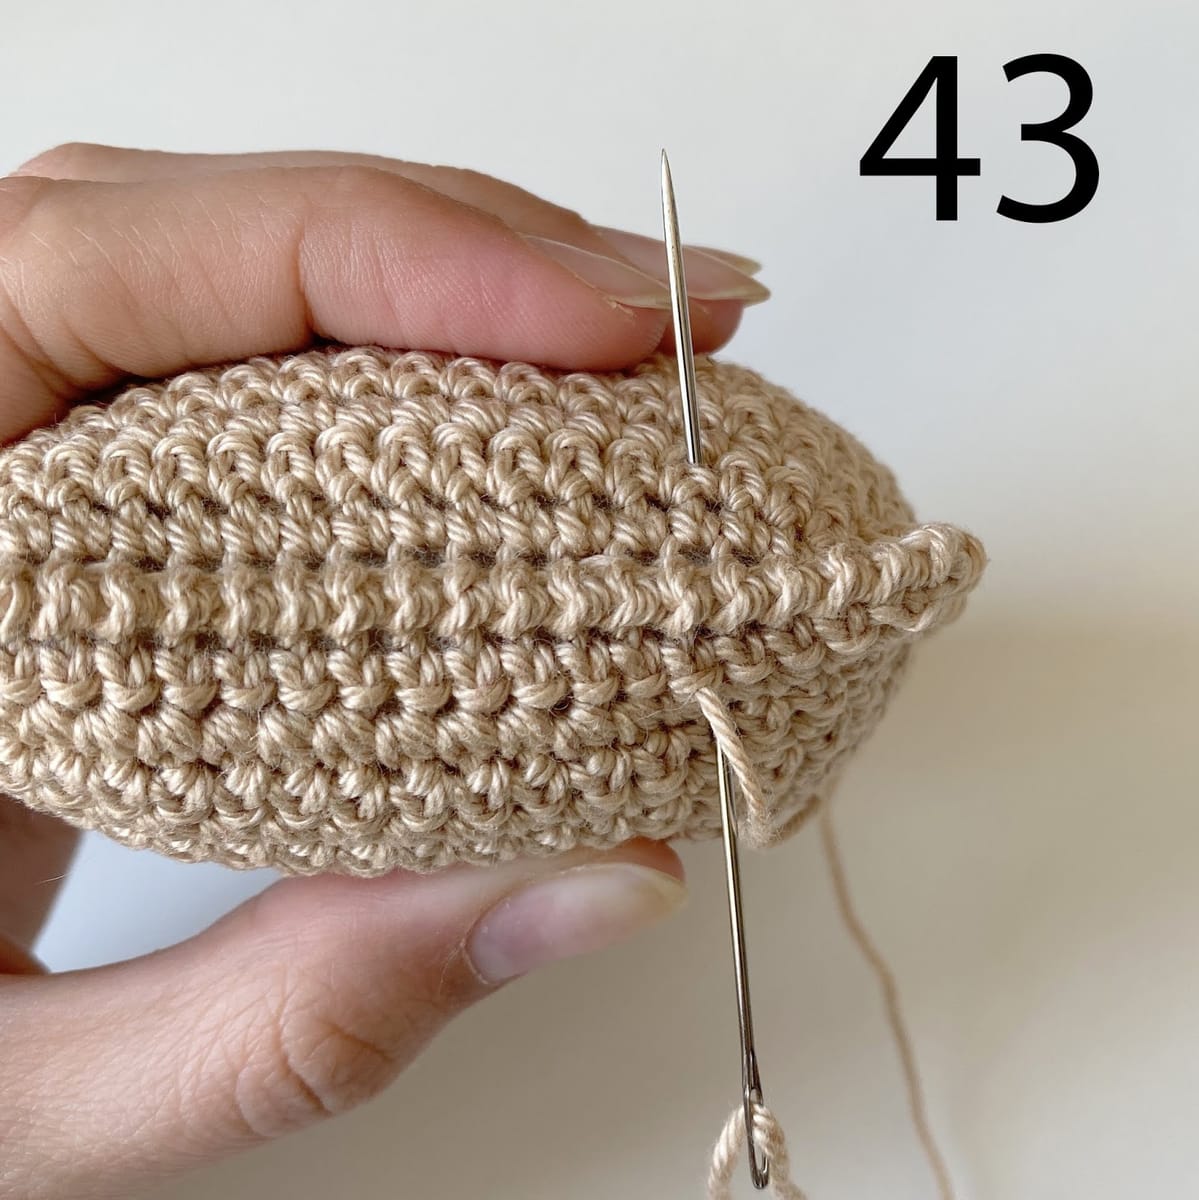
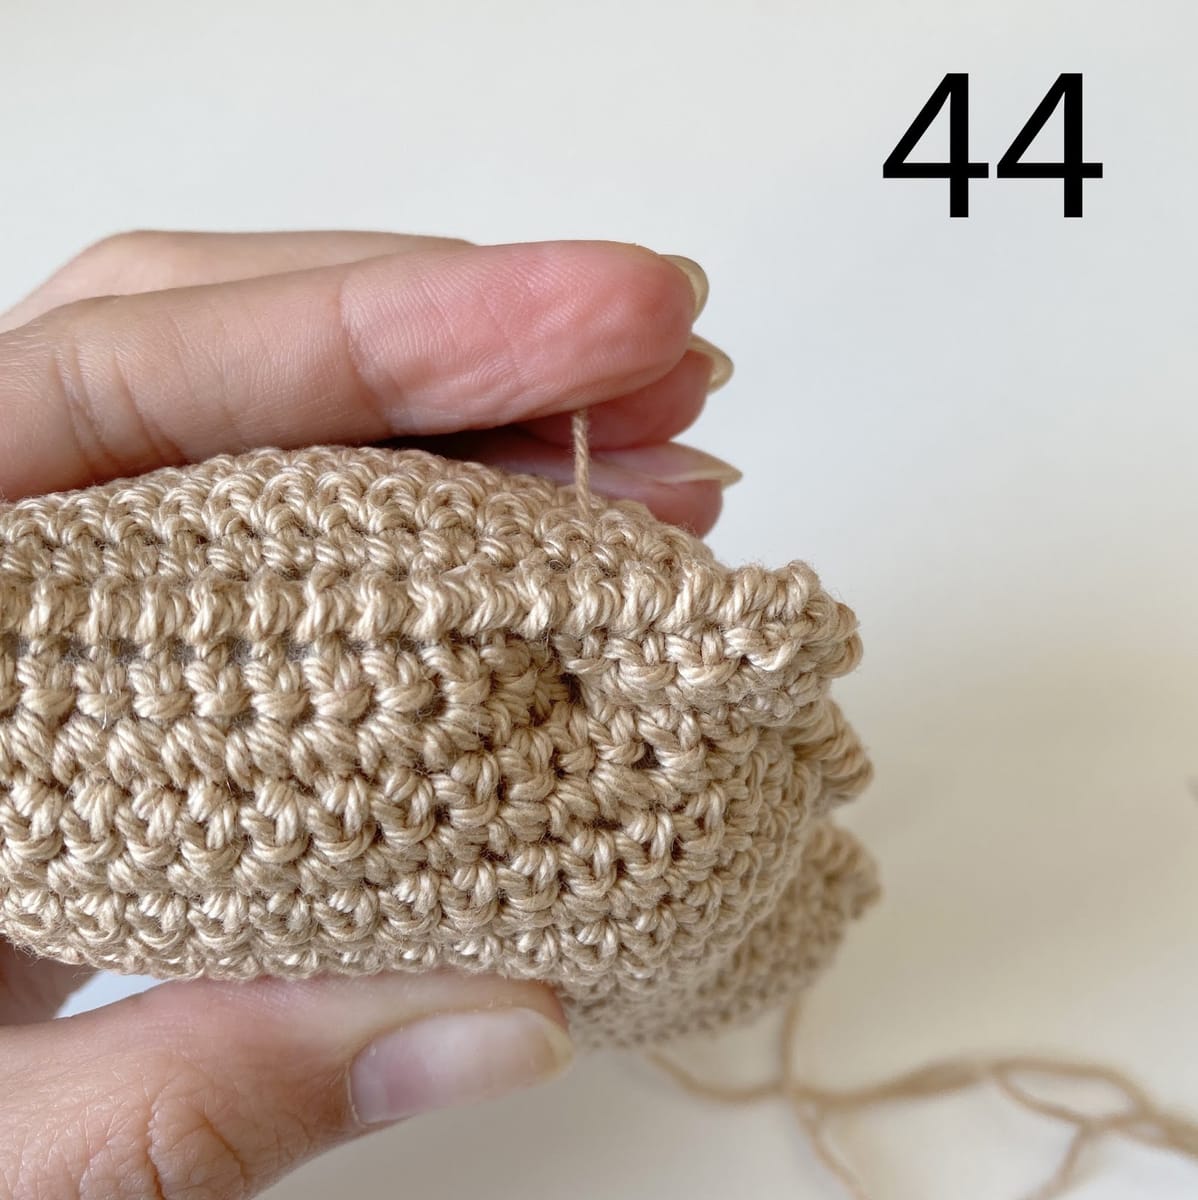
Insert needle near this point and output from the other side of the toy, pull tightly. (pic.42-44)
Then insert the needle again, and output in point 2, pull tightly. (pic.45)
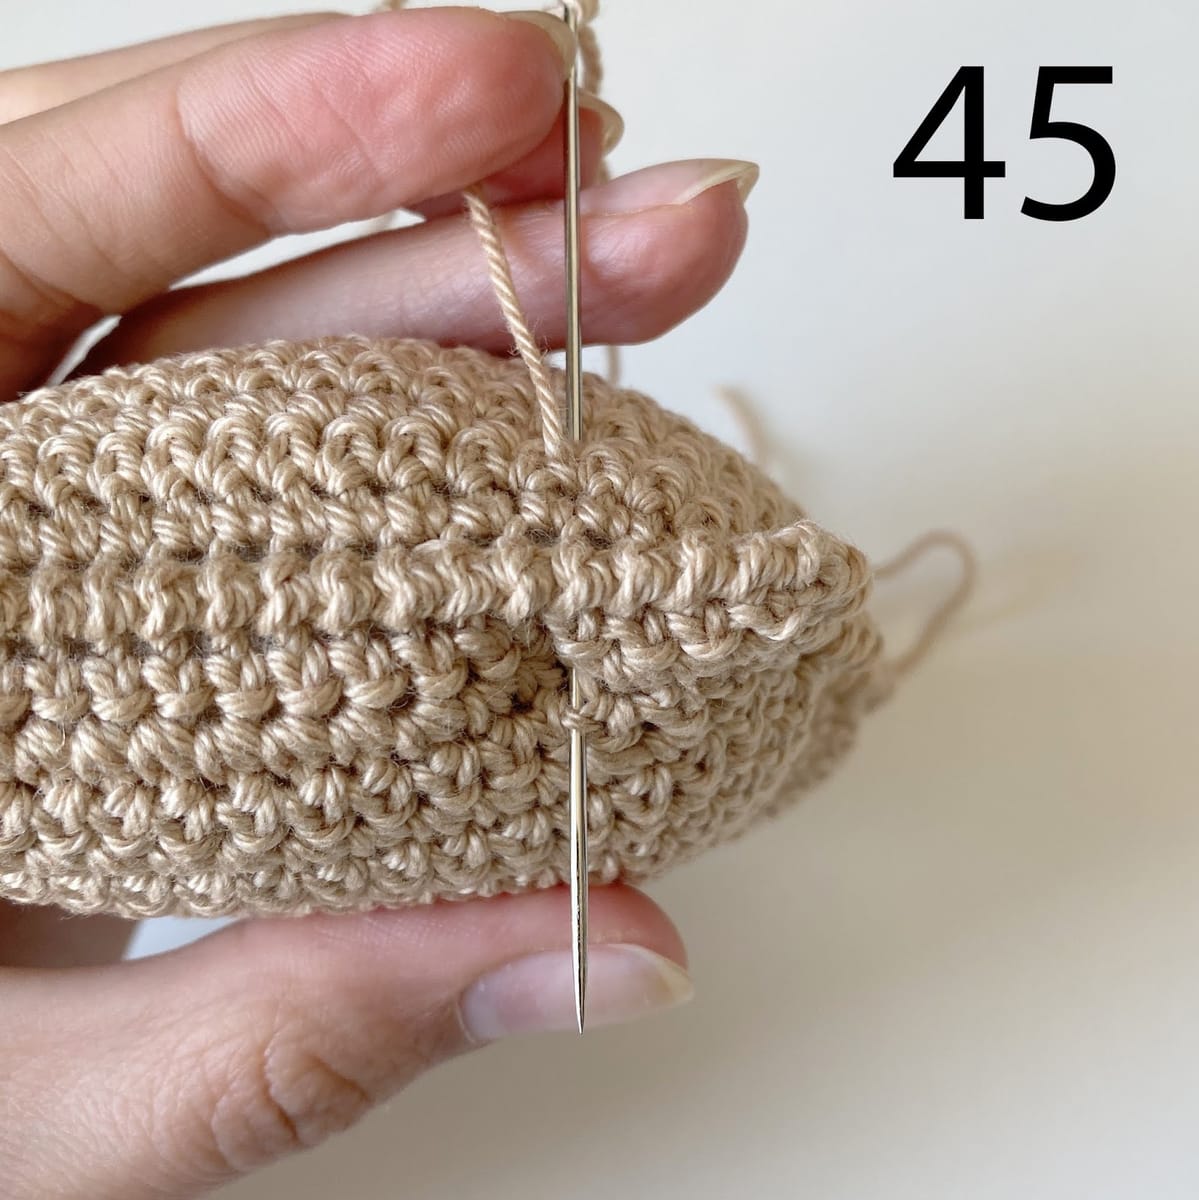
Repeat this movement along the line (pic.40) until the paws are pronounced. (pic.46-48)
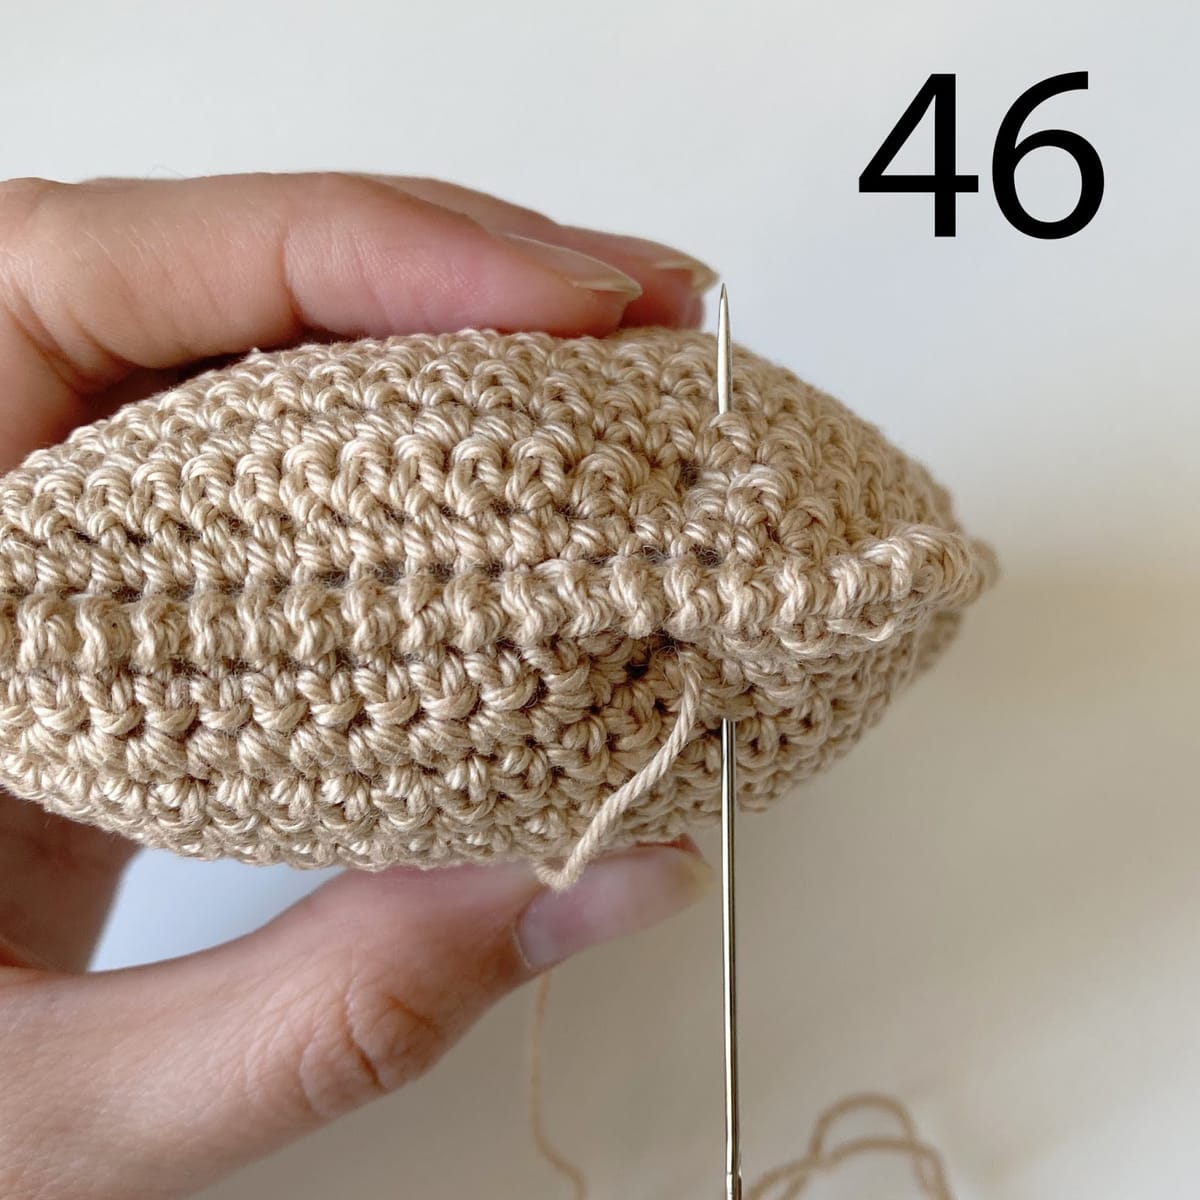
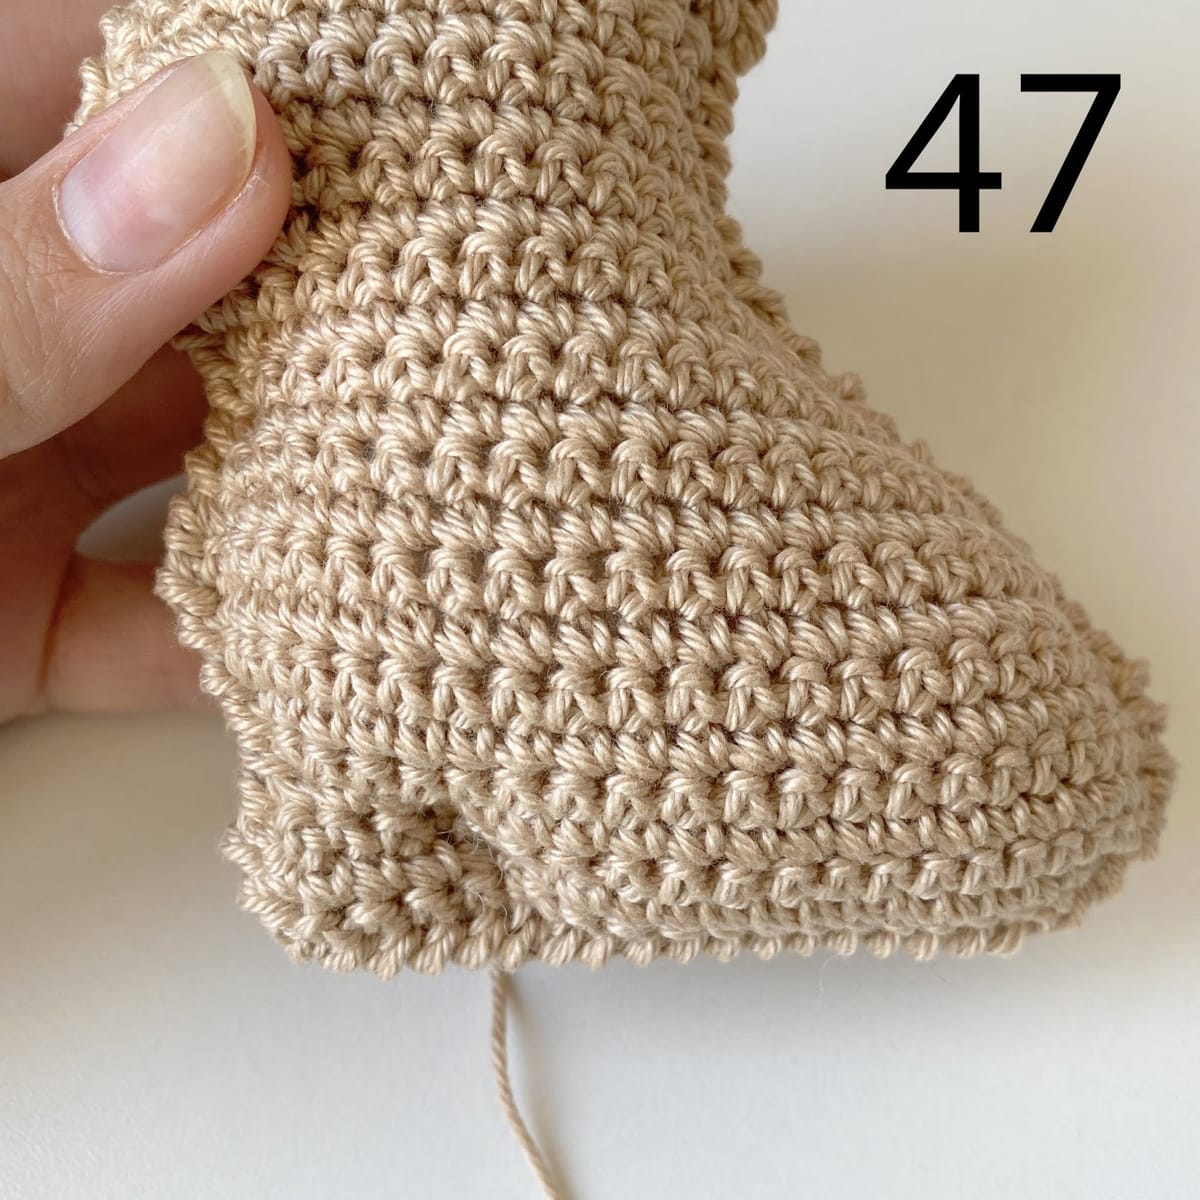
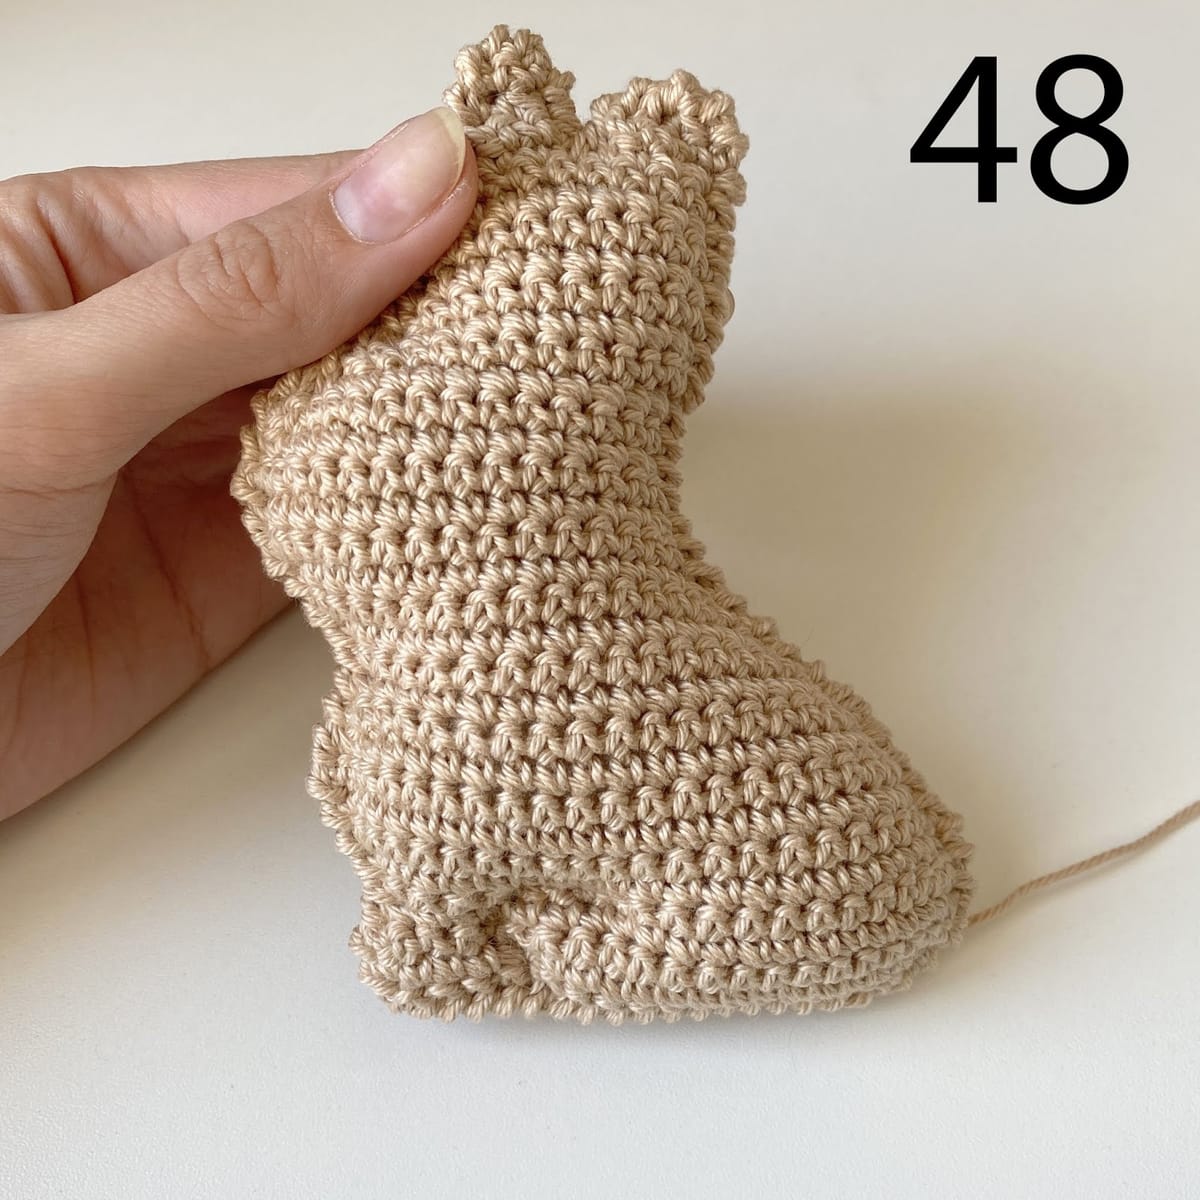
Do the same for the tail, head, and ears, follow the lines as shown on pic.40.
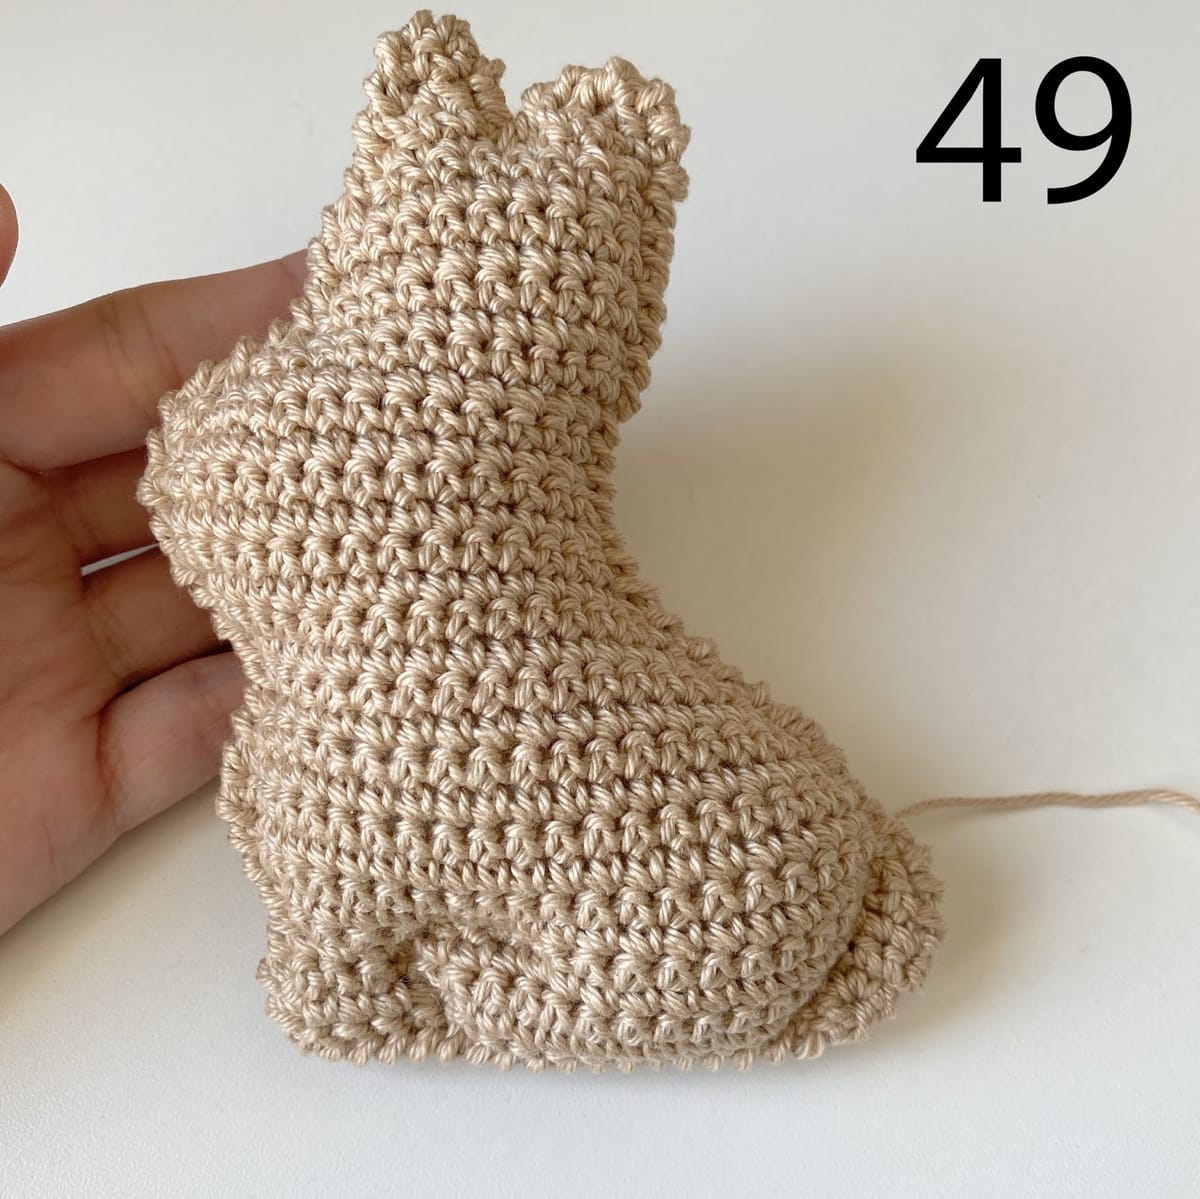
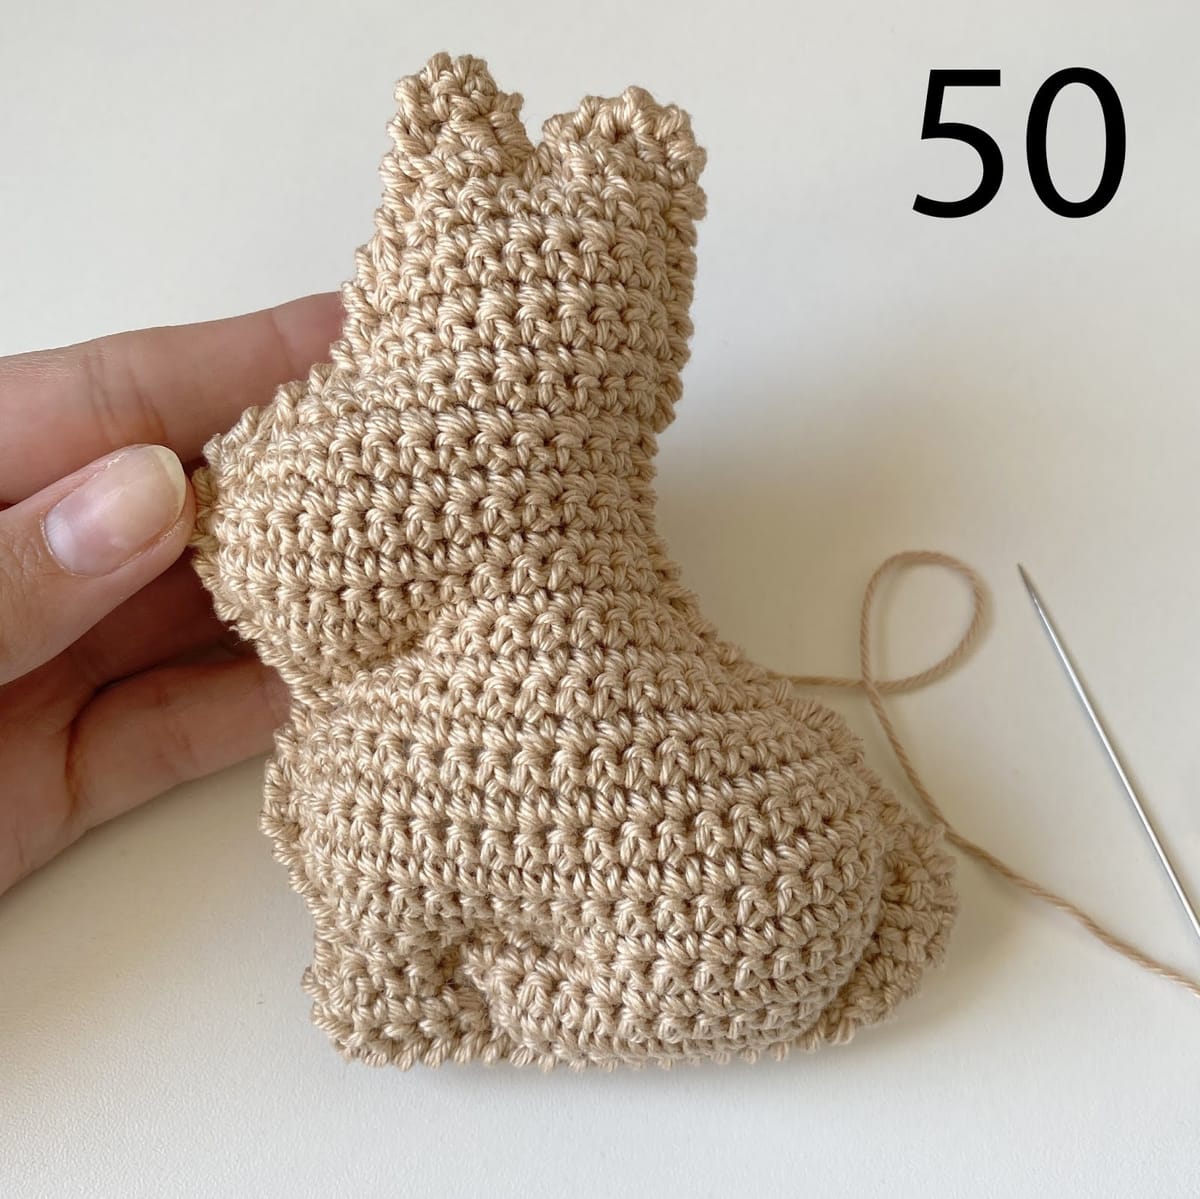
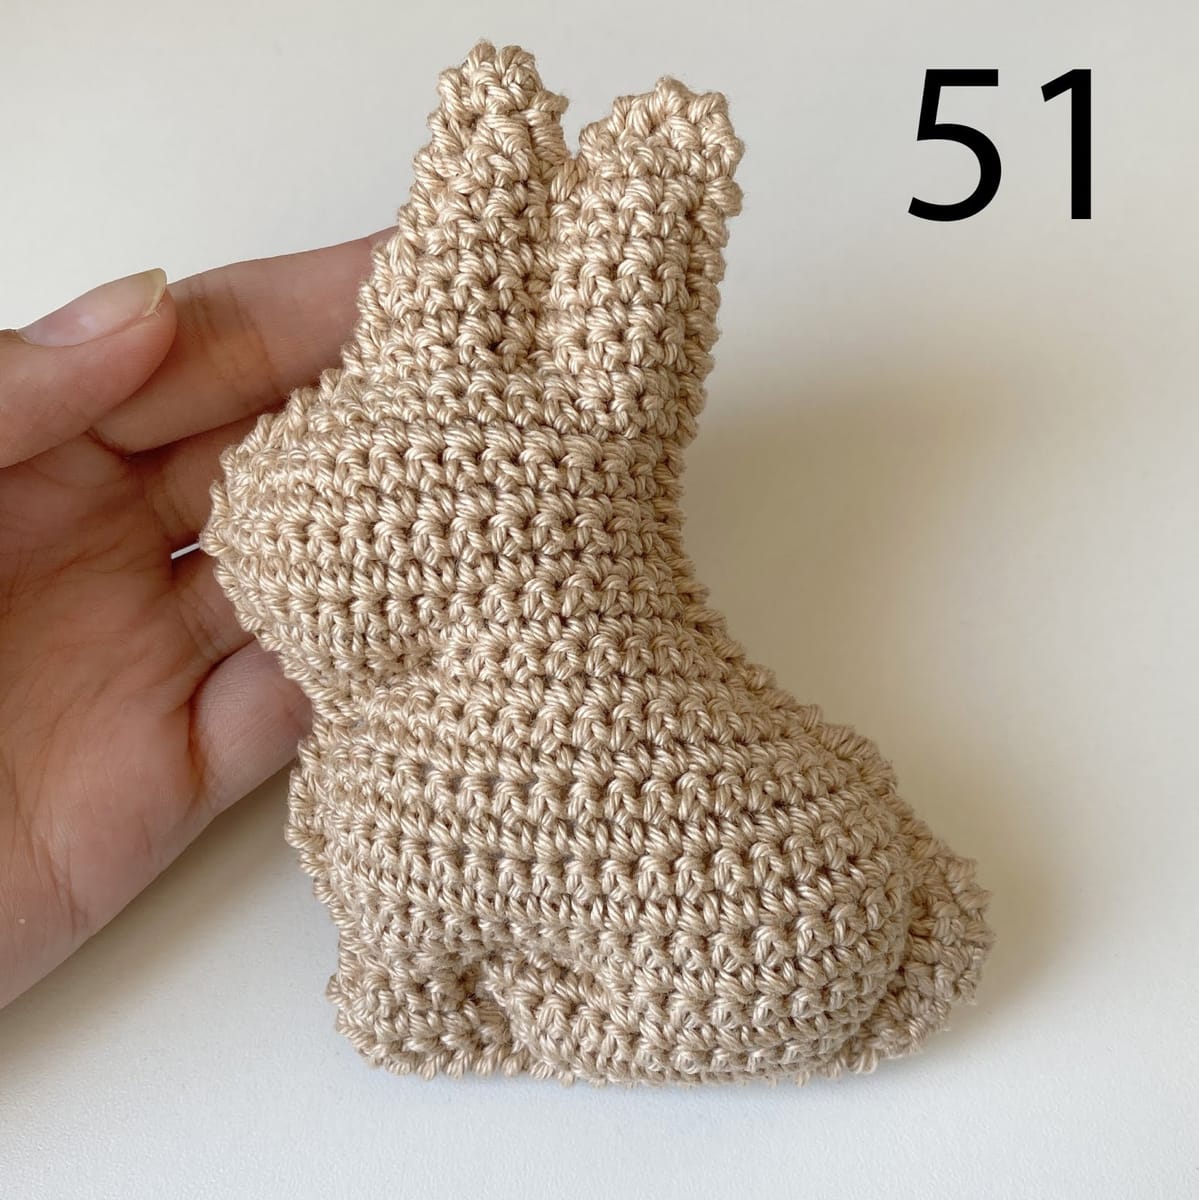
The bunny is almost ready! Decorate him with accessories. Also, you can embroider the eyes and nose.
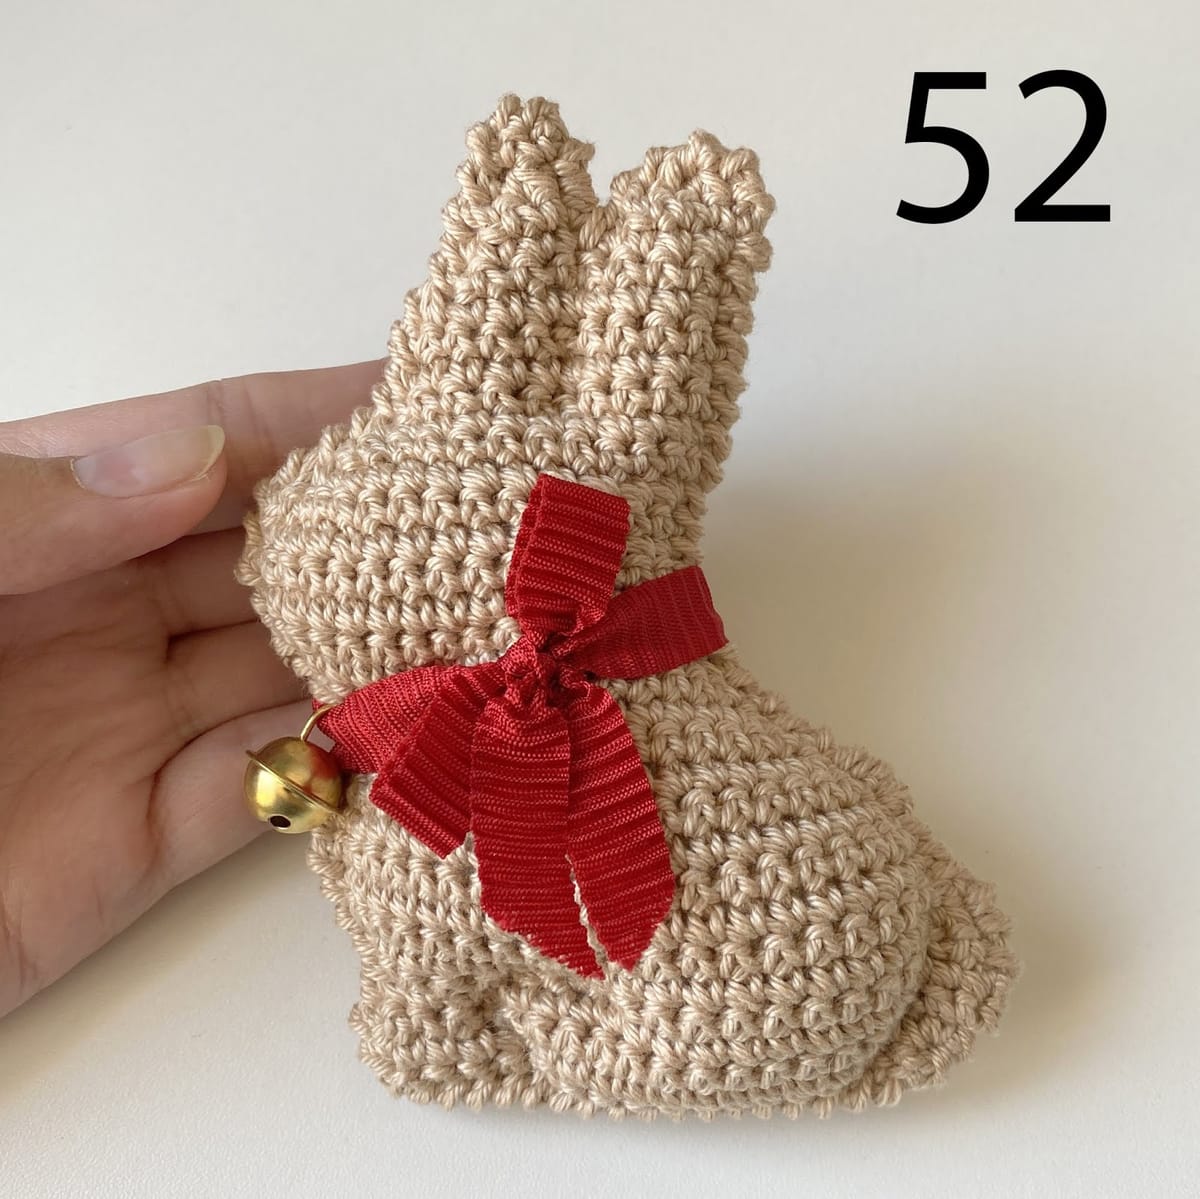
Share your finished toys on Instagram with #knittedstorybears or tag me @knittedstorybears
If you have any questions feel free to ask in comments or contact form below.
My links:
FREE PATTERNS ↠ all free patterns
INSTAGRAM ↠ https://www.instagram.com/knittedstorybears/
FACEBOOK ↠ https://www.facebook.com/knittedstorybears
RAVELRY ↠ https://www.ravelry.com/designers/vira-velmozhna
YOUTUBE ↠ https://www.youtube.com/channel/UCVf-I2z0TVqyTv17T2XSvZw?view_as=subscriber
Comments
Your name and comment are shown publicly under this pattern. See the privacy policy.
Comments couldn't load right now. Please try again later.
4 earlier comments from the old blog
Thank you sharing with us. it's beautiful
Thank you so much for this pattern, I love it!
Thank you very much ! My sister in law loves the Lindt bunny and I'm going to make it for her.
Thanks great blog poost