Little Pig Princess
Little crochet pigs from my Chinese horoscope series — a cute farm animal in sport weight yarn.
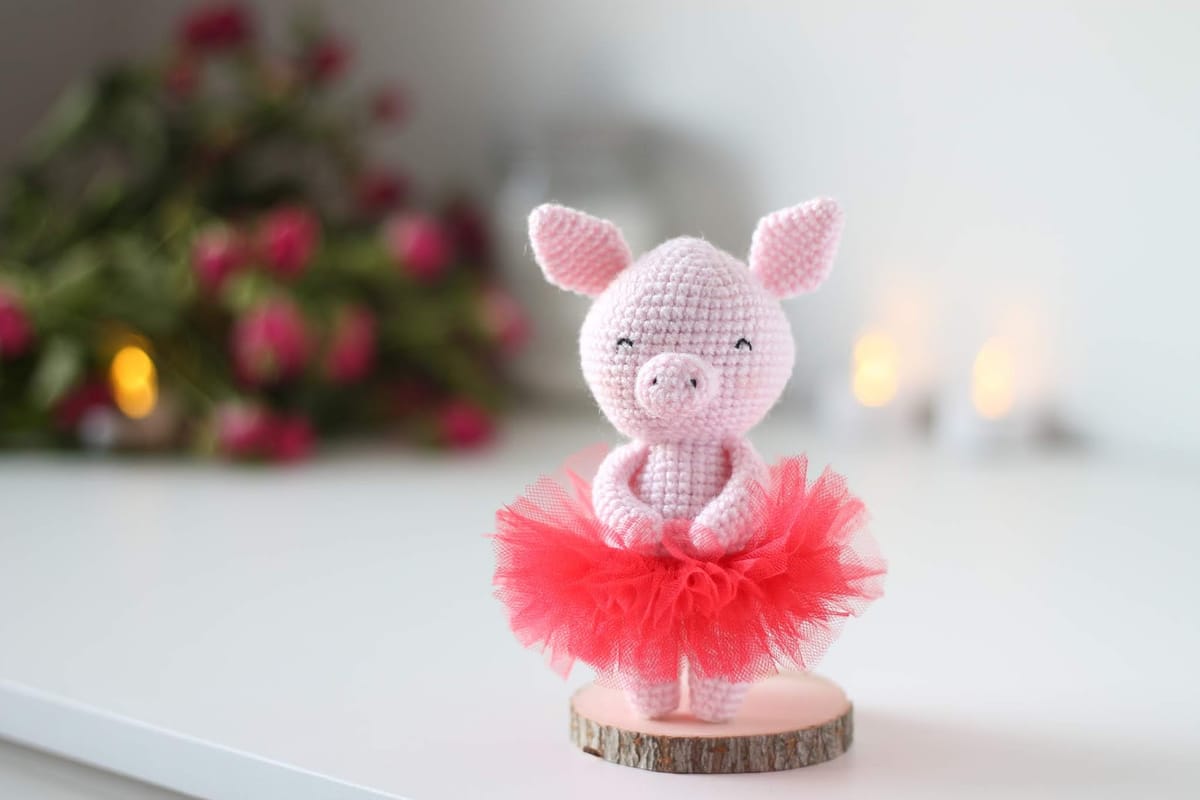
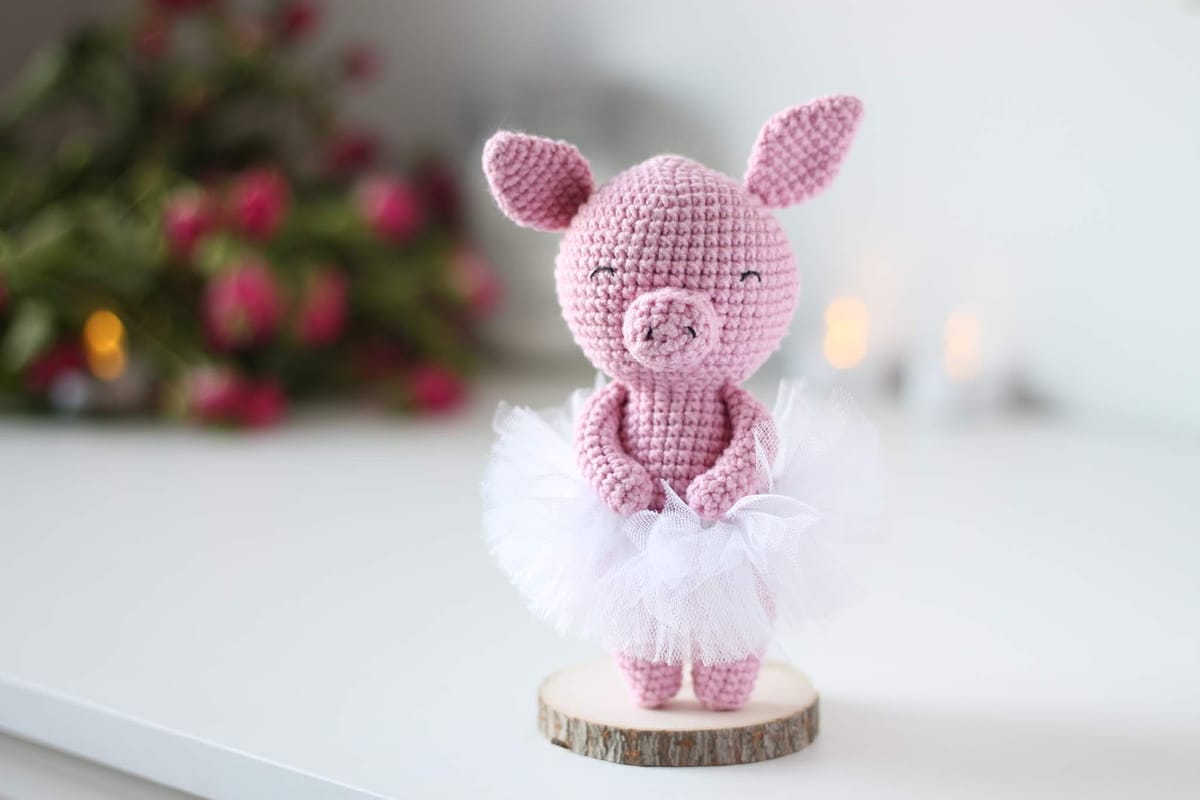
No need to say that the pig is a symbol of 2019. Besides the pigs, it is just a cute farm animal that can be crocheted in so many variations.
This pig toy is a part of the Chinese horoscope bundle of free patterns.
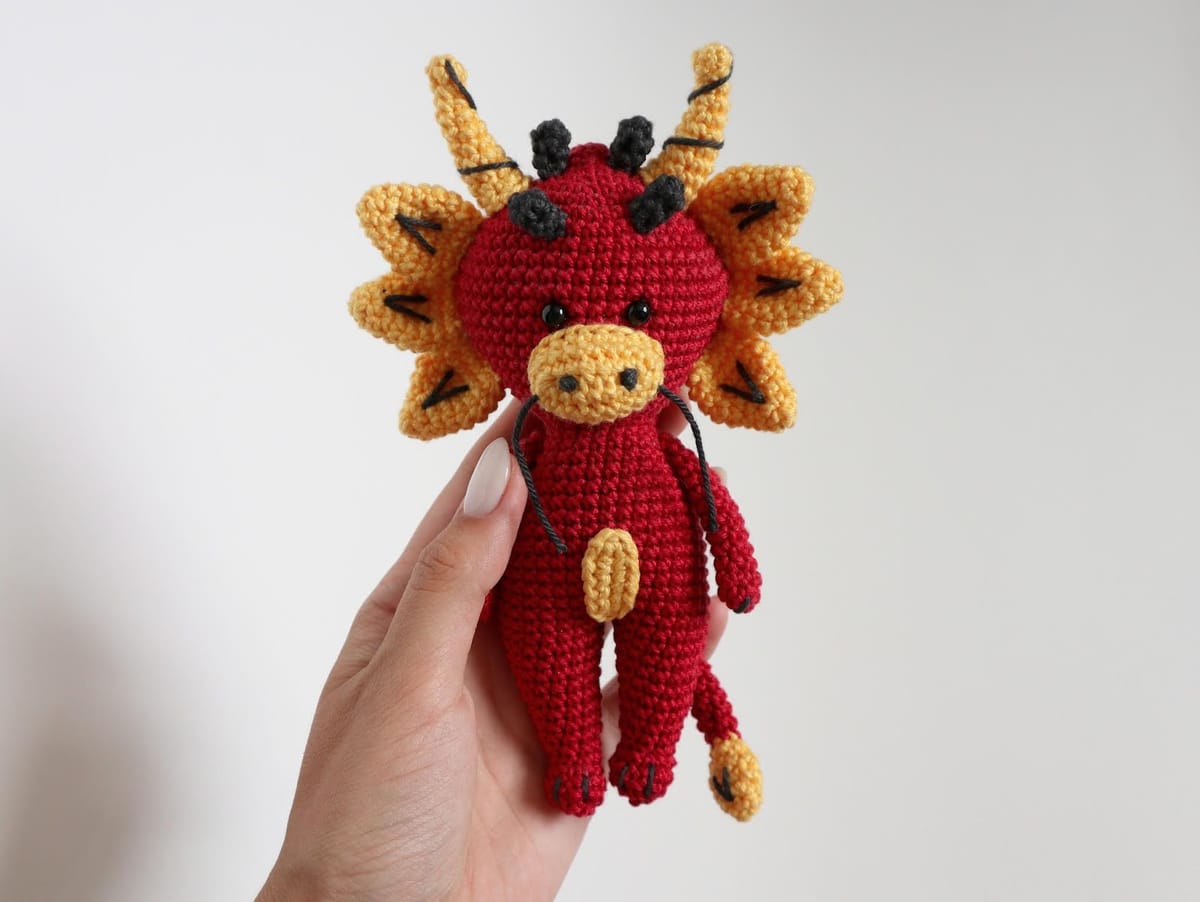
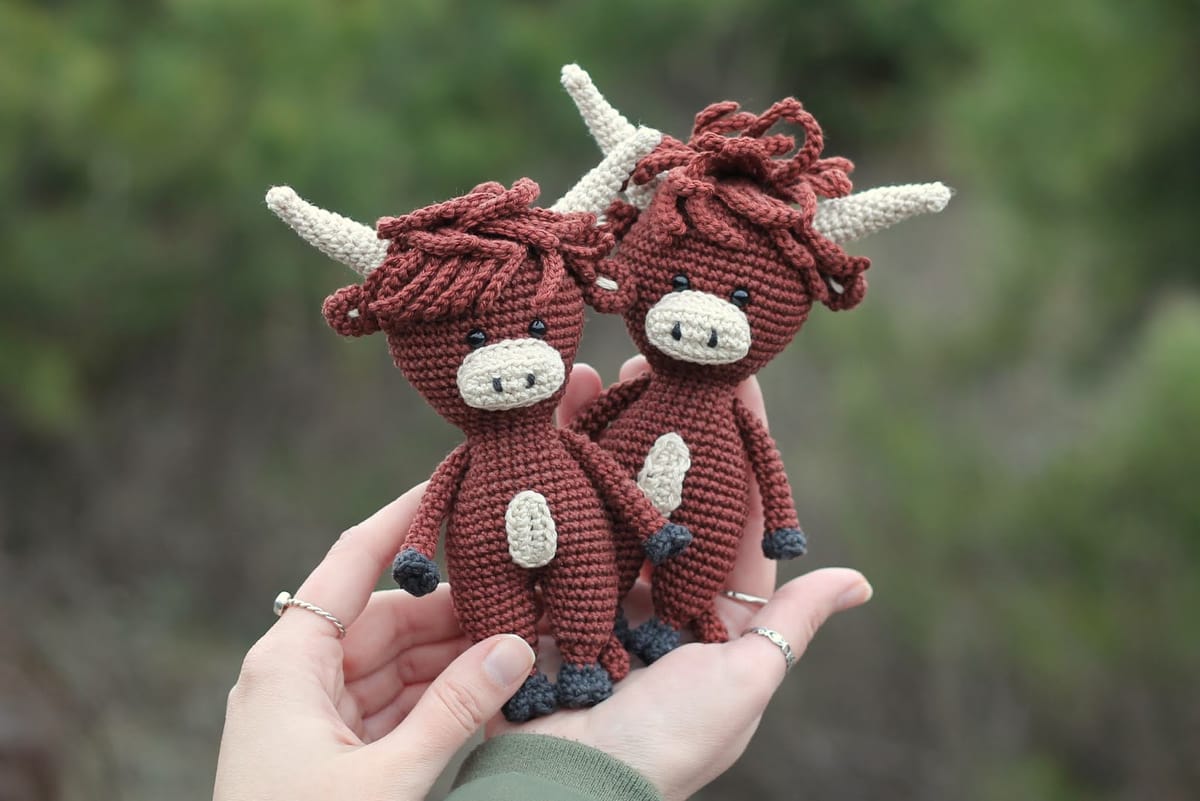
Other designs you can find here:
bunny
Little Grey Bunny
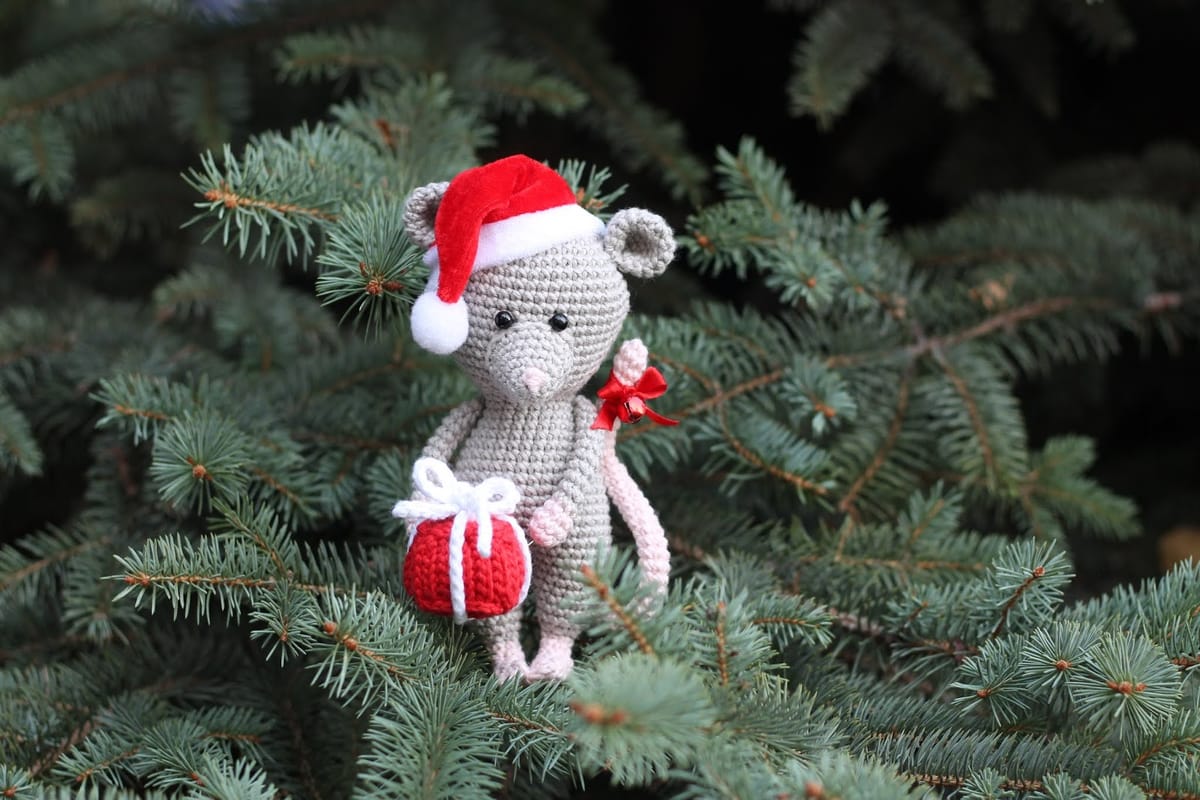
rat
Little Mouse in a Santa Hat
The toy is approx. 5 inches tall.
ABBREVIATIONS
The pattern is written in English, using US terminology.
ch - chain
sc - single crochet
inc - increase
dec - decrease
sl st - slip stitch
BLO - back loop only
[number] - number of stitches in the round
You should know how to crochet: chain, single crochet, increase, decrease, crochet in rounds, crochet in rows, crochet in back loops only.
Happy crocheting!
Head and body
Start at the top of the head.
RND 1: 3 ch, 1 sc in the second ch from hook (pic.1), 3 sc in next st (pic.2), continue on the other side of the foundation chain, 2 sc in next st (pic.3) [6]
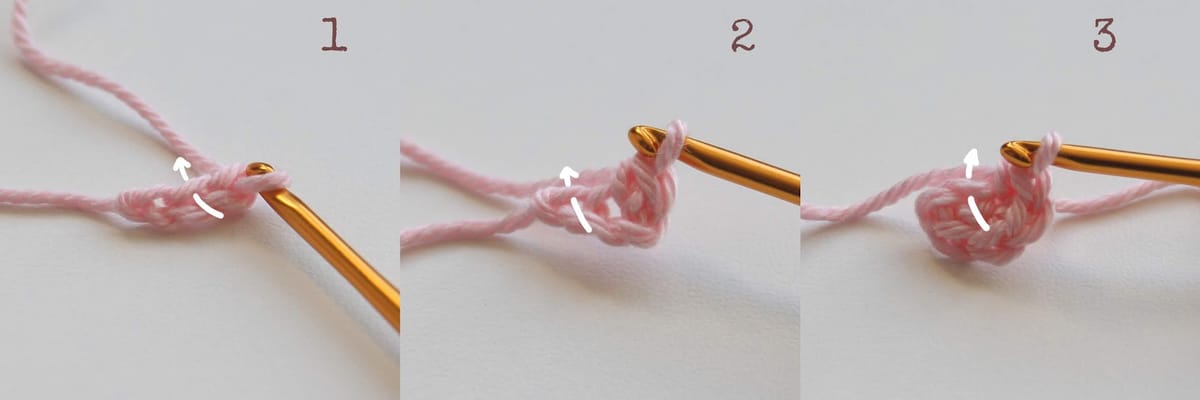
RND 2: (pic.4) inc in next st, sc in next st, inc in next 2 st, sc in next st, inc in next st [10]
RND 3: (pic.5) inc in next st, sc in next 4 st, inc in next st, sc in next 4 st [12]
RND 4: (sc in next st, inc in next st) * repeat 6 times [18]
RND 5: (sc in next 2 st, inc in next st) * repeat 6 times [24]
RND 6: (sc in next 3 st, inc in next st) * repeat 6 times [30]
RND 7: (sc in enxt 4 st, inc in next st) * repeat 6 times [36]
RND 8: (sc in next 5 st, inc in next st) * repeat 6 times [42]
RND 9: (sc in next 20 st, inc in next st) * repeat 2 times [44]
RND 10: (sc in next 21 st, inc in next st) * repeat 2 times [46]
RND 11: (sc in next 22 st, inc in next st) * repeat 2 times [48] (pic.6)
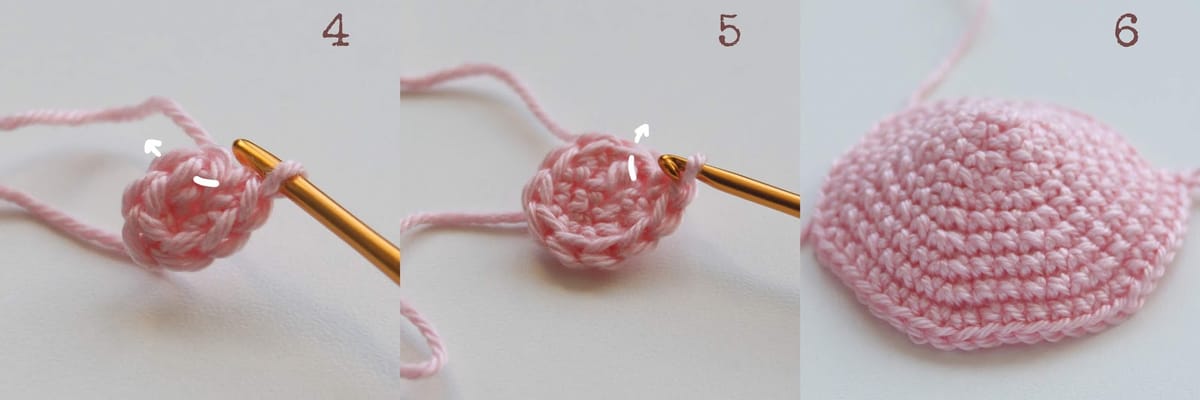
RND 12-14: sc in next 48 st [48] - 3 rounds
RND 15: (dec, sc in next 22 st) * repeat 2 times [46]
RND 16: (dec, sc in next 21 st) * repeat 2 times [44]
RND 17: (dec, sc in next 20 st) * repeat 2 times [42]
RND 18: (dec, sc in next 19 st) * repeat 2 times [40]
RND 19: (dec, sc in next 18 st) * repeat 2 times [38]
RND 20: (dec, sc in next 17 st) * repeat 2 times [36]
RND 21: (sc in next 4 st. dec) * repeat 6 times [30]
RND 22: (sc in next 3 st, dec) * repeat 6 times [24]
RND 23: (sc in next 2 st, dec) * repeat 6 times [18]
RND 24: sc in next 18 st [18] (pic.9)
Stuff the head (pic.10).
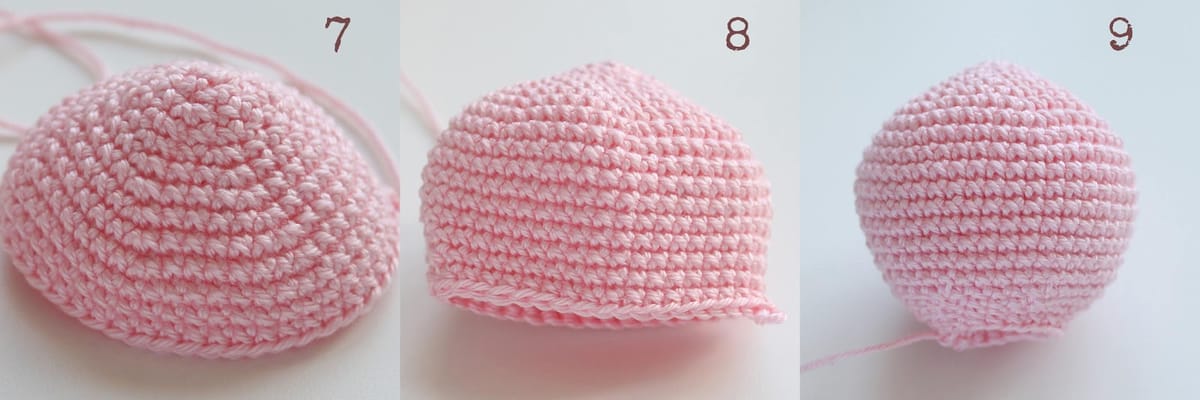
RND 25: (inc in next st, sc in next 8 st) * repeat 2 times [20]
RND 26: (sc in next st, inc in next st, sc in next 8 st) * repeat 2 times [22]
RND 27: (sc in next 2 st, inc in next st, sc in next 8 st) * repeat 2 times [24]
RND 28: (sc in next 3 st, inc in next st, sc in next 8 st) * repeat 2 times [26]
RND 29: (sc in next 4 st, inc in next st, sc in next 8 st) * repeat 2 times [28]
RND 30: (sc in next 5 st, inc in next st, sc in next 8 st) * repeat 2 times [30]
RND 31: (sc in next 6 st, inc in next st, sc in next 8 st) * repeat 2 times [32]
RND 32: (sc in next 7 st, inc in next st, sc in next 8 st) * repeat 2 times [34]
RND 33: (sc in next 8 st, inc in next st, sc in next 8 st) * repeat 2 times [36]
RND 34-39: sc in next 36 st [36] - 6 rounds
RND 40: sc in next 34 st (+ - 1 st, it should be in the middle of the head, pic.11). Do not finish this round. Don’t fasten off, continue with leg 1.
Leg 1
RND 1: sc in next 18 st, skip next 18 st [18]
RND 2: start in first st of the previous round, sc in next 18 st [18] (pic.12)
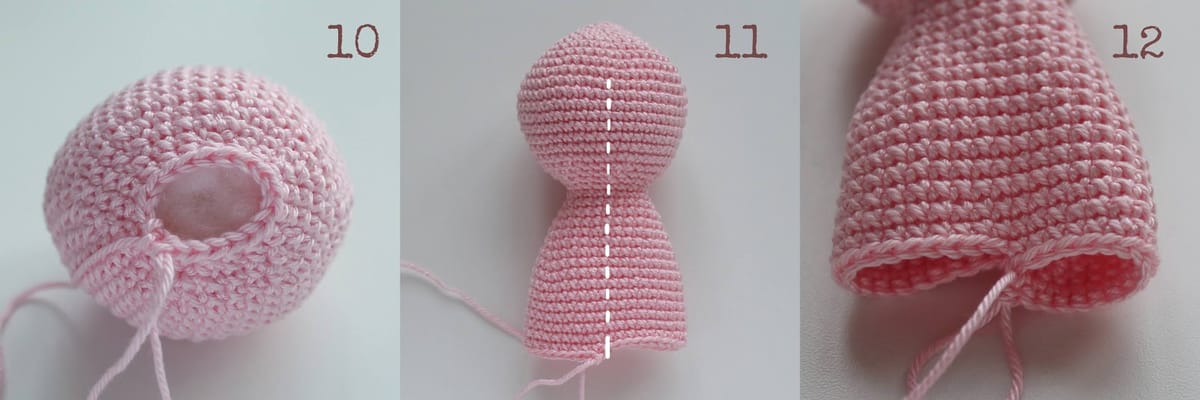
RND 3: (dec, sc in next 7 st) * repeat 2 times [16]
RND 4: (dec, sc in next 6 st) * repeat 2 times [14]
RND 5: (dec, sc in next 5 st) * repeat 2 times [12]
RND 6: (dec, sc in next 4 st) * repeat 2 times [10]
RND 7: BLO dec 5 times.
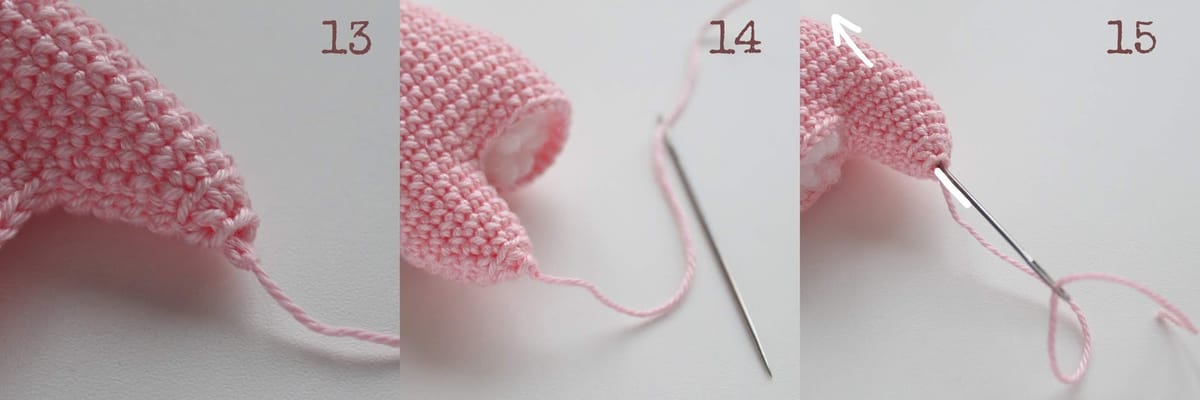
Fasten off. Leave a tail approx. 15 cm and weave the yarn end (see pic.13-15)
Stuff the body and leg 1 (pic.16).
Leg 2
Start crochet in the first skipped stitch in Rnd 1 of the Leg 1 (pic.17).
RND 1: sc in next 18 st [18]
RND 2: start in first st of the previous round, sc in next 18 st [18]
RND 3: (dec, sc in next 7 st) * repeat 2 times [16]
RND 4: (dec, sc in next 6 st) * repeat 2 times [14]
RND 5: (dec, sc in next 5 st) * repeat 2 times [12]
RND 6: (dec, sc in next 4 st) * repeat 2 times [10]
Stuff the leg 2.
RND 7: BLO dec 5 times.
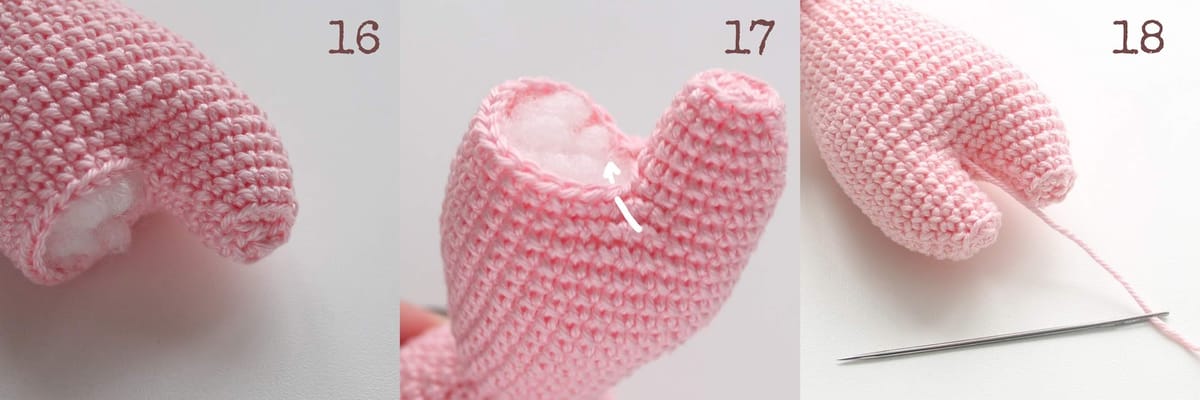
Fasten off. Leave a tail approx. 15 cm and weave the yarn ends (see pic.13-15, 18-19).
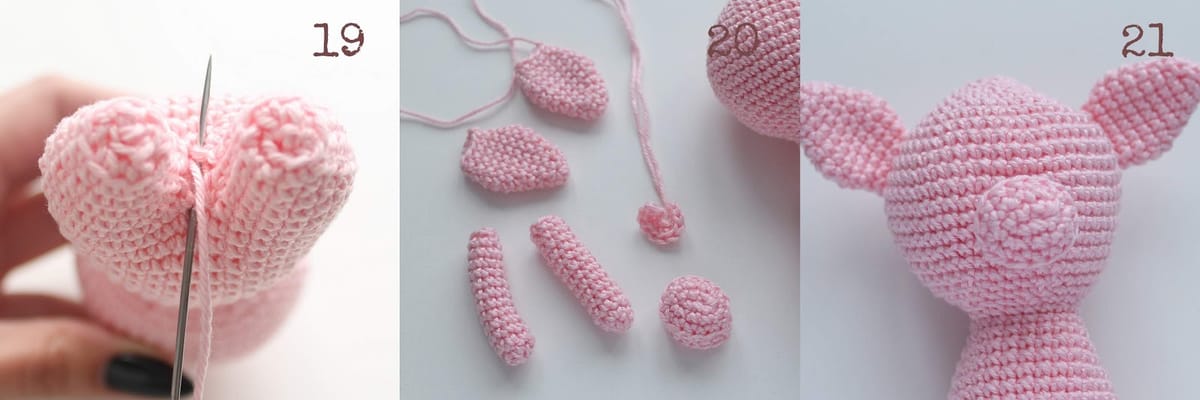
Arms
Make 2.
RND 1: 2 ch, 6 sc in second ch from hook [6]
RND 2: (inc in next st, sc in next 2 st) * repeat 2 times [8]
RND 3-13: sc in next 8 st [8] - 11 rounds
The arms do not need to be stuffed.
Fasten off. Leave a long tail for sewing.
Ears
Make 2.
RND 1: 2 ch, 4 sc in second ch from hook [4]
RND 2: (inc in next st, sc in next st) * repeat 2 times [6]
RND 3: (inc in next st, sc in next 2 st) * repeat 2 times [8]
RND 4: (inc in next st, sc in next 3 st) * repeat 2 times [ 10]
RND 5: (inc in next st, sc in next 4 st) * repeat 2 times [12]
RND 6: (inc in next st, sc in next 5 st) * repeat 2 times [14]
RND 7: (inc in next st, sc in next 6 st) * repeat 2 times [16]
RND 8: sc in next 16 st [16]
RND 9: (dec, sc in next 6 st) * repeat 2 times [14]
RND 10: (dec, sc in next 5 st) * repeat 2 times [12]
RND 11: (dec, sc in next 4 st) * repeat 2 times [10]
The ears do not need to be stuffed. Fasten off and leave a long tail for sewing.
Nose
RND 1: 4 ch, 1 sc in the second ch from hook, 1 sc in next st, 3 sc in next st, continue on the other side of the foundation chain, 1 sc in next st, 2 sc in next st [8]
RND 2: inc in next st, sc in next 2 st, inc in next 2 st, sc in next 2 st, inc in next st [12]
RND 3: inc in next st, sc in next 5 st, inc in next st, sc in next 5 st [14]
RND 4: BLO sc in next 14 st [14]
RND 5: inc in next st, sc in next 6 st, inc in next st, sc in next 6 st [16]
Stuff the detail.
Fasten off and leave a long tail for sewing.
Tail
6 ch, start in the second ch from hook, inc in all 5 st. Fasten off, leave a long tail for sewing.
Assembly
Sew the ears to the head.
Sew the nose to the head.
Embroider the eyes and nose on the head. (pic.22)
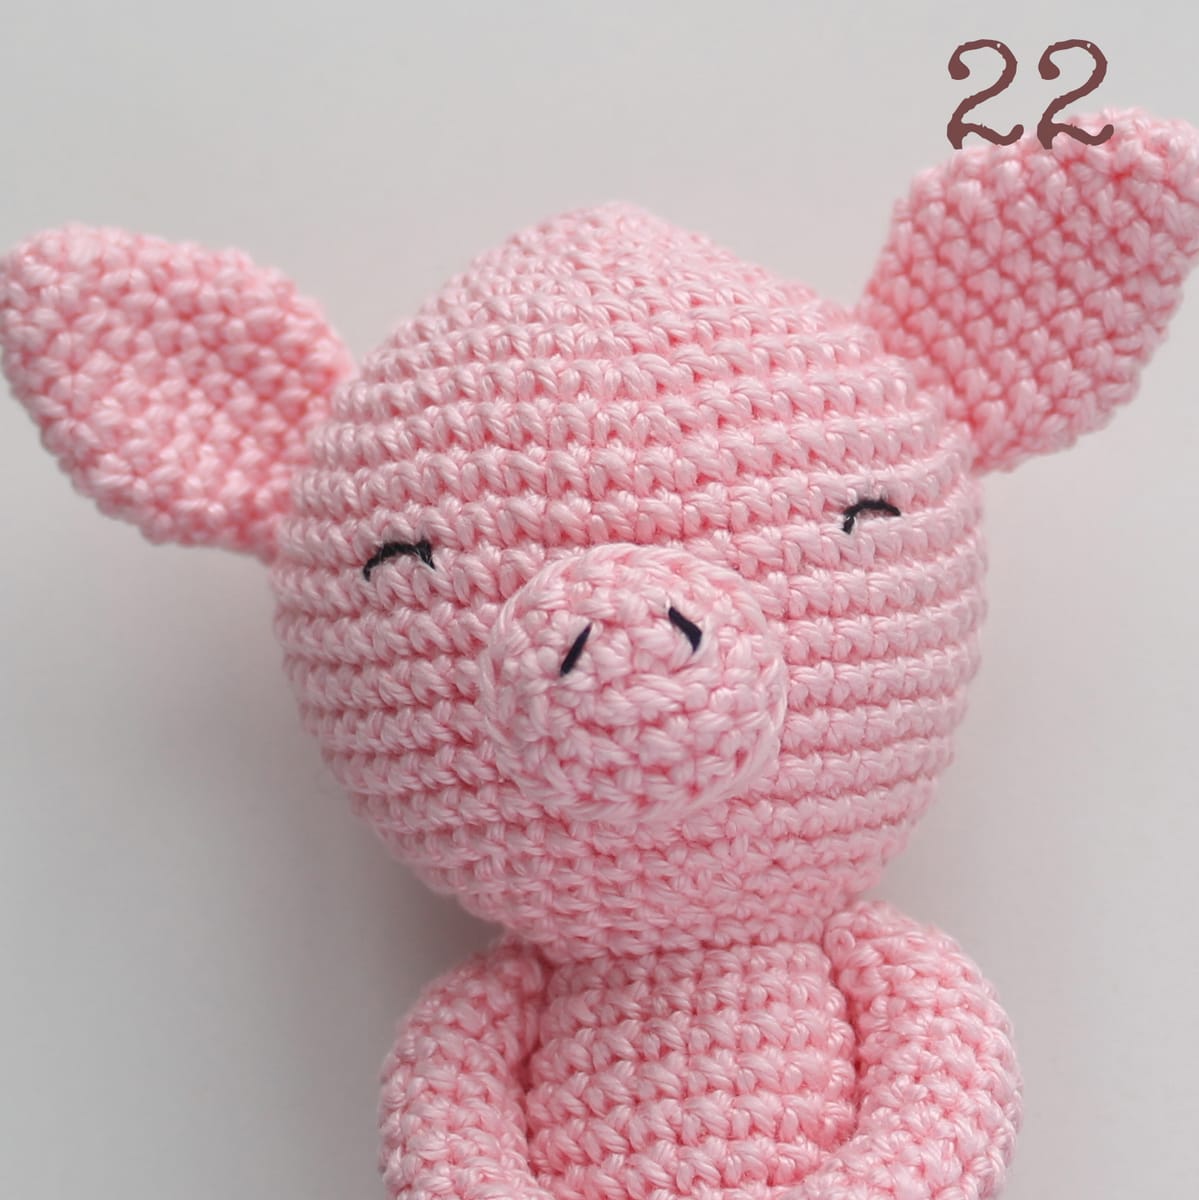
Sew the arms to the body.
Sew the tail to the body.
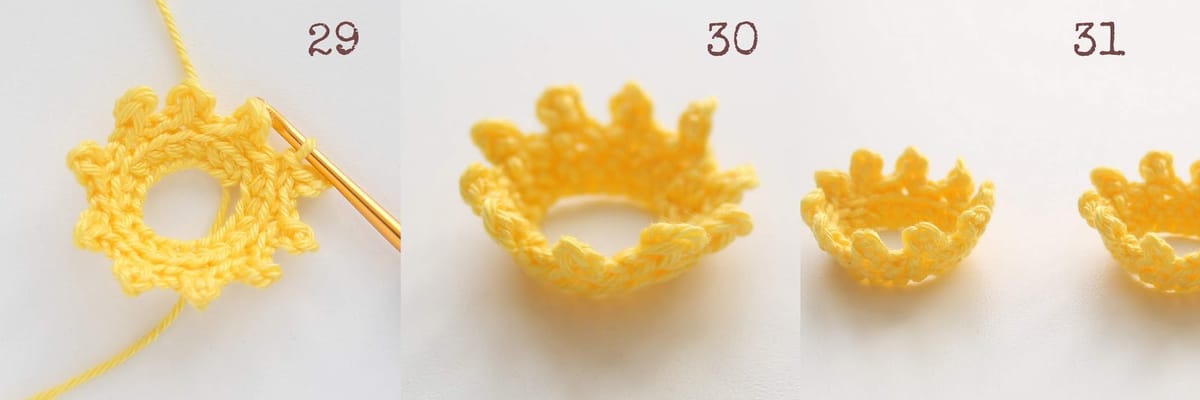
Crown
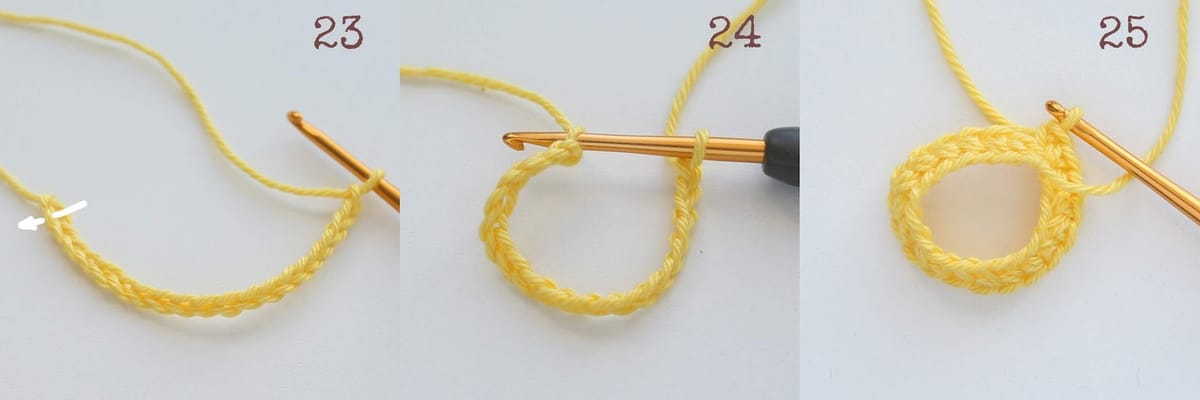
RND 1: 20 ch
RND 2: start in the first chain of the previous round (pic.23-24), sc in next 19 st [19] (pic.25)
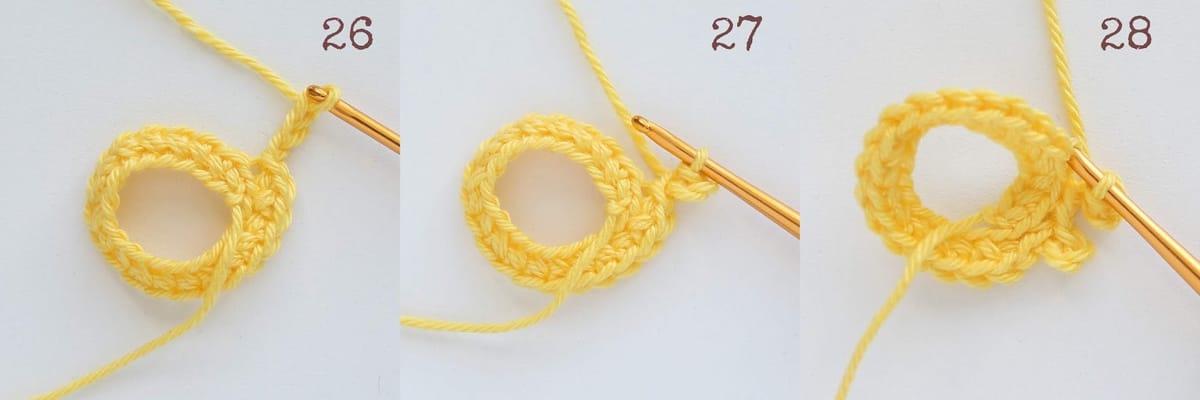
RND 3: BLO (1 sl st, 3 ch (pic.26), 1 sl st in the third ch from a hook (pic.27), 1 sl st in next st of round 2 (pic.28)) * repeat 10 times.
Fasten off.
Skirt
Share your finished toys on Instagram with #knittedstorybears or tag me @knittedstorybears
Or create a page for your project on Ravelry.
If you have any questions feel free to ask in comments or contact form below.
My links:
FREE PATTERNS ↠ all free patterns
INSTAGRAM ↠ https://www.instagram.com/knittedstorybears/
FACEBOOK ↠ https://www.facebook.com/knittedstorybears
RAVELRY ↠ https://www.ravelry.com/designers/vira-velmozhna
Comments
Your name and comment are shown publicly under this pattern. See the privacy policy.
Comments couldn't load right now. Please try again later.
8 earlier comments from the old blog
Great pattern wow
Thank you!
I absolutely love this pattern. The pig is adorable. What is your policy on selling them once their made? I would of course link back to your pattern - and no worries at all if you would prefer not to do that.
Hi! Thank you for your words about the piglet!!
Of course, you can sell the finished toys, it is absolutely okay!
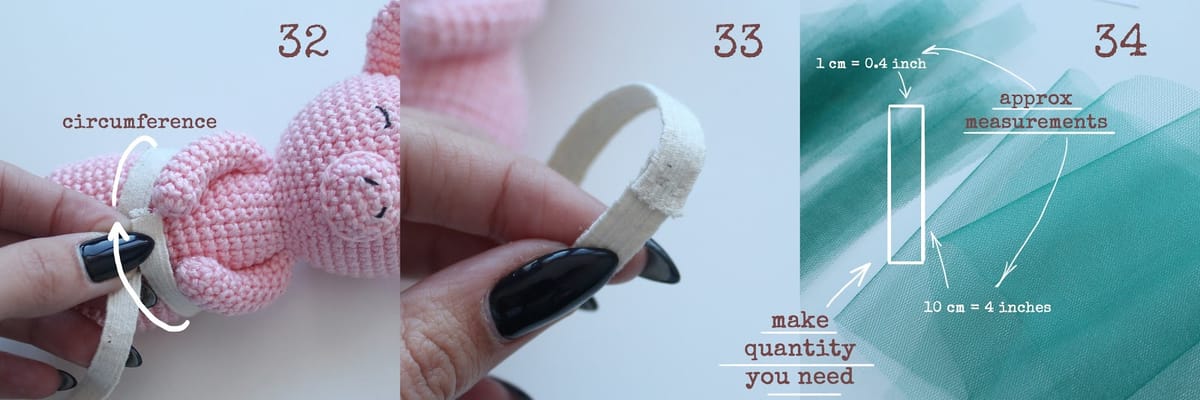
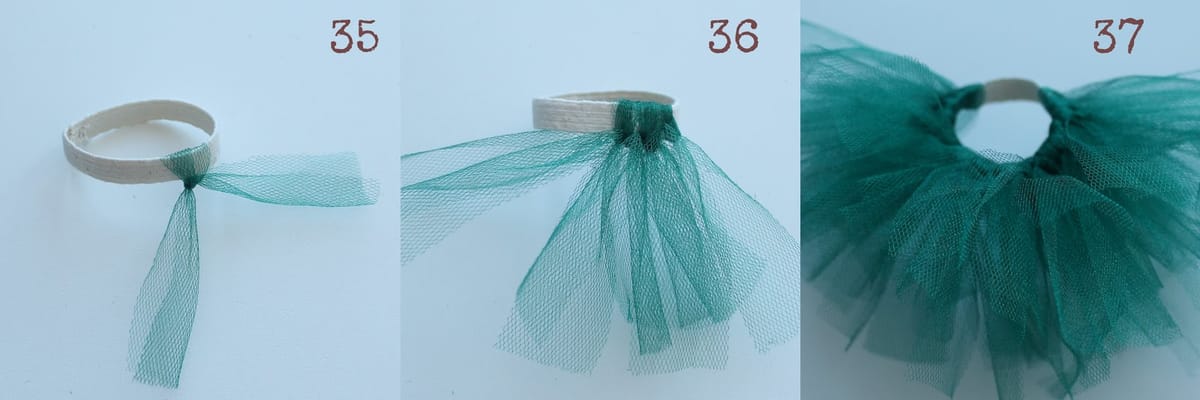
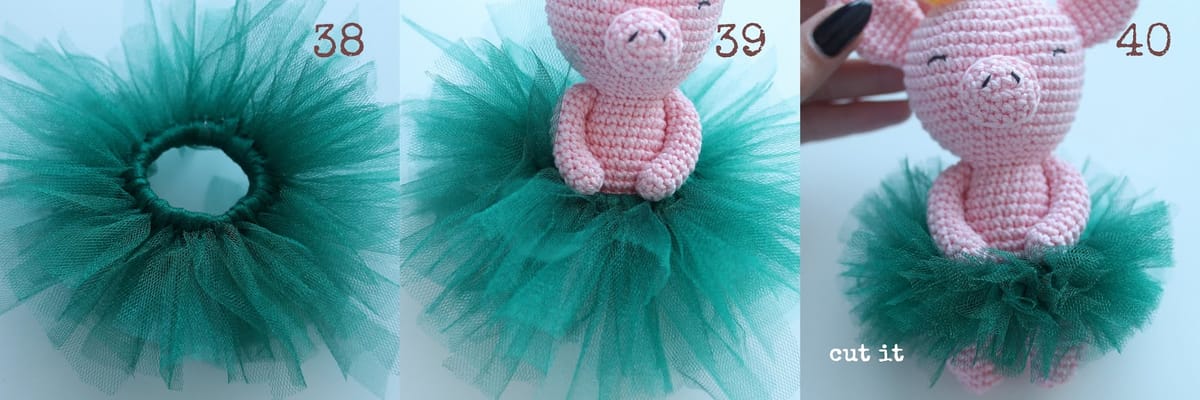
is the skirt made with a piece of elastic?
Yes, it is, with elastic band
All of your patterns are so cute! What are the measurements for the fabric strips for the skirt?
Thank you!
I made "0.4 inch/4 inch" stripes for my size of the pig (5 inches)