Little Mouse in a Santa Hat
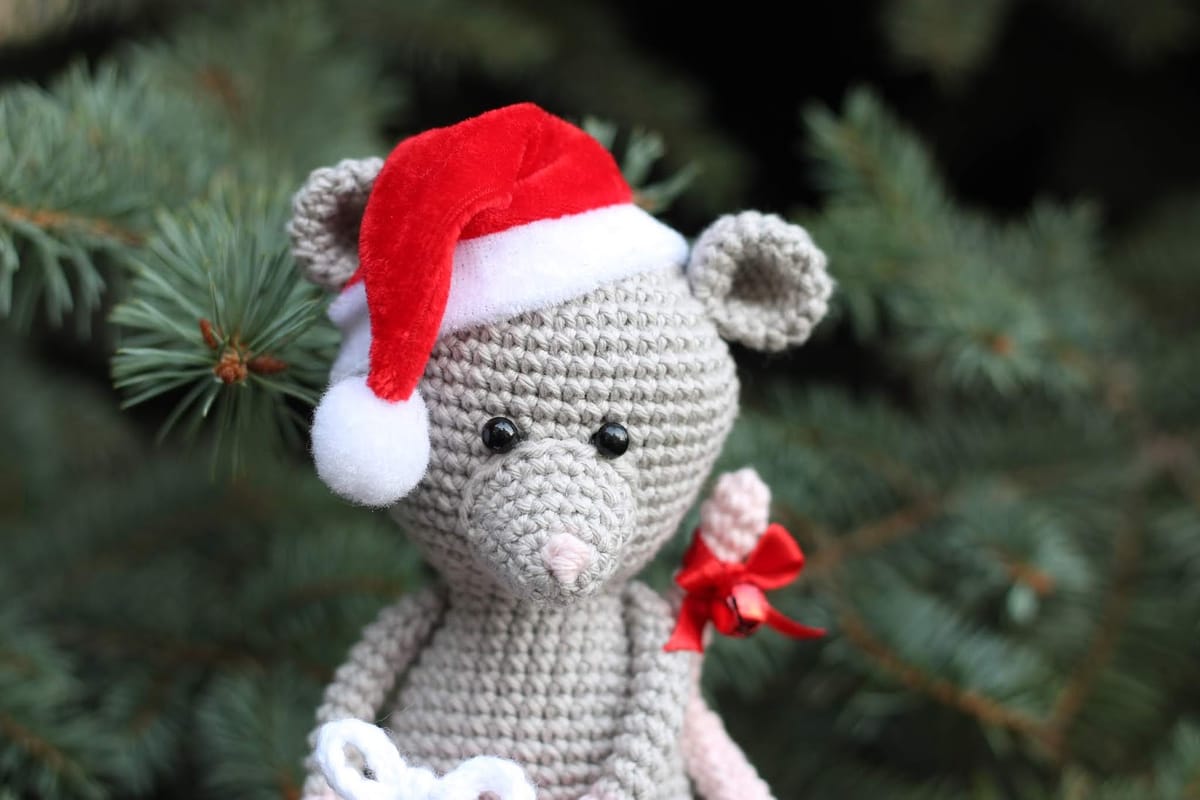
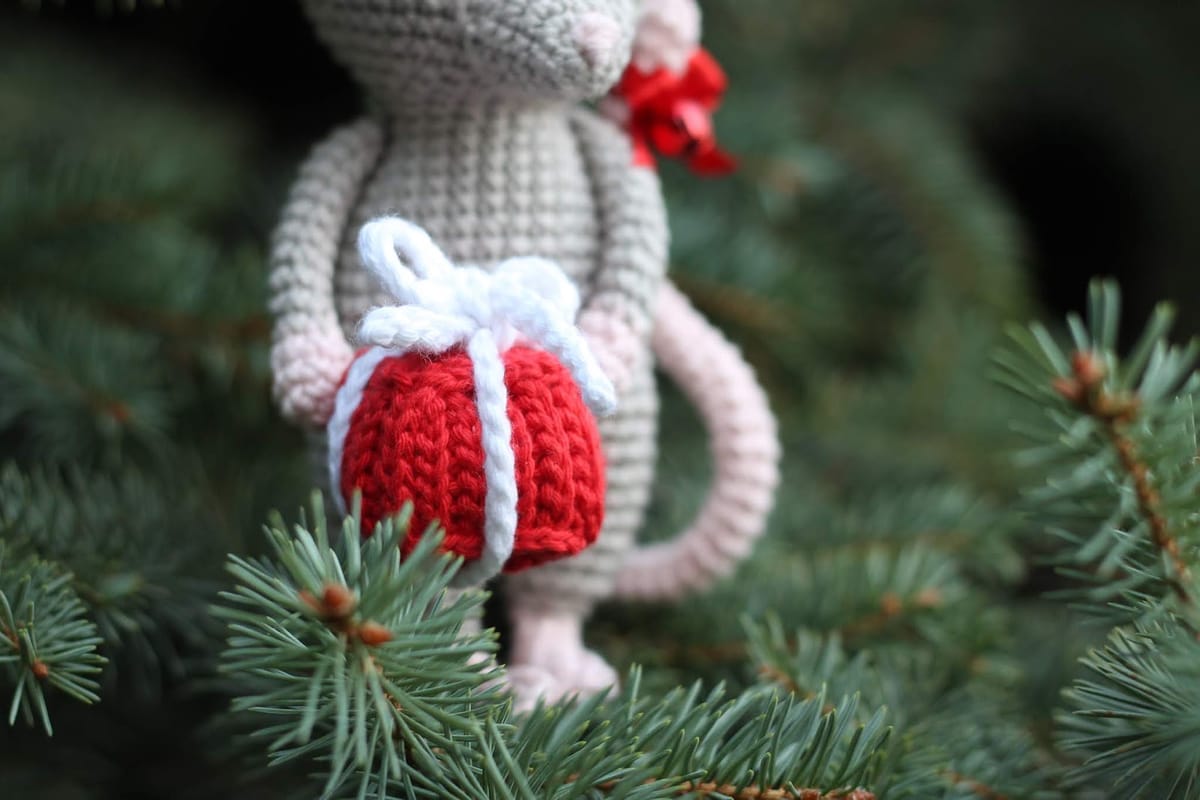
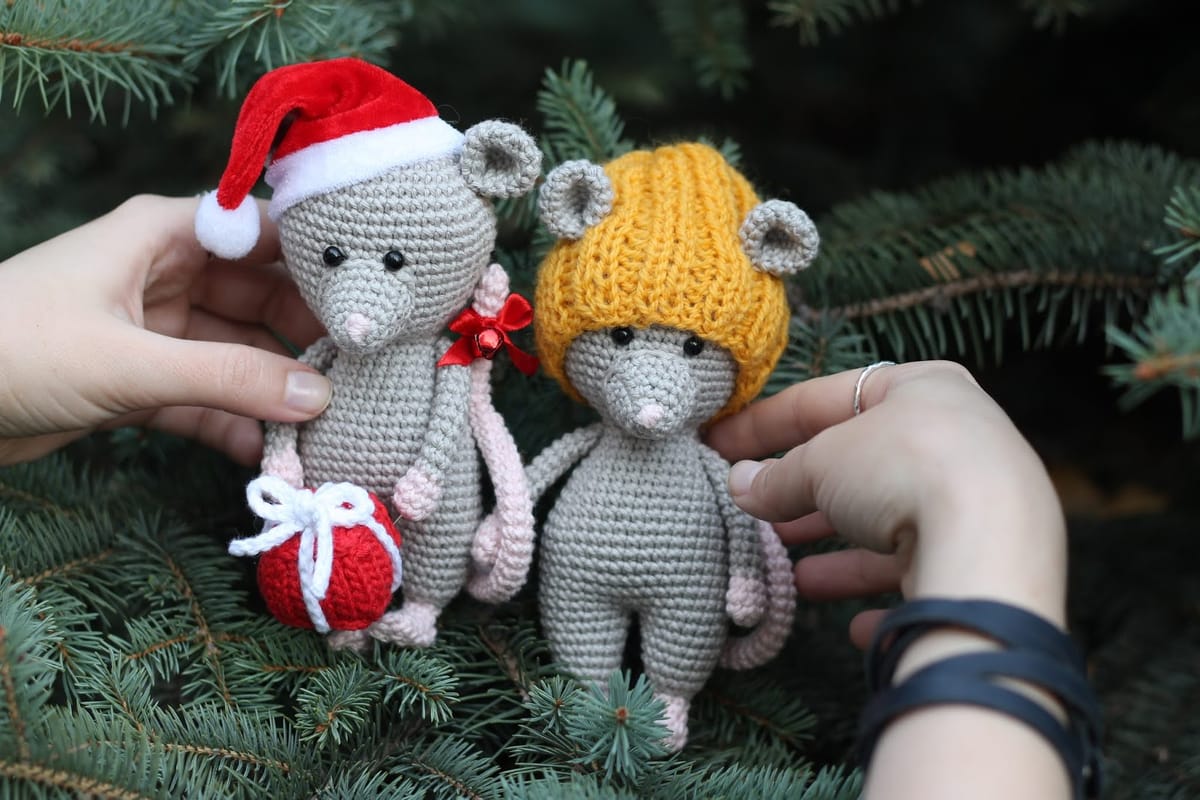
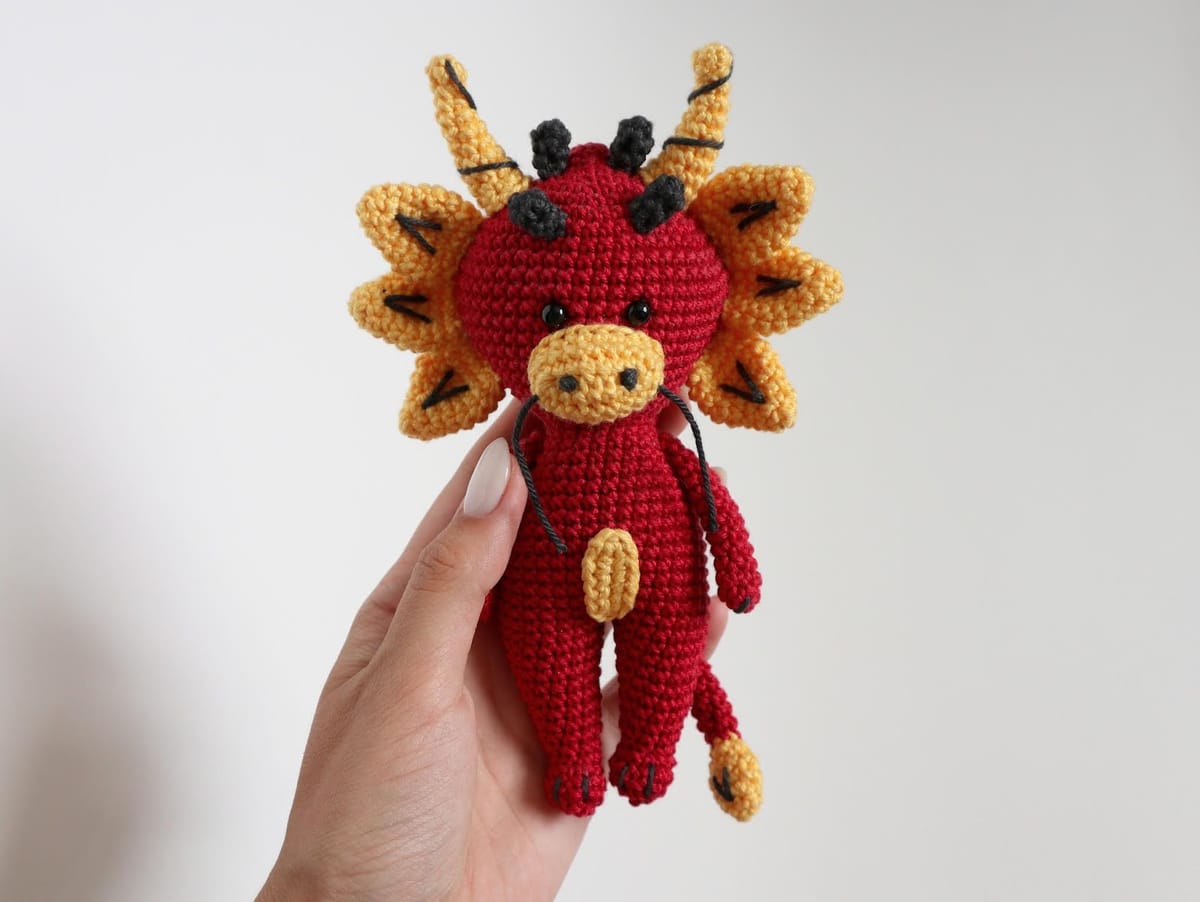
A little mouse (or rat!) from my Chinese horoscope series, with a knitted hat and a tiny present.
Hey!
I continue to create free patterns for all animals from the Chinese horoscope. Today I invite you to crochet cute little rat!
(although I named her “a mouse” but it still is like a rat)
Previous designs you can find there
crochet pig Little Pig Princess
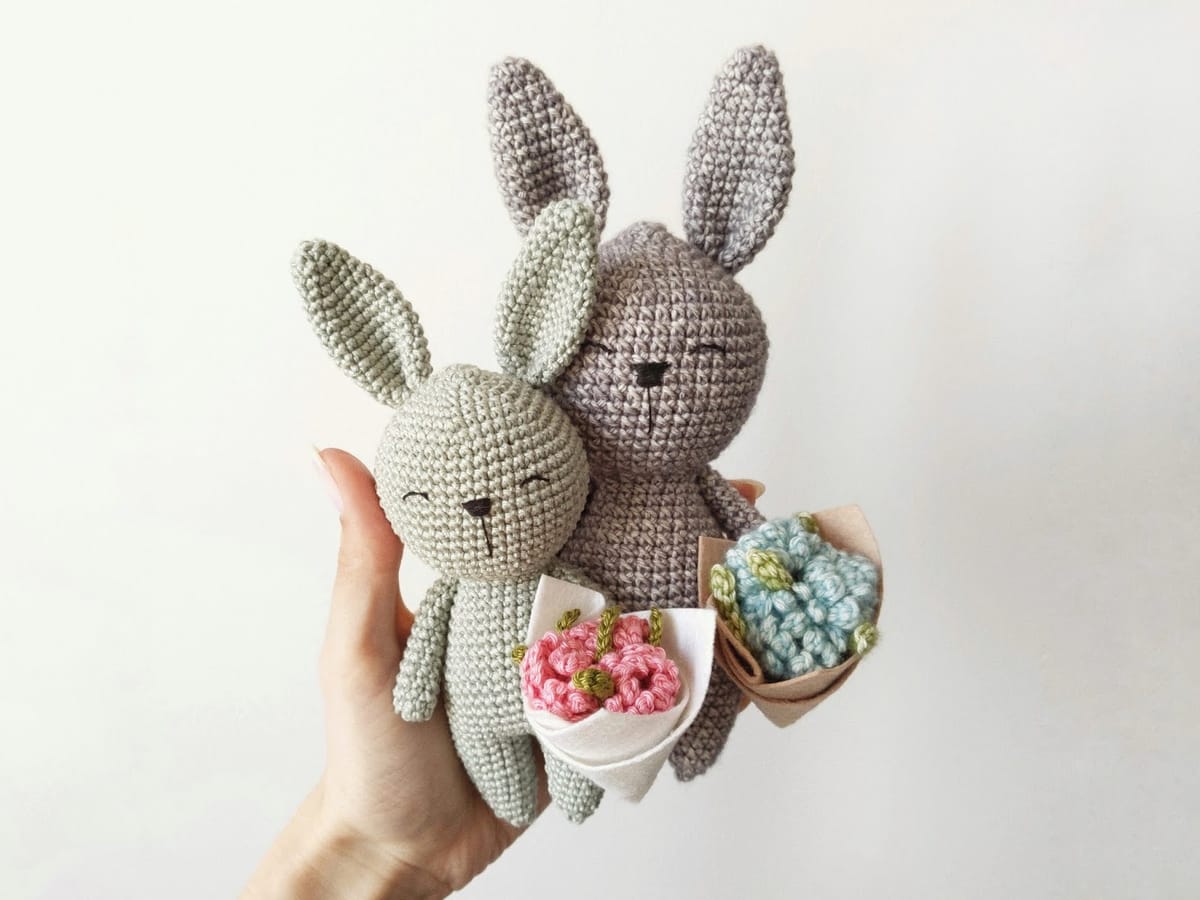
crochet bunny Little Grey Bunny
The toy is approx. 6.5 inches tall.
ABBREVIATIONS
The pattern is writting in English, using US terminology.
FOR CROCHETING
ch - chain
sc - single crochet
inc - increase
dec - decrease
RND - round
You should know how to crochet: chain, single crochet, increase, decrease, crochet in rounds, crochet in rows.
FOR KNITTING
K - knit stitch
P - purl stitch
st - stitch
You should know how to knit with needles: cast on, knit stitch, purl stitch, cast off.
Head and body
Start at the top of the head.
Start with gray yarn.
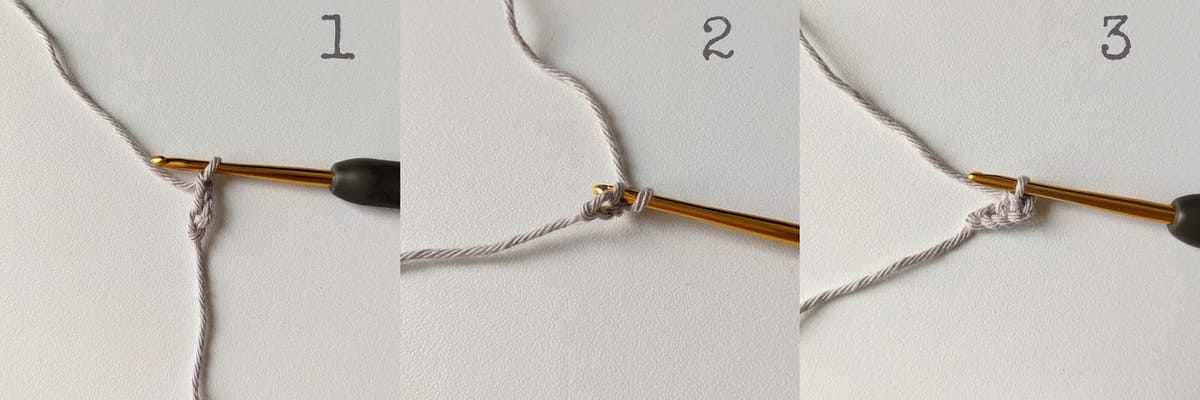
RND 1: 3 ch (pic.1), 1 sc in second ch from a hook (pic.2-3), 3 sc in next st (pic.4), continue on the other side of the foundation chains (pic.5), 2 sc in next st (pic.6) [6]
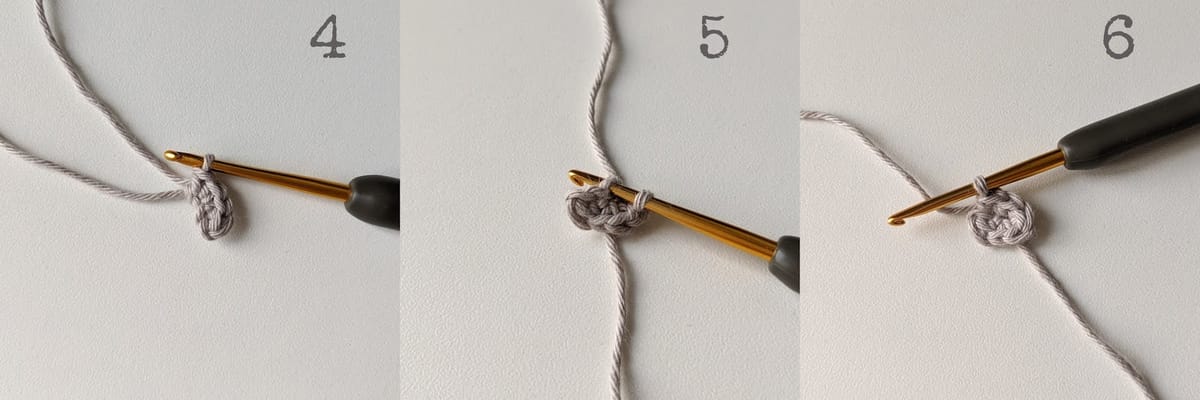
RND 2: (pic.7) inc in next st, sc in next st, inc in next 2 st, sc in next st, inc in next st (pic.8) [10]
RND 3: (inc in next st, sc in next 4 st) * repeat 2 times (pic.9) [12]
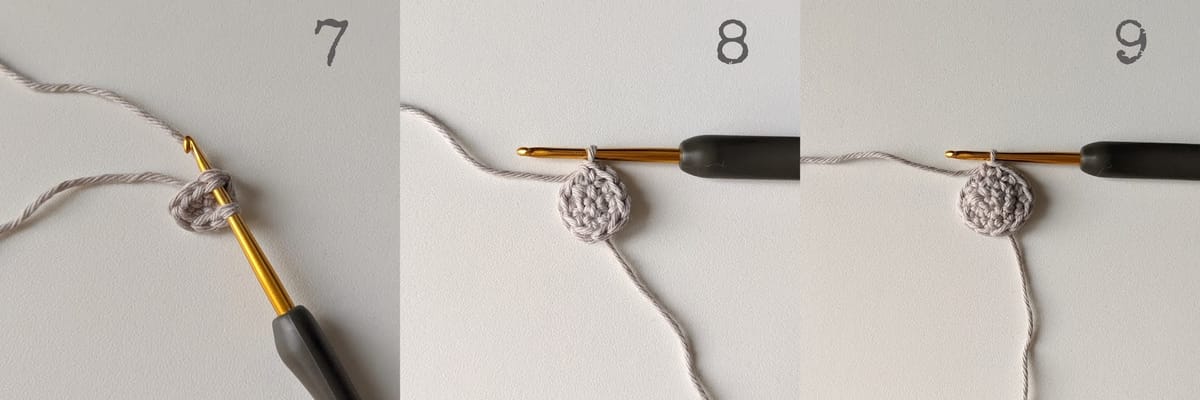
RND 4: (sc in next st, inc in next st) * repeat 6 times [18]
RND 5: (sc in next 2 st, inc in next st) * repeat 6 times [24] (pic.10)
RND 6: (sc in next 3 st, inc in next st) * repeat 6 times [30]
RND 7: (sc in next 4 st, inc in next st) * repeat 6 times [36]
RND 8: (sc in next 5 st, inc in next st) * repeat 6 times [42] (pic.11)
RND 9: (sc in next 20 st, inc in next st) * repeat 2 times [44]
RND 10: (sc in next 21 st, inc in next st) * repeat 2 times [46]
RND 11: (sc in next 22 st, inc in next st) * repeat 2 times [48] (pic.12)
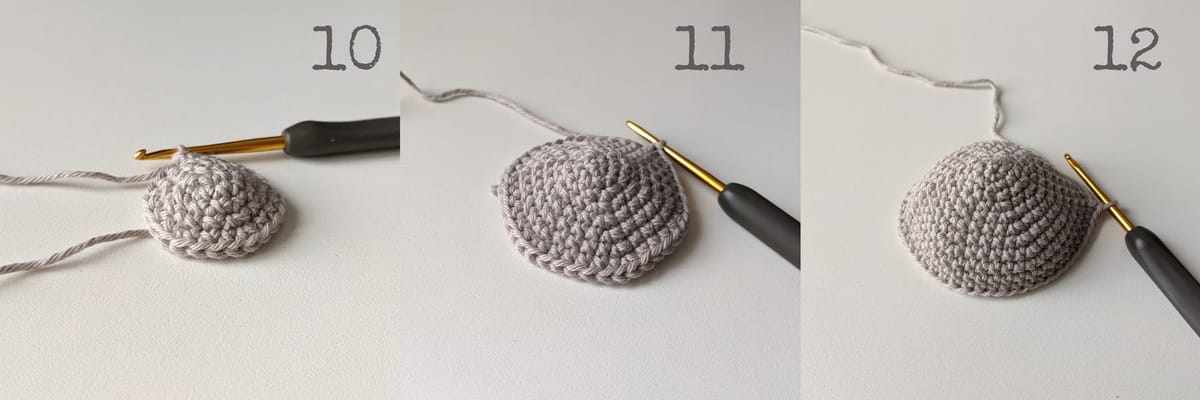
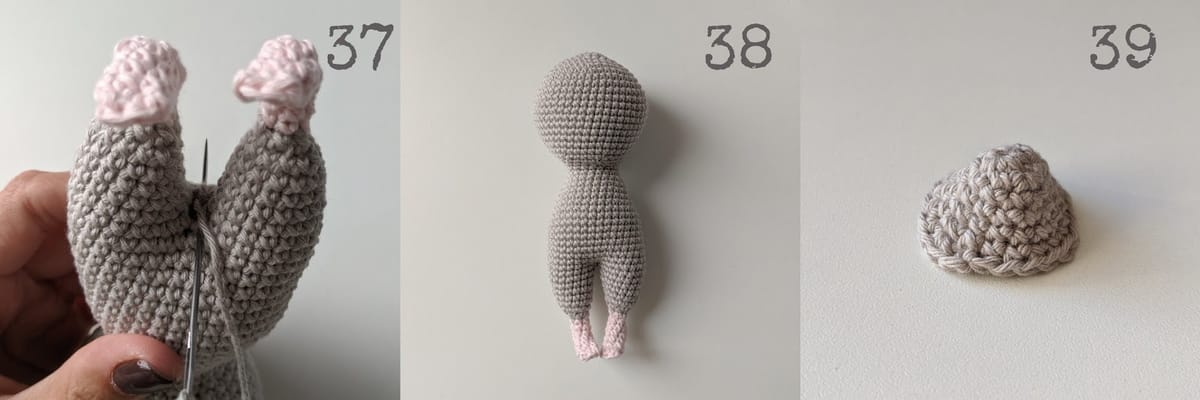
RND 12-14: sc in next 48 st [48] - 3 rounds (pic.13)
RND 15: (dec, sc in next 22 st) * repeat 2 times [46]
RND 16: (dec, sc in next 21 st) * repeat 2 times [44]
RND 17: (dec, sc in next 20 st) * repeat 2 times [42]
If you use the safety eyes put them now between rounds 14 and 15 (5 stitches apart).
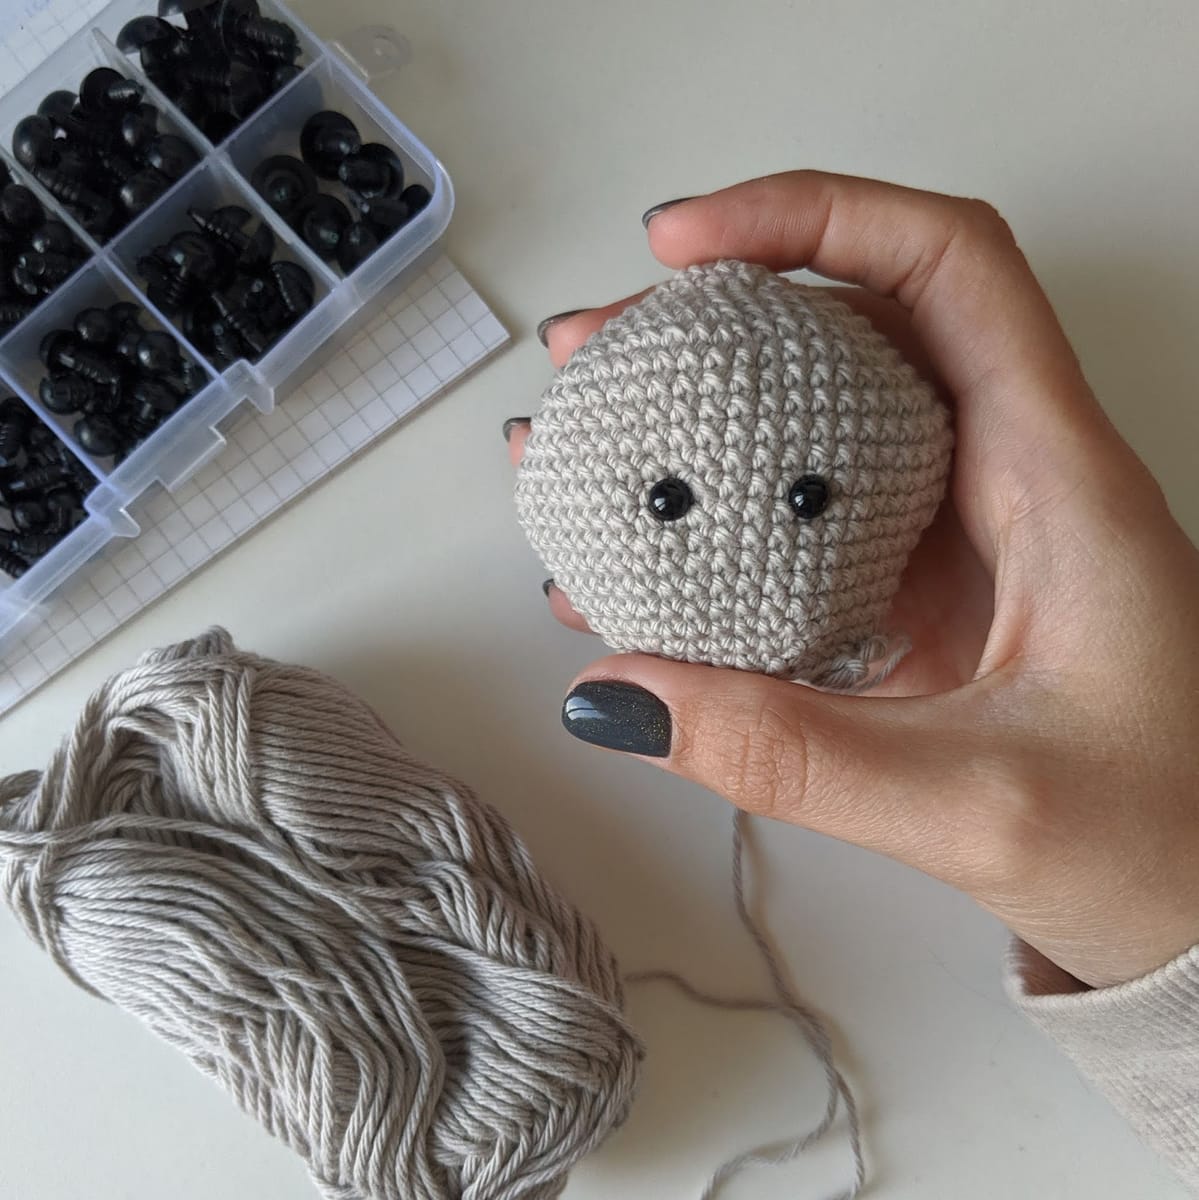
RND 18: (dec, sc in next 19 st) * repeat 2 times [40]
RND 19: (dec, sc in next 18 st) * repeat 2 times [38]
RND 20: (dec, sc in next 17 st) * repeat 2 times [36]
RND 21: (sc in next 4 st, dec) * repeat 6 times [30]
RND 22: (sc in next 3 st, dec) * repeat 6 times [24]
Stuff the head and continue stuffing as you go. (pic.15)
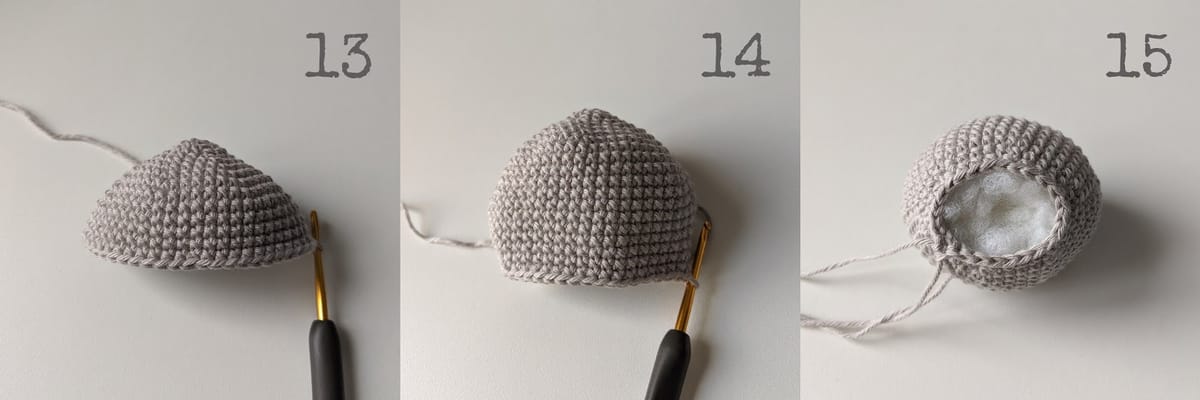
RND 23: (sc in next 2 st, dec) * repeat 6 times [18]
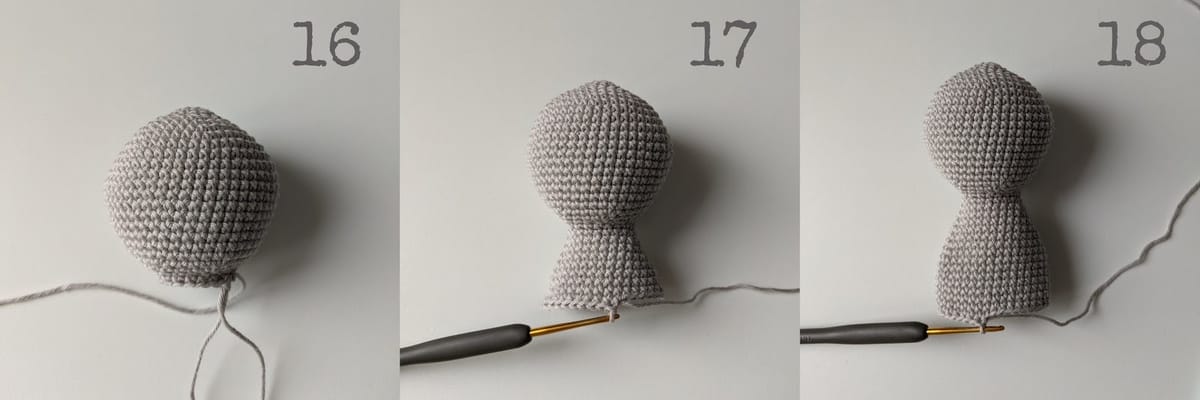
RND 24: sc in next 18 st [18] (pic.16)
RND 25: (inc in next st, sc in next 8 st) * repeat 2 times [20]
RND 26: (sc in next st, inc in next st, sc in next 8 st) * repeat 2 times [22]
RND 27: (sc in next 2 st, inc in next st, sc in next 8 st) * repeat 2 times [24]
RND 28: (sc in next 3 st, inc in next st, sc in next 8 st) * repeat 2 times [26]
RND 29: (sc in next 4 st, inc in next st, sc in next 8 st) * repeat 2 times [28]
RND 30: (sc in next 5 st, inc in next st, sc in next 8 st) * repeat 2 times [30]
RND 31: (sc in next 6 st, inc in next st, sc in next 8 st) * repeat 2 times [32]
RND 32: (sc in next 7 st, inc in next st, sc in next 8 st) * repeat 2 times [34]
RND 33: (sc in next 8 st, inc in next st, sc in next 8 st) * repeat 2 times [36] (pic.17)
RND 34-39: sc in next 36 st [36] - 6 rounds
RND 40: sc in next 34 st (pic.18) (+ - 1 st, it should be in the middle of the eyes). Do not finish this round.
Don’t fasten off, continue working with a pattern for the leg 1.
Leg 1
RND 1: sc in next 18 st, skip next 18 st [18]
RND 2: start in the first stitch of the previous round (pic.19), sc in next 18 st (pic.20) [18]
RND 3: (dec, sc in next 7 st) * repeat 2 times [16] (pic.21)
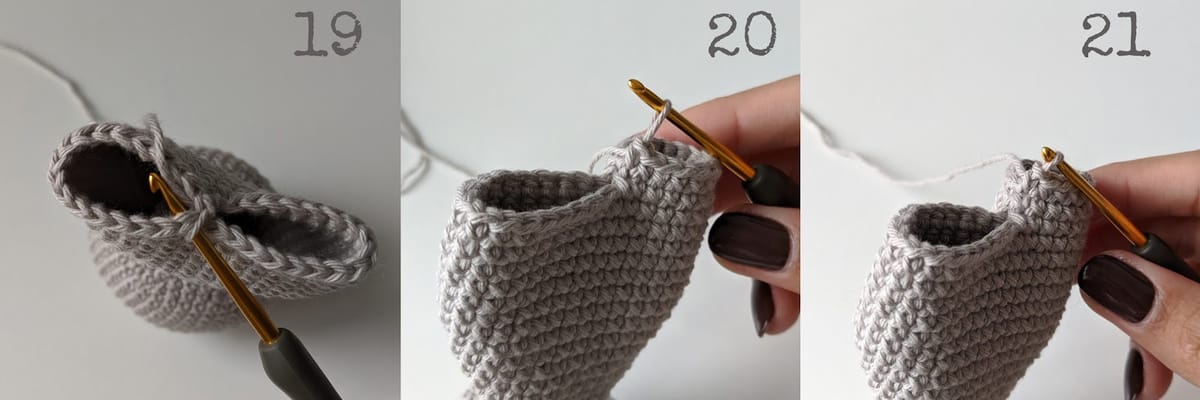
RND 4: sc in next 16 st [16]
RND 5: (dec, sc in next 6 st) * repeat 2 times [14]
RND 6: sc in next 14 st [14]
RND 7: (dec, sc in next 5 st) * repeat 2 times [12] (pic.22)
RND 8: dec 6 times [6] (pic.23)
Change yarn to the pink.
RND 9-10: sc in next 6 st [6] - 2 rounds (pic.24-25)
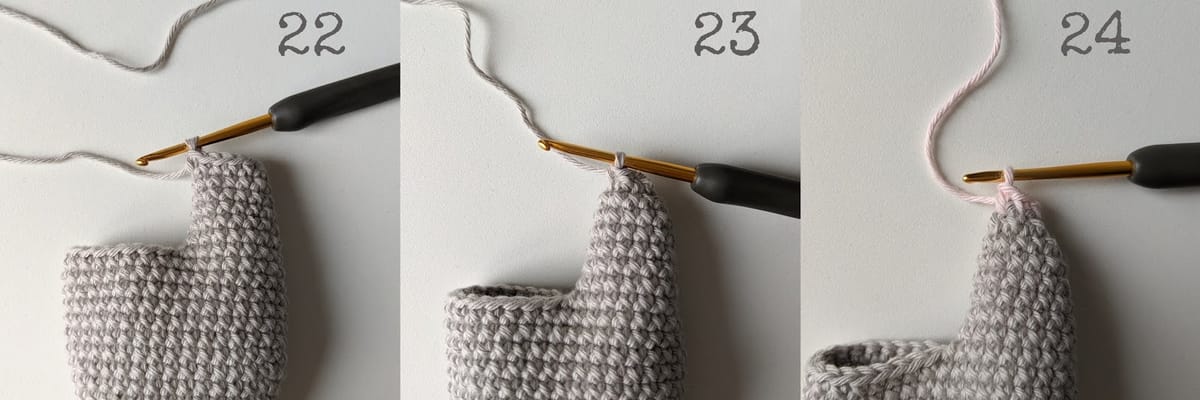
Work in rows.
ROW 11: ch 1 (pic.26), turn the detail (pic.27), sc in next 3 st (pic.28)
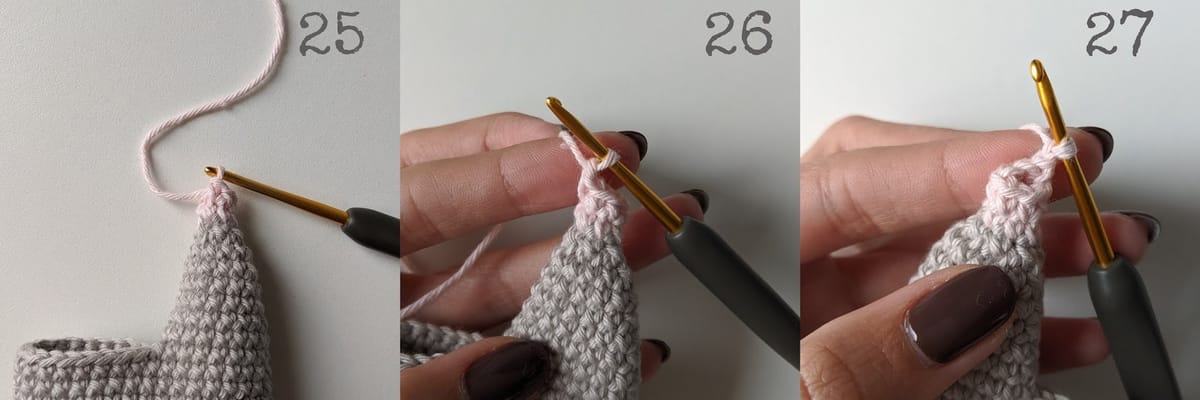
ROW 12: ch 1, turn the detail, sc in next 3 st (pic.29)
Work in rounds.
RND 13: sc in all 6 st around the detail [6] (pic.30)
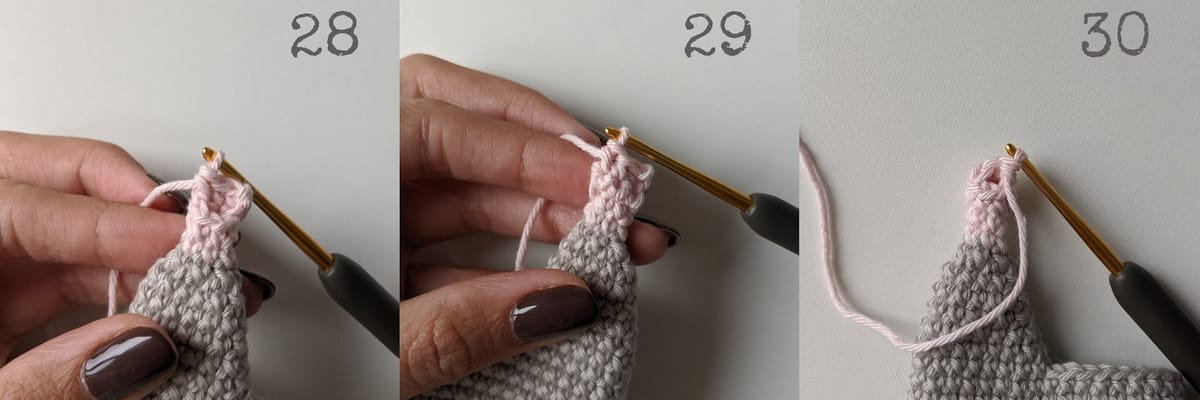
RND 14-16: sc in next 6 st [6] - 3 rounds (pic.31-32)
Stuff the pink part of the leg.
Make 1 sc*, then fold the circle to a semicircle.* Make sc in next 2 st through both layers*. (pic.33)*
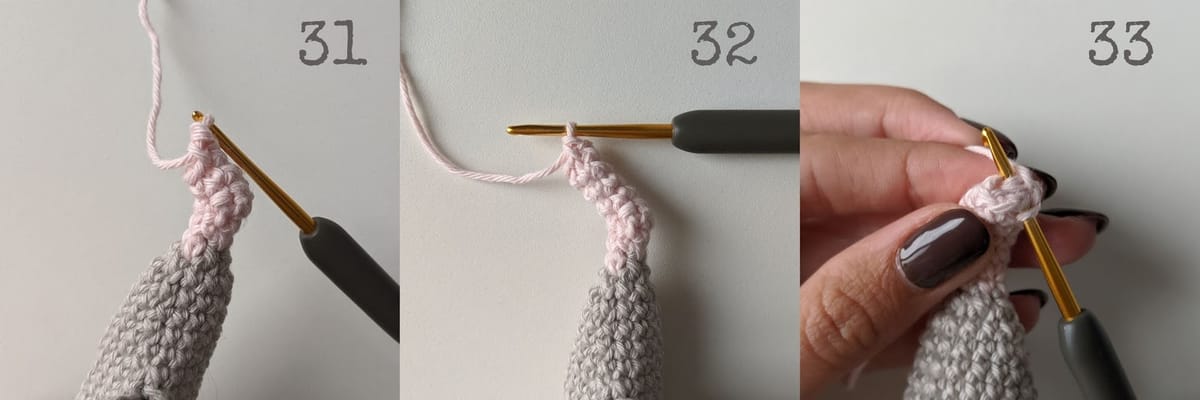
Fasten off and weave in the yarn ends. (pic.34)
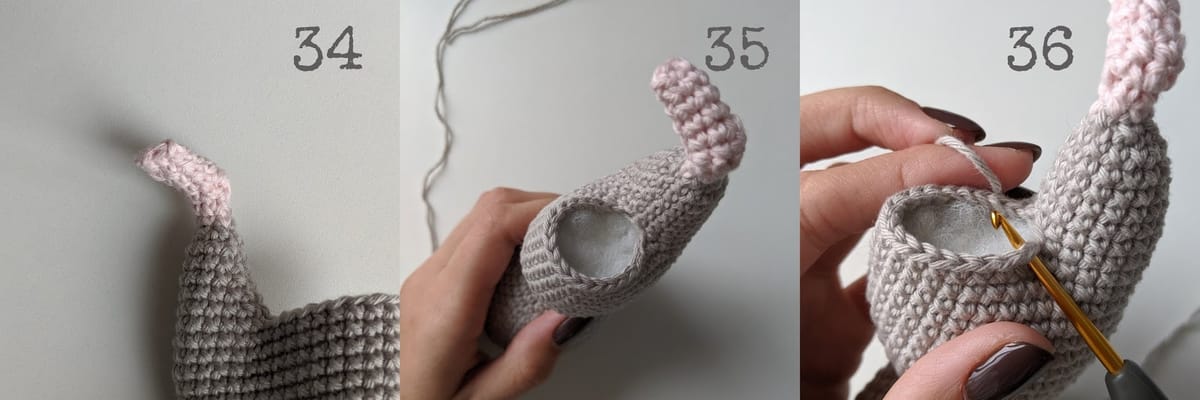
Stuff the body and gray part of the leg. (pic.35)
Leg 2
Start crochet with gray yarn.
Start crochet in the first skipped stitch in Rnd 1 of the Leg 1. (pic.36)
RND 1: sc in next 18 st [18]
RND 2: start in first st of the previous rnd, sc in next 18 st [18]
RND 3: (dec, sc in next 7 st) * repeat 2 times [16]
RND 4: sc in next 16 st [16]
RND 5: (dec, sc in next 6 st) * repeat 2 times [14]
RND 6: sc in next 14 st [14]
RND 7: (dec, sc in next 5 st) * repeat 2 times [12]
Stuff the leg.
RND 8: dec 6 times [6]
Change yarn to the pink.
RND 9-10: sc in next 6 st [6] - 2 rounds
Work in rows.
ROW 11: sc in next 4 st, ch 1, turn the detail
ROW 12: sc in next 3 st, ch 1, turn the detail
Work in rounds.
RND 13: sc in all 6 st around the detail [6]
RND 14-16: sc in next 6 st [6] - 3 rounds
Stuff the pink part of the leg.
Make 1 sc*, then f**old the circle to a semicircle.* Make sc in next 2 st through both layers.
Fasten off and weave in the yarn ends.
Nose
Crochet in gray yarn.
RND 1: 2 ch, 6 sc in second ch from a hook [6]
RND 2: (sc in next st, inc in next st) * repeat 3 times [9]
RND 3: (sc in next 2 st, inc in next st) * repeat 3 times [12]
RND 4: (sc in next 3 st, inc in next st) * repeat 3 times [15]
RND 5: (sc in next 4 st, inc in next st) * repeat 3 times [18]
RND 6: (sc in next 5 st, inc in next st) * repeat 3 times [21] (pic.39)
Fasten off, leave a long tail for sewing.
Stuff the detail.
Sew the detail. Embroider a little nose with pink yarn.
Arms
Make 2.
Start crochet with pink yarn.
RND 1: 2 ch (pic.40), 6 sc in second ch from a hook [6] (pic.41)
RND 2: (inc in next st, sc in next 2 st) * repeat 2 times [8] (pic.42)
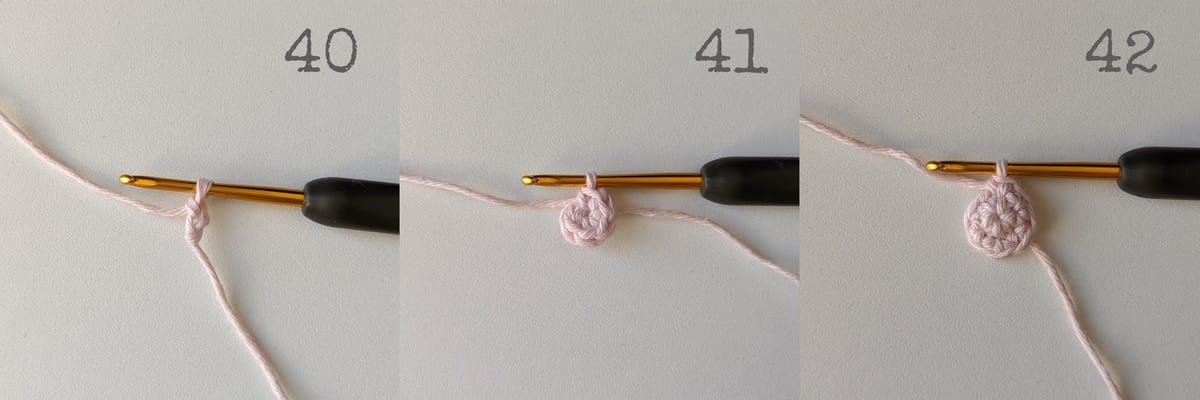
RND 3: sc in next 8 st [8]
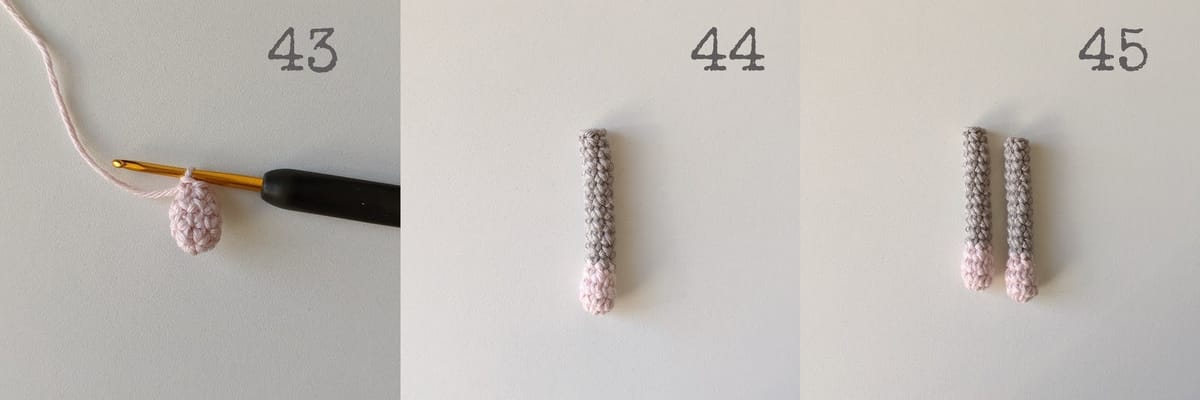
RND 4: (dec, sc in next 2 st) * repeat 2 times [6] (pic.43)
Change yarn to the gray.
RND 5-15: sc in next 6 st [6] - 11 rounds
The arms do not need to be stuffed.
Fasten off, leave a long tail for sewing.
Sew the arms.
Ears
Make 2.
Crochet with gray yarn.
RND 1: 2 ch, 6 sc in second ch from a hook [6]
RND 2: inc in all 6 st [12]
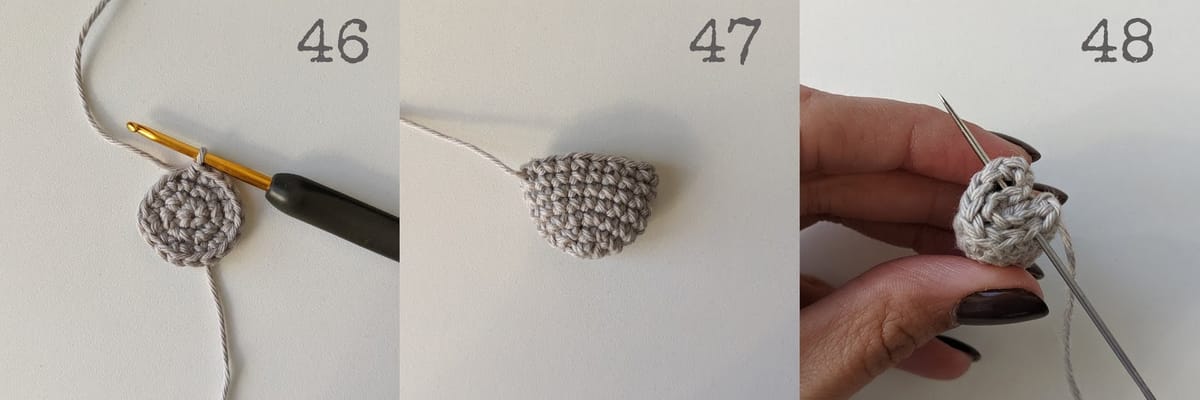
RND 3: (sc in next st, inc in next st) * repeat 6 times [18] (pic.46)
RND 4-7: sc in next 18 st [18] - 4 rounds (pic.47)
The ears do not need to be stuffed.
Fasten off, leave a long tail for sewing.
Tail
Crochet in pink yarn.
2 ch, 6 sc in second ch from a hook [6]
Crochet 6 sc in a round till needed length of tail.
The tail does not need to be stuffed.
Fasten off, leave a long tail for sewing. Sew the tail.
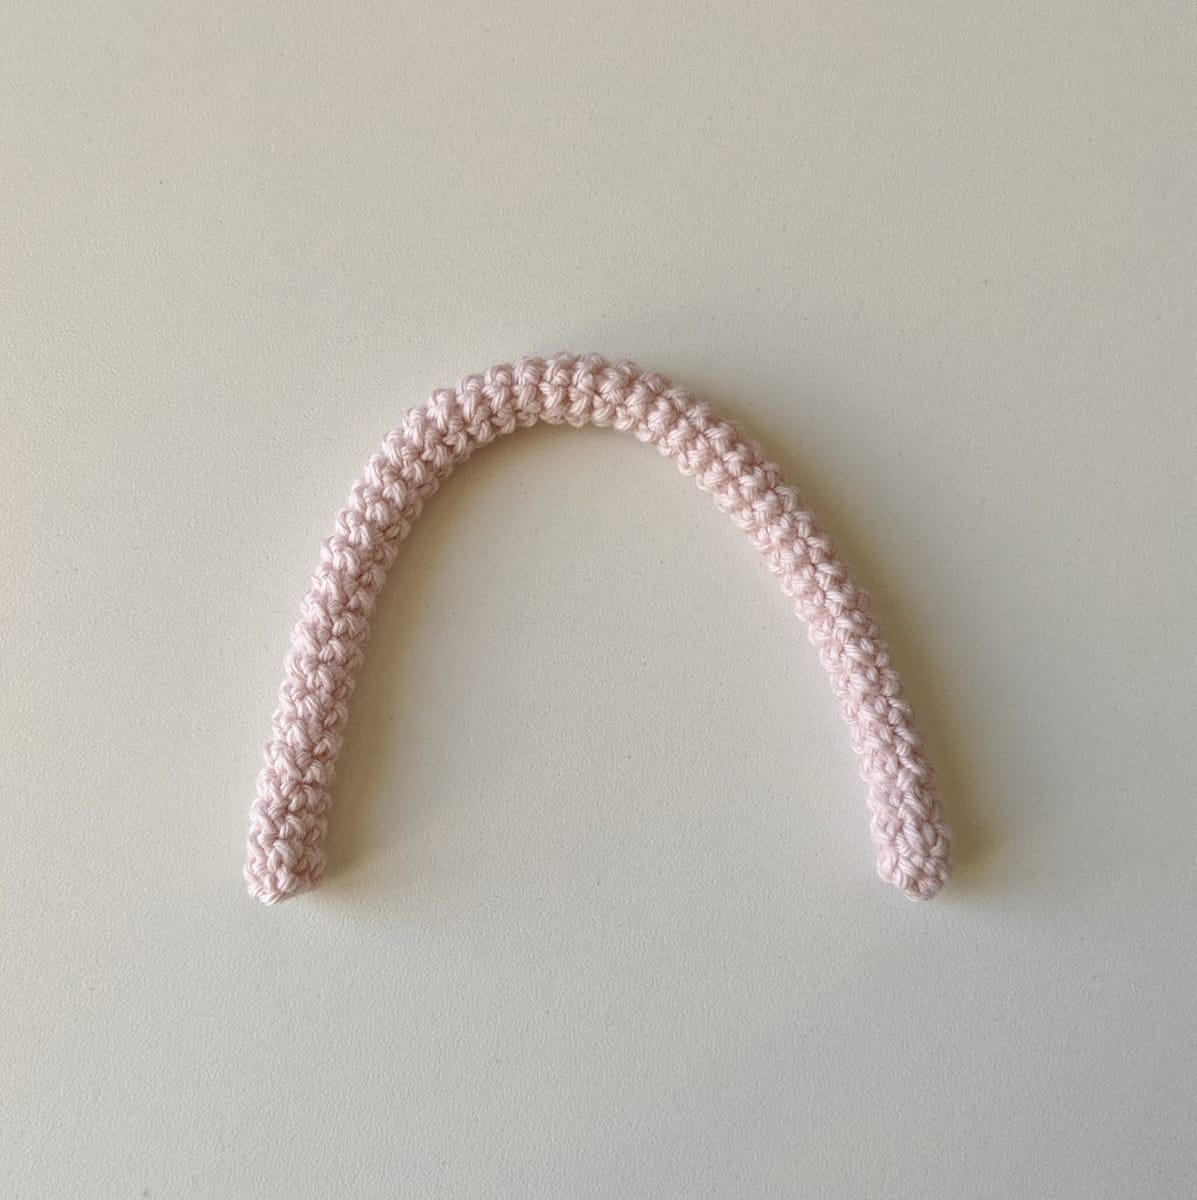
Knitted hat
Knit with yellow yarn.
Knit a sample (5 x 5 cm) with your knitting needles and yarn to calculate how many stitches you will need for your circumference.
Pattern - (knit two, purl two) * repeat to the end of the row. Repeat this row until the end.
19 cm head circumference
11 stitches in 5 cm
So for 19 cm, you will need 42 stitches
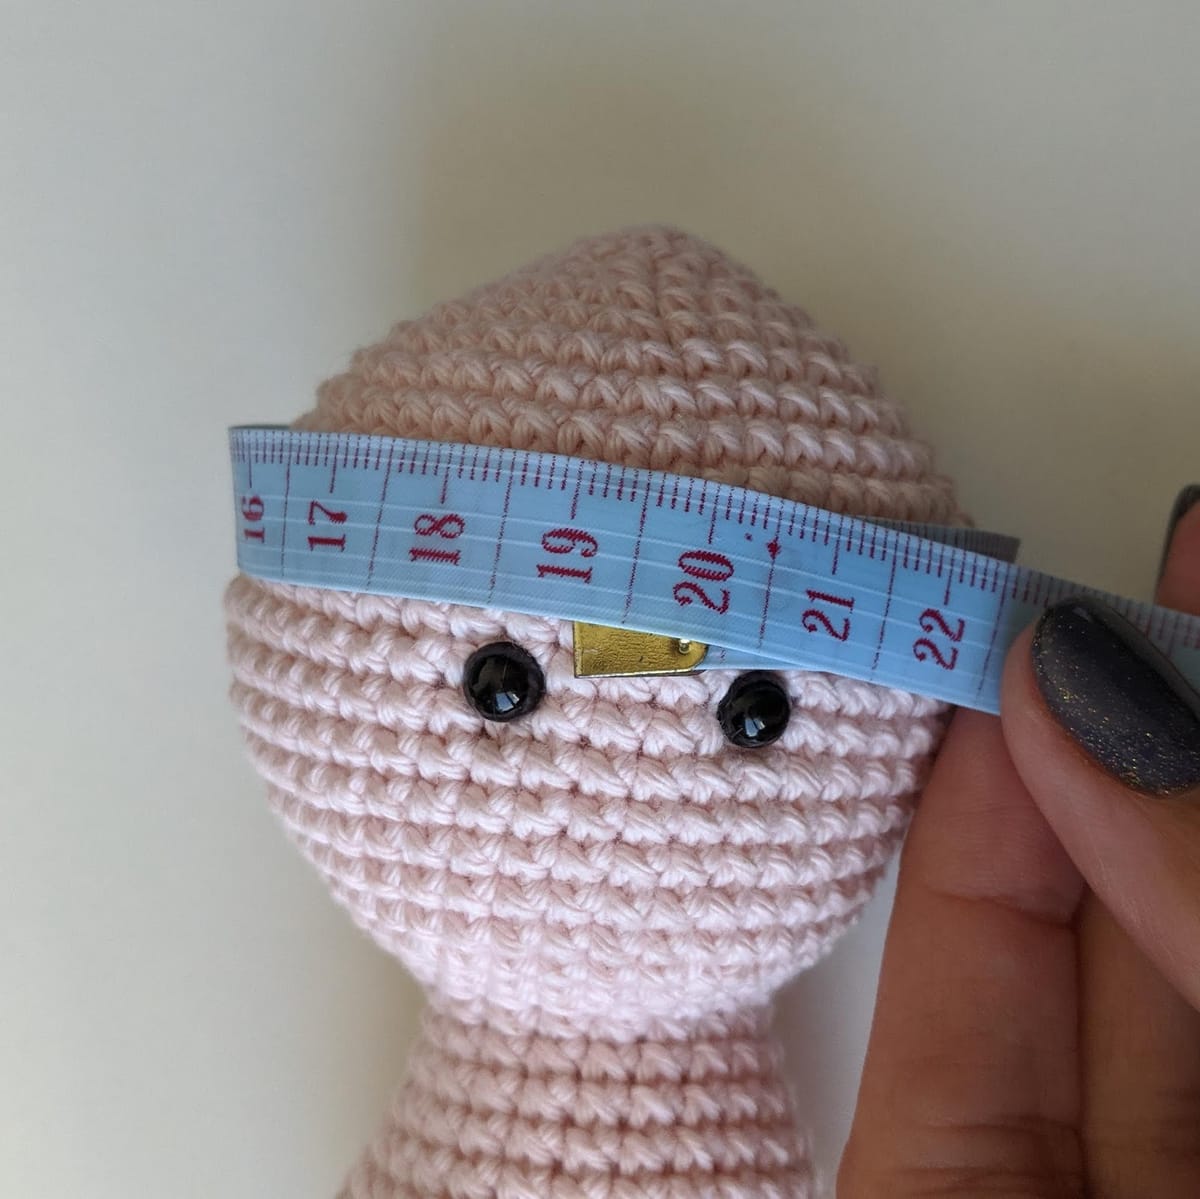
Cast on 42 st.
ROW 1: (K2, P2) * repeat to end
ROW 2: (K2, P2) * repeat to end
Repeat row 2 until work measures needed hat’s height.
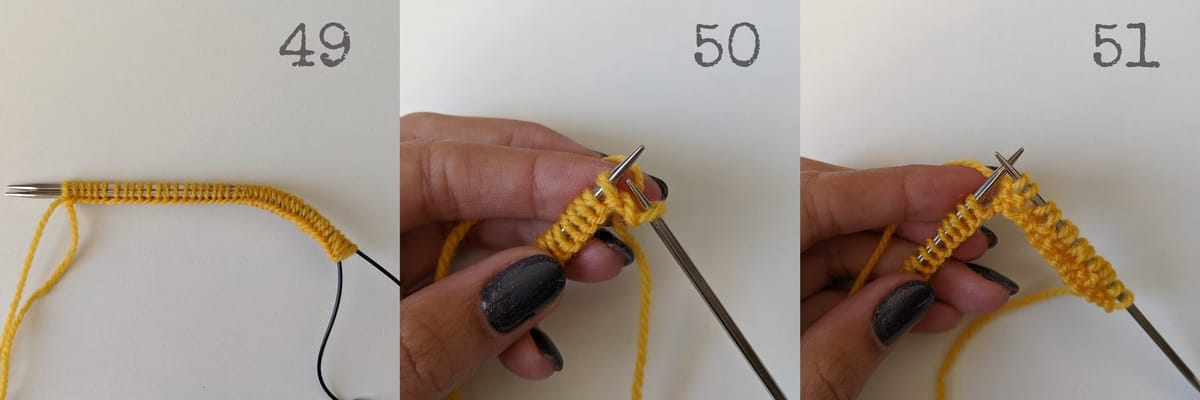
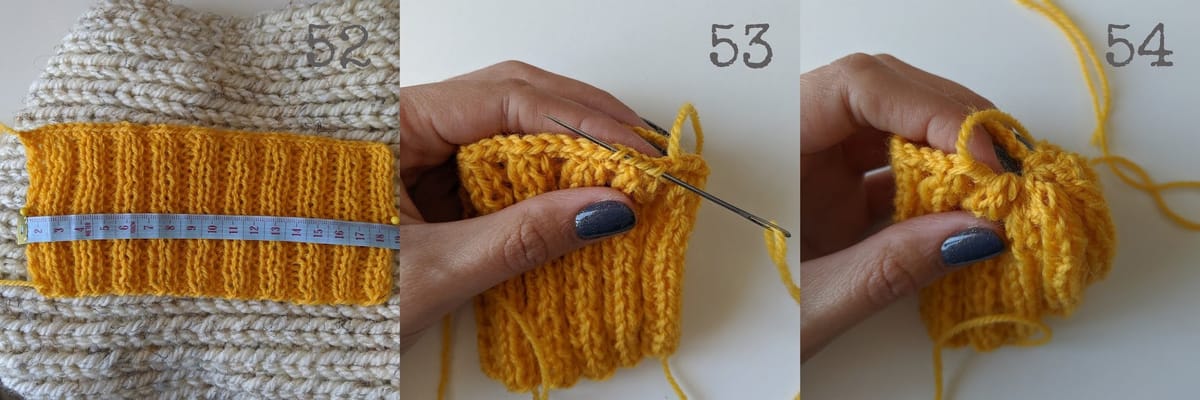
Cast off, leaving a long tail.
With yarn needle - insert a tail of yarn through all stitches on the top of the detail and pull it. (pic.53-54)
Sew together two sides of the hat (with a yarn needle).
Put on the hat and then sew ears to the head.
Christmas edition
Gift
Crochet with red yarn.
Make 6 pieces.
ROW 1: 8 ch (pic.55), start in the second ch from a hook, sl st in next 7 ch [7] (pic.56)
ROW 2-8: ch 1, turn the detail, BLO sl st in next 7 st [7] - 7 rounds (pic.58)
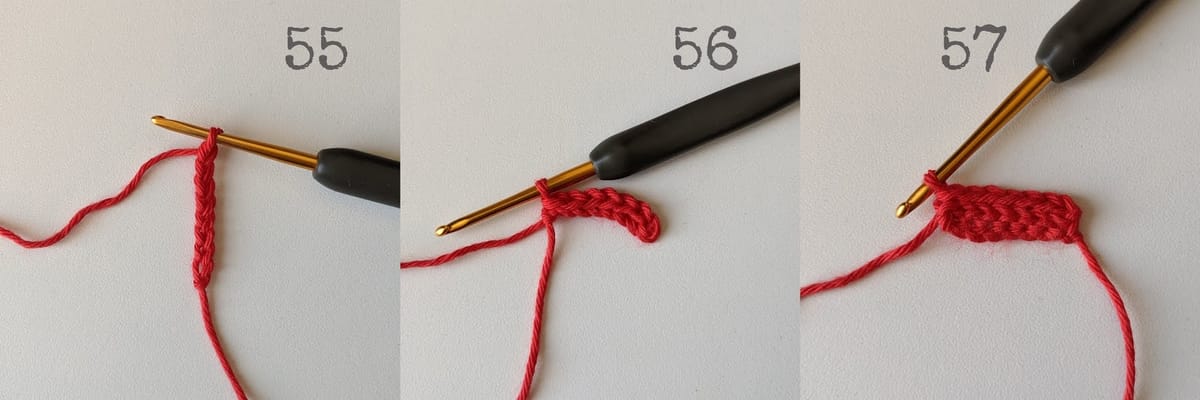
Fasten off.
Sew all pieces together in a gift box (with yarn needle or crochet hook and slip stitches) and stuff it. (pic.59-60)
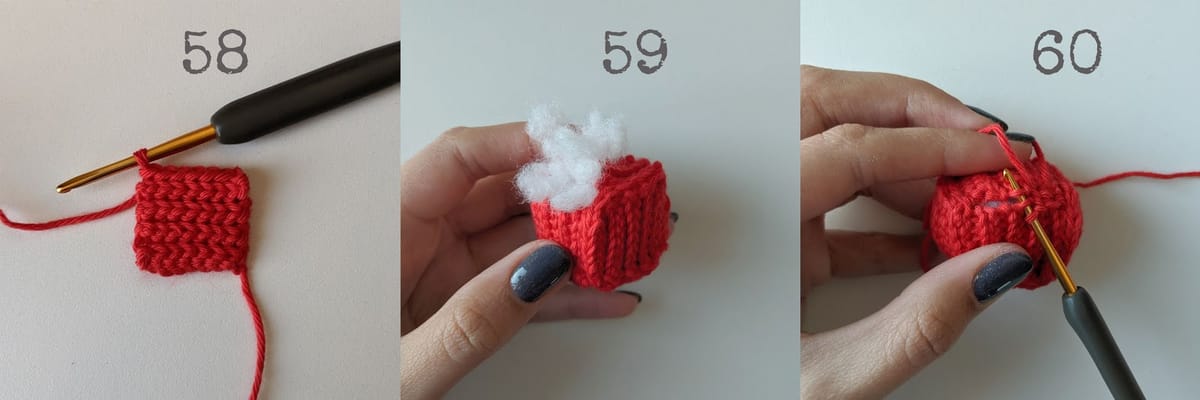
With white yarn make 100 ch, then make sl st in each stitch starting from the second ch from a hook. (pic.61)
Decorate the gift box with white detail.
Decorate the tail with a red ribbon.
Put on the hat and then sew ears to the head.
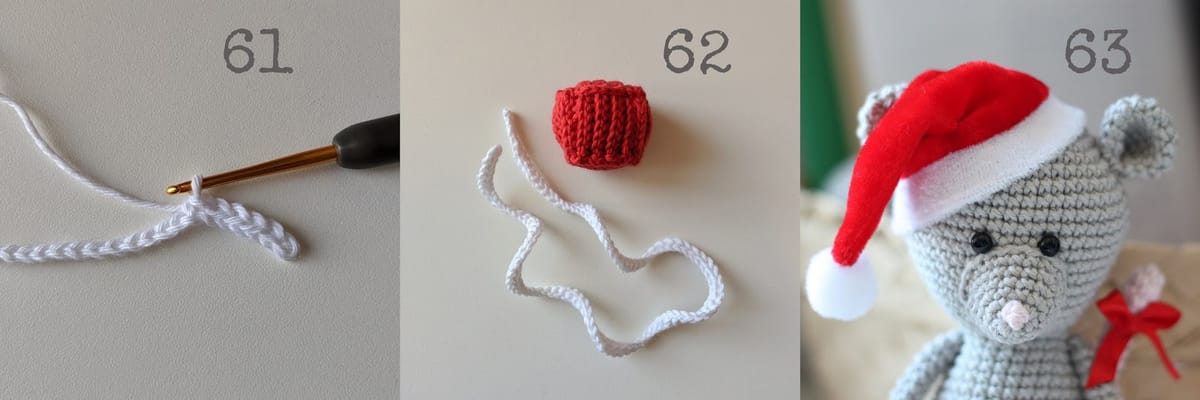
Share your finished toys on Instagram with #knittedstorybears or tag me @knittedstorybears
If you have any questions feel free to ask in comments or contact form below.
My links:
FREE PATTERNS ↠ all free patterns
INSTAGRAM ↠ https://www.instagram.com/knittedstorybears/
FACEBOOK ↠ https://www.facebook.com/knittedstorybears
YOUTUBE ↠ https://www.youtube.com/channel/UCVf-I2z0TVqyTv17T2XSvZw?view_as=subscriber
Comments
Your name and comment are shown publicly under this pattern. See the privacy policy.
Comments couldn't load right now. Please try again later.
10 earlier comments from the old blog
Hi, Vira, I happened to come to your webpage through "Share a Pattern". I love your design and tutorials. Keep it up, looking forward to seeing more of your creations.
Thank you so much for your kind words! More patterns is coming! (including another christmas designs)
Fantàstica página! Muchas gracias por tu generosidad. Besos! 😘
Muchas gracias por tus palabras! Que tengas un buen tejido!
Hi, Vira, It is me again, I come over through " Share A Pattern". Thank you for your kindness and thoughtfulness for creasing the mouse/rat for the Chinese New Year. It is lovely. I am a Chinese, so we will celebrate this coming Saturday, the first day of the Year Rat.
I'm sorry that my answer so late... Thank you so much for your kind words and for choosing my patterns!
I want to specially show my appreciation: thank you for keeping the patterns free. That is very generous. I find that some bloggers change their mind after being very popular.
I make both types of patterns - free and paid. Thank you for choosing my patterns! I will continue to create more free patterns!
The hat instructions are Knitted. Do you have crochet instructions for that?
Thanks.
Appreciate this bllog post