Scandinavian Christmas Gnome
A flat Scandinavian gnome ornament for your Christmas tree, worked in rows and joined with reverse single crochet.
As I promised I continue to publish the free Xmas patterns for you.
Are you ready to crochet more Christmas tree ornaments?
Let’s go! Today is a day for a small cute Scandinavian gnome!
ABBREVIATIONS
The pattern is written in English, using US terminology.
ch - chain
sc - single crochet
inc - increase
dec - decrease
sl st - slip stitch
rsc - reverse single crochet
You should know how to crochet: chain, slip stitch, single crochet, increase, decrease, reverse single crochet, crochet in rows and rounds.
Happy crocheting!
Body
Crochet in grey or red yarn (for your choice).
Ch 9.
ROW 1: start crochet in a second ch from a hook (pic.1), sc in next 8 ch [8] (pic.2)
ROW 2: ch 1 (pic.3), turn the detail (pic.4), inc in next st, sc in next 6 st, inc in next st [10] (pic.5)
ROW 3: ch 1, turn the detail, sc in next 10 st [10] (pic.6)
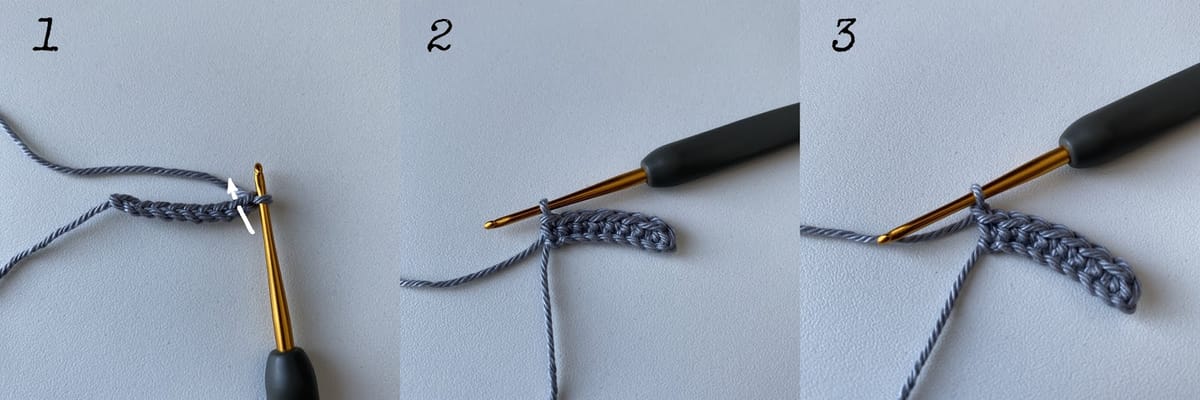
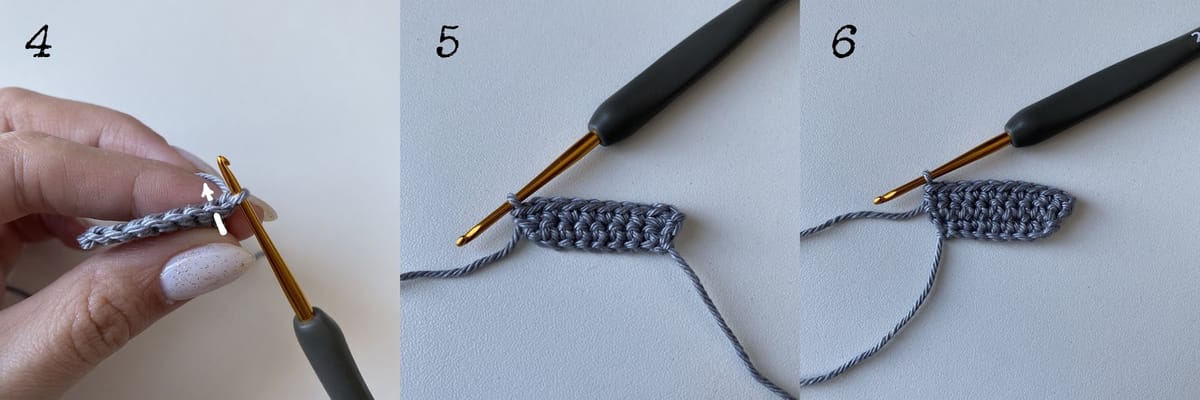
ROW 4: ch 1, turn the detail, inc in next st, sc in next 8 st, inc in next st [12]
ROW 5: ch 1, turn the detail, sc in next 12 st [12]
ROW 6: ch 1, turn the detail, inc in next st, sc in next 10 st, inc in next st [14]
ROW 7-8: ch 1, turn the detail, sc in next 14 st [14] - 2 rows
ROW 9: ch 1, turn the detail, inc in next st, sc in next 12 st, inc in next st [16]
ROW 10-11: ch 1, turn the detail, sc in next 16 st [16] - 2 rows
ROW 12: ch 1, turn the detail, inc in next st, sc in next 14 st, inc in next st [18]
ROW 13: ch 1, turn the detail, sc in next 18 st [18]
ROW 14: ch 1, turn the detail, inc in next st, sc in next 16 st, inc in next st [20]
ROW 15: ch 1, turn the detail, sc in next 20 st [20]
ROW 16: ch 1, turn the detail, inc in next st, sc in next 18 st, inc in next st [22]
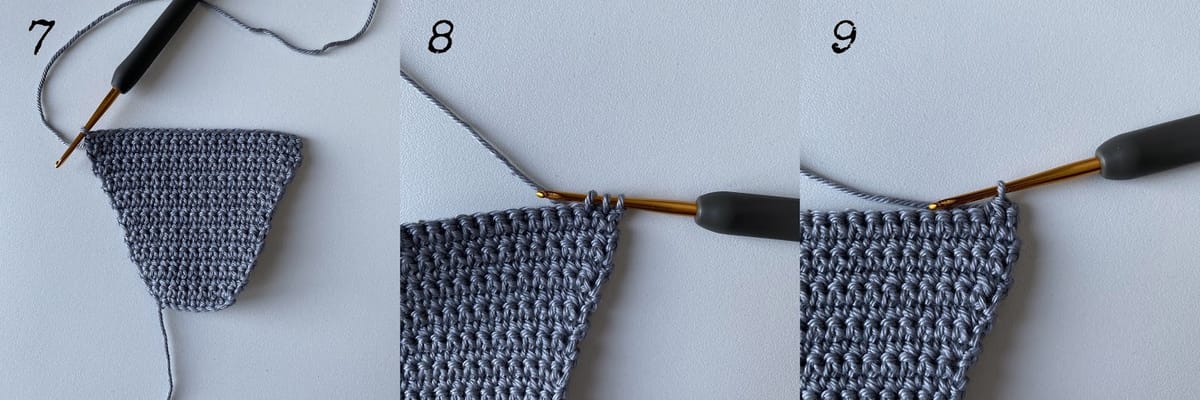
ROW 17-19: ch 1, turn the detail, sc in next 22 st [22] - 3 rows (pic.7)
ROW 20: ch 1, turn the detail, dec (pic.8-9), sc in next 18 st, dec (pic.10-11) [20]
ROW 21: ch 1, turn the detail, sc in next 20 st [20] (pic.12)
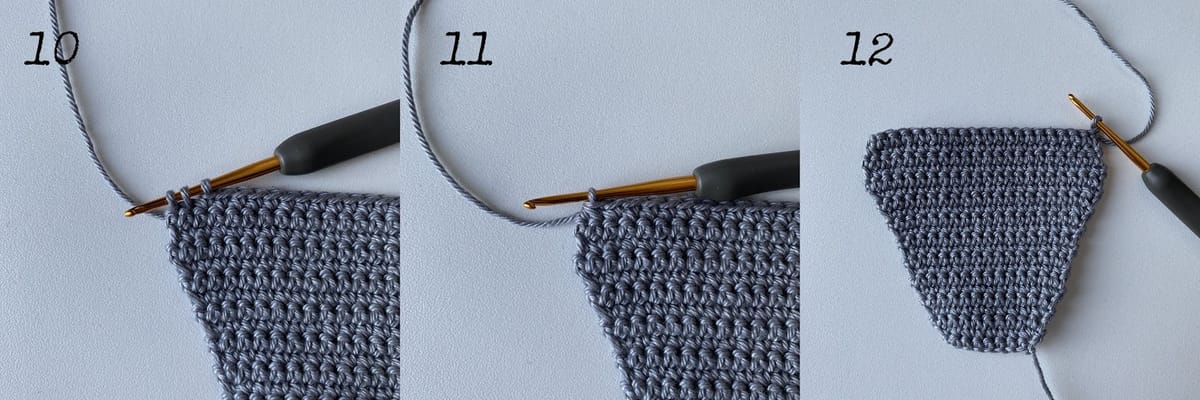
ROW 22a: ch 1, turn the detail, dec, sc in next 5 st, do not finish this row [6] (pic.13)
ROW 23a: ch 1 (pic.14), turn the detail, dec, sc in next 4 st [5] (pic.15)
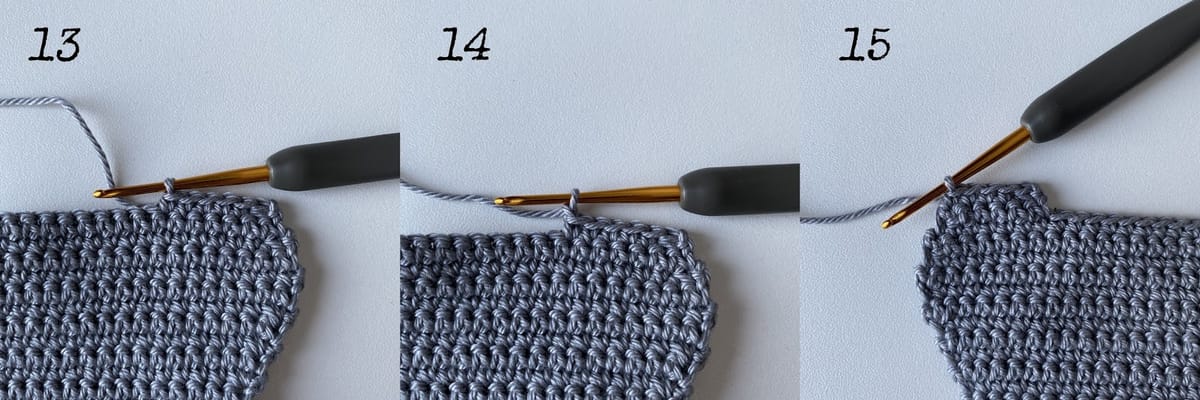
ROW 24a: ch 1, turn the detail, dec, sc in next 3 st [4]
ROW 25a: ch 1, turn the detail, dec, sc in next 2 st [3] (pic.16)
Fasten off.
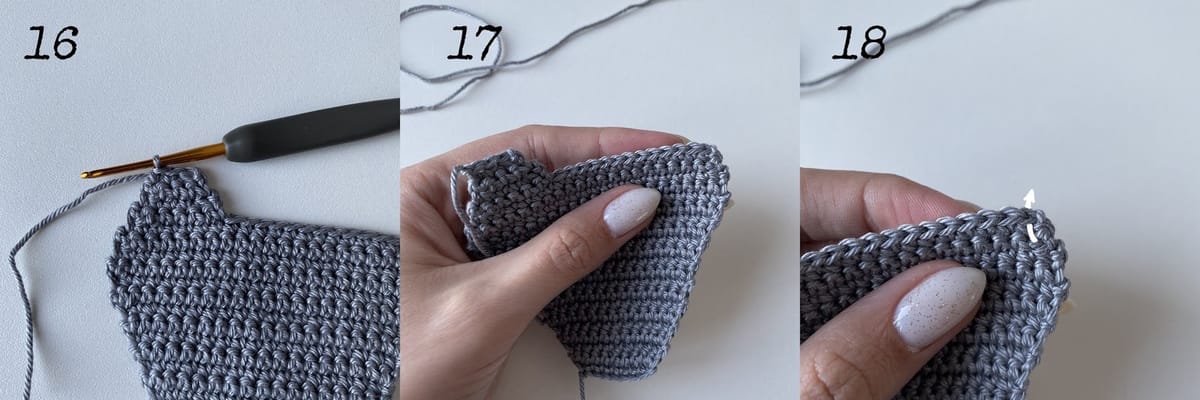
Start crochet in the last stitch of row 21, it will be the first stitch now (pic.17-18).
ROW 22b: dec (pic.19-22), sc in next 5 st, do not finish this row [6] (pic. 23)
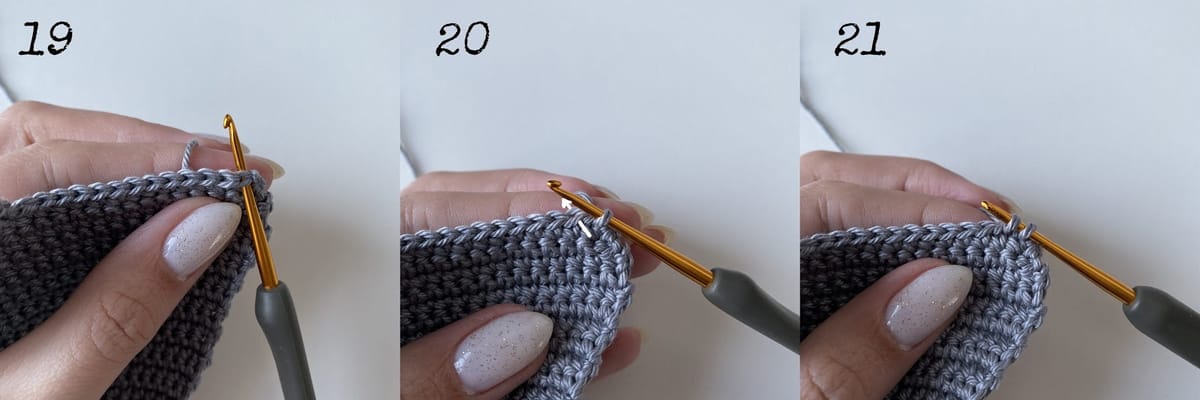
ROW 23b: ch 1, turn the detail, dec, sc in next 4 st [5]
ROW 24b: ch 1, turn the detail, dec, sc in next 3 st [4]
ROW 25b: ch 1, turn the detail, dec, sc in next 2 st [3] (pic.24)
Fasten off.
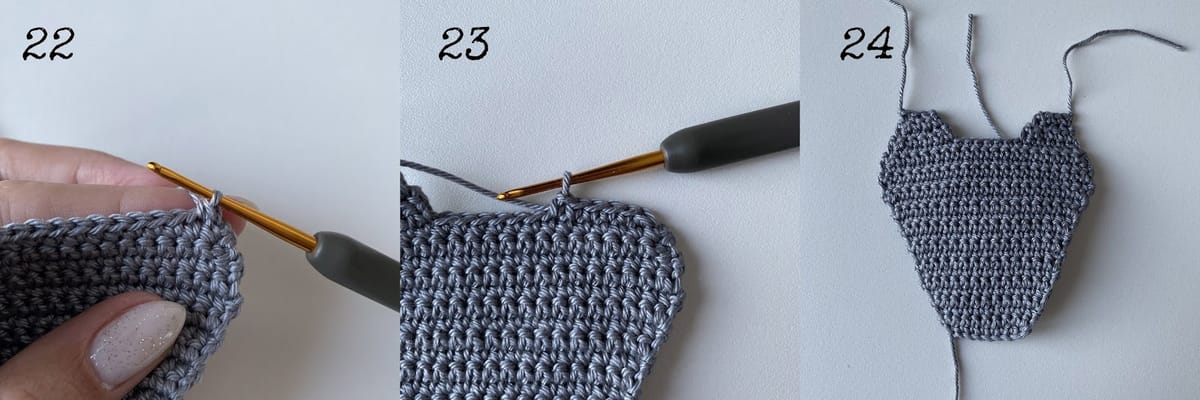
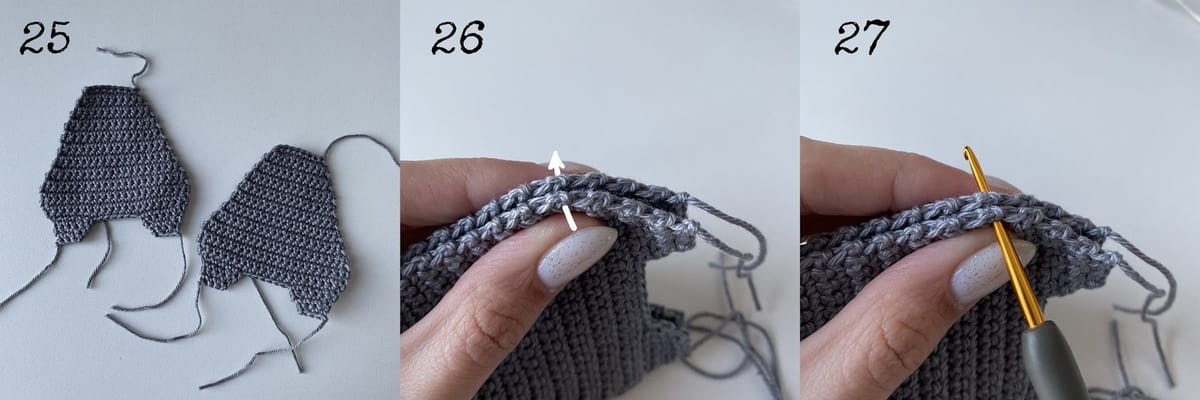
Make 2 pc. (pic.25)
Place both details together, matching up all sides.
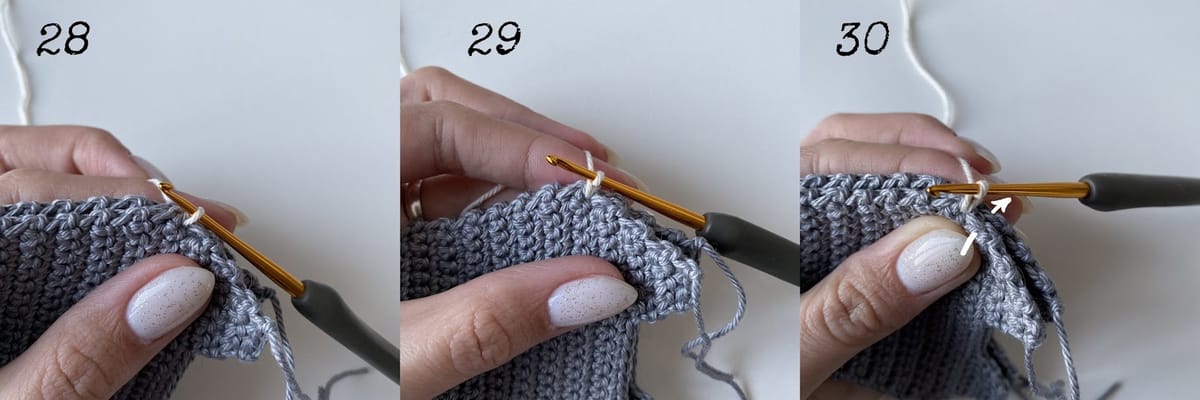
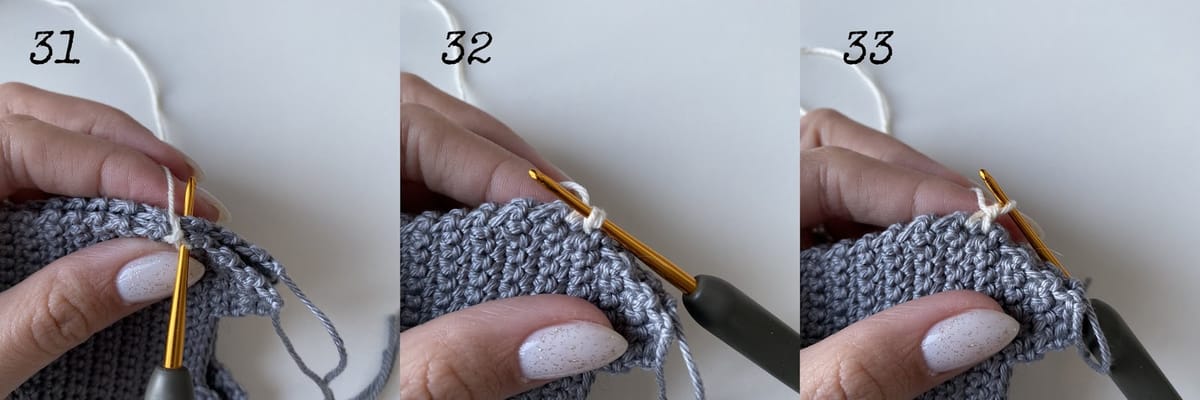
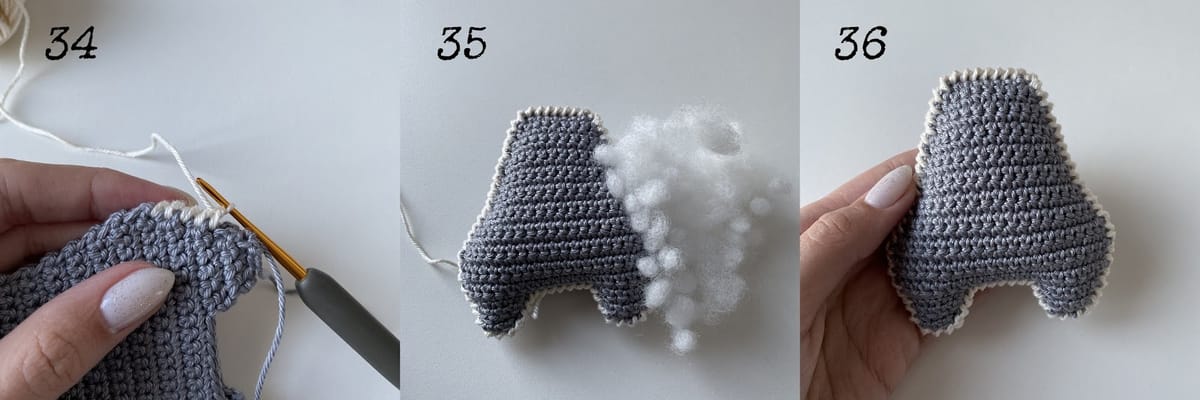
Begin attaching details together with reverse sc around, using cream color yarn. (pic. 26-34)
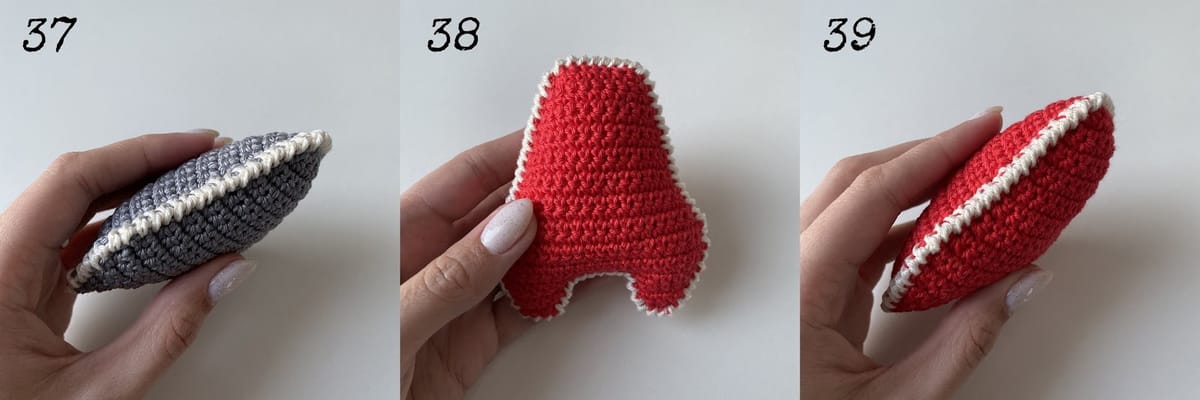
Stop in the middle of the last side, stuff the detail (pic.35). Continue crochet rsc and close with rsc in first st and fasten off, weave in yarn ends (pic.36-40).
Hat
Crochet with red yarn.
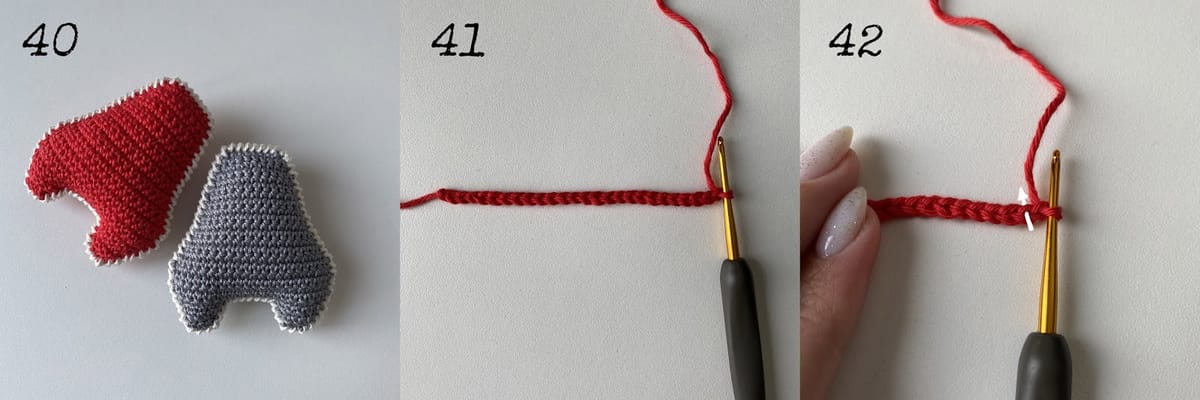
Ch 25. (pic.41)
ROW 1: start crochet in the second ch from a hook (pic.42), sc in next 24 ch [24] (pic.43)
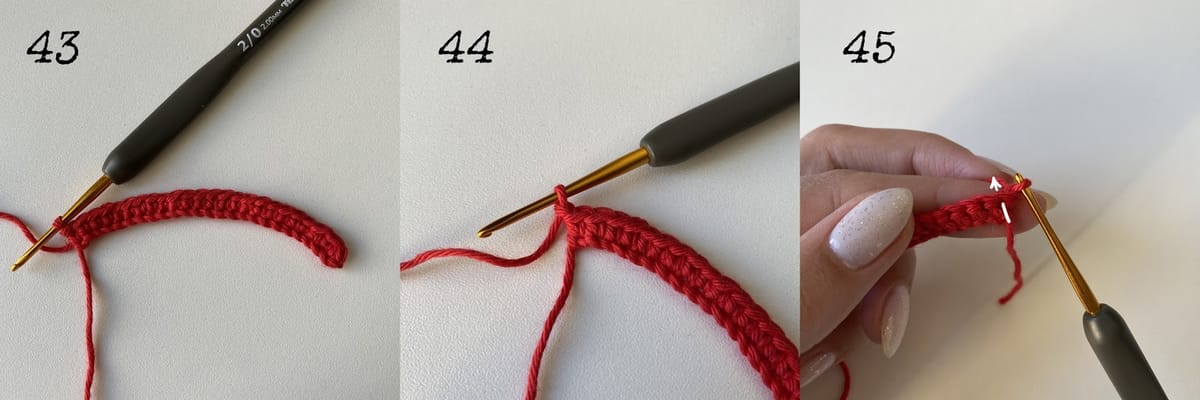
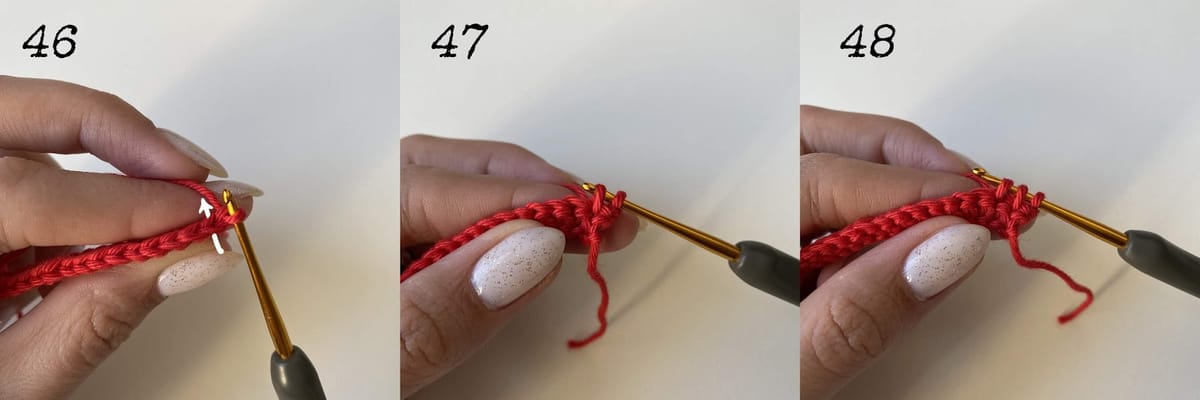
ROW 2: ch 1 (pic.44), turn the detail (pic.45-46), dec (pic.47-49), sc in next 20 st, dec (pic.50-53) [22]
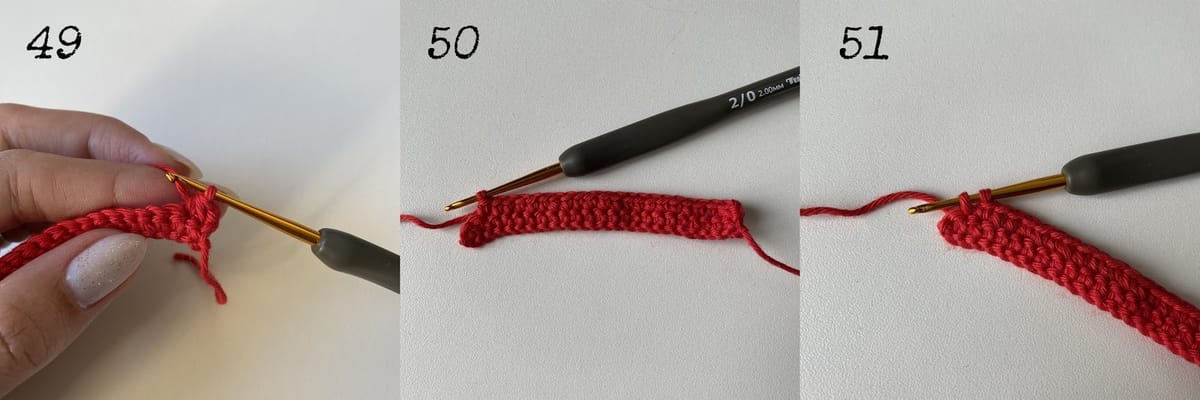
ROW 3: ch 1, turn the detail, dec, sc in next 18 st, dec [20]
ROW 4: ch 1, turn the detail, dec, sc in next 16 st, dec [18]
ROW 5: ch 1, turn the detail, sc in next 18 st [18]
ROW 6: ch 1, turn the detail, dec, sc in next 14 st, dec [16]
ROW 7: ch 1, turn the detail, sc in next 16 st [16]
ROW 8: ch 1, turn the detail, dec, sc in next 12 st, dec [14]
ROW 9: ch 1, turn the detail, sc in next 14 st [14]
ROW 10: ch 1, turn the detail, dec, sc in next 10 st, dec [12]
ROW 11: ch 1, turn the detail, sc in next 12 st [12]
ROW 12: ch 1, turn the detail, dec, sc in next 8 st, dec [10]
ROW 13: ch 1, turn the detail, sc in next 10 st [10]
ROW 14: ch 1, turn the detail, dec, sc in next 6 st, dec [8]
ROW 15: ch 1, turn the detail, sc in next 8 st [8]
ROW 16: ch 1, turn the detail, dec, sc in next 4 st, dec [6]
ROW 17: ch 1, turn the detail, sc in next 6 st [6]
ROW 18: ch 1, turn the detail, dec, sc in next 2 st, dec [4]
ROW 19: ch 1, turn the detail, sc in next 4 st [4]
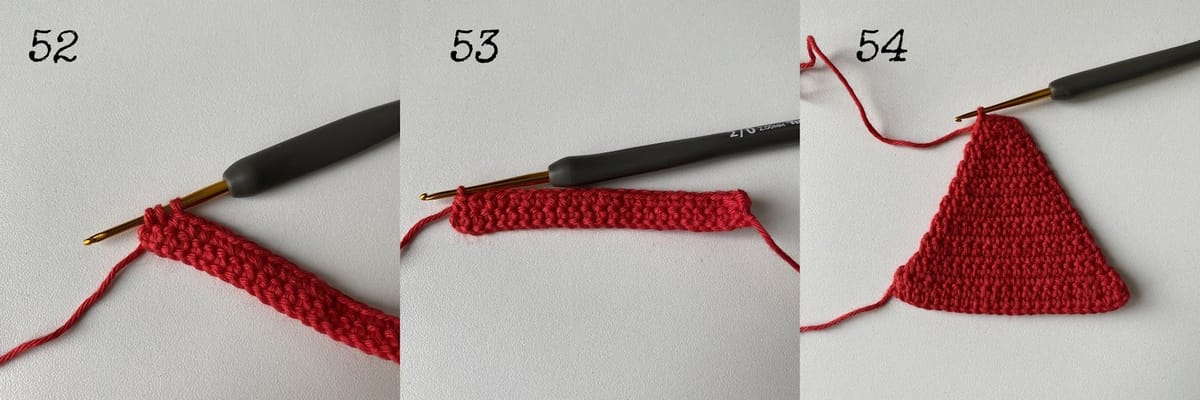
ROW 20: ch 4 (pic.55), turn the detail (pic.56), start crochet in the second ch from a hook (pic.57), sc in next 3 ch, continue crochet in stitches of row 19, sc in next 2 st, dec [6] (pic.58)
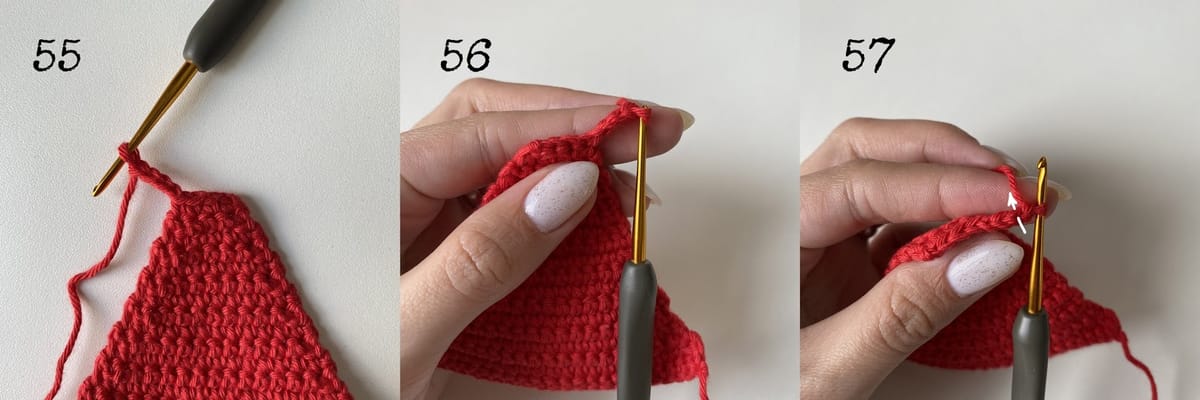
ROW 21: ch 1, turn the detail, dec, sc in next 3 st, inc in next st [6] (pic.59)
Fasten off.
Make 2 pc. (pic.60)
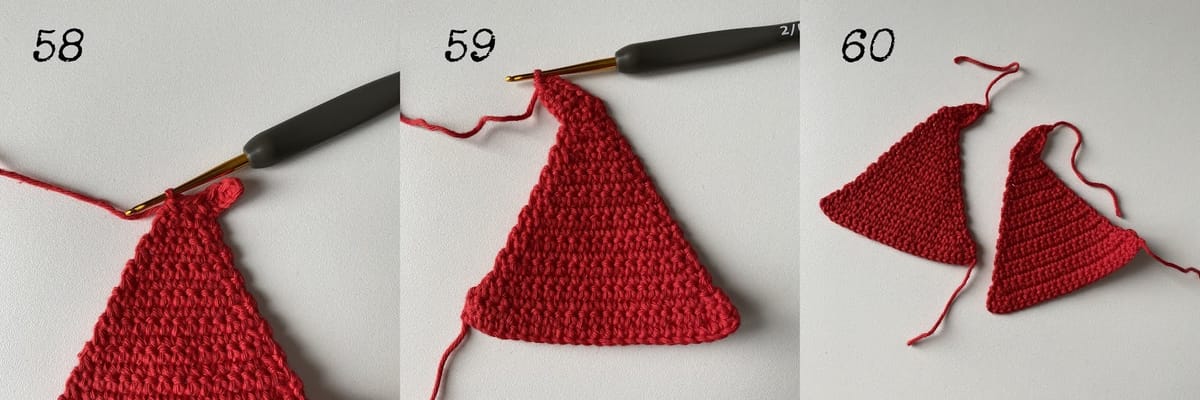
Place both details together, matching up all sides.
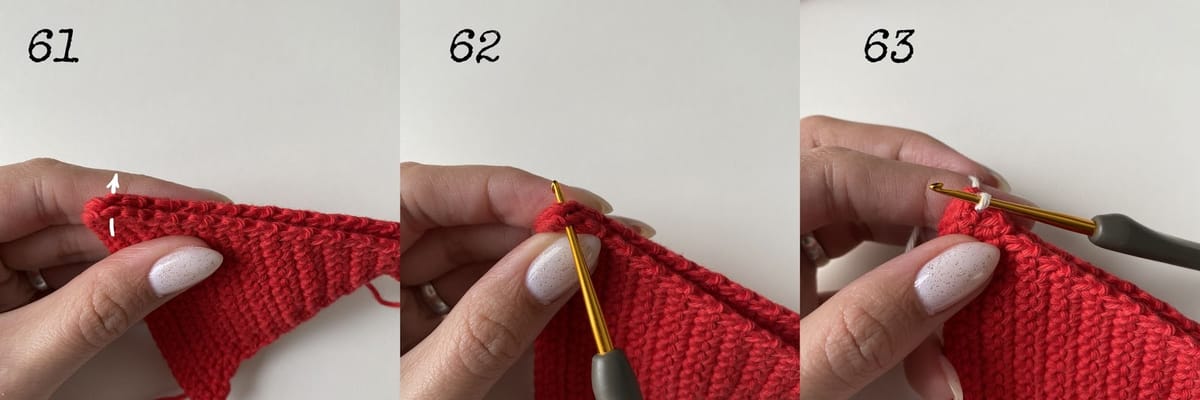
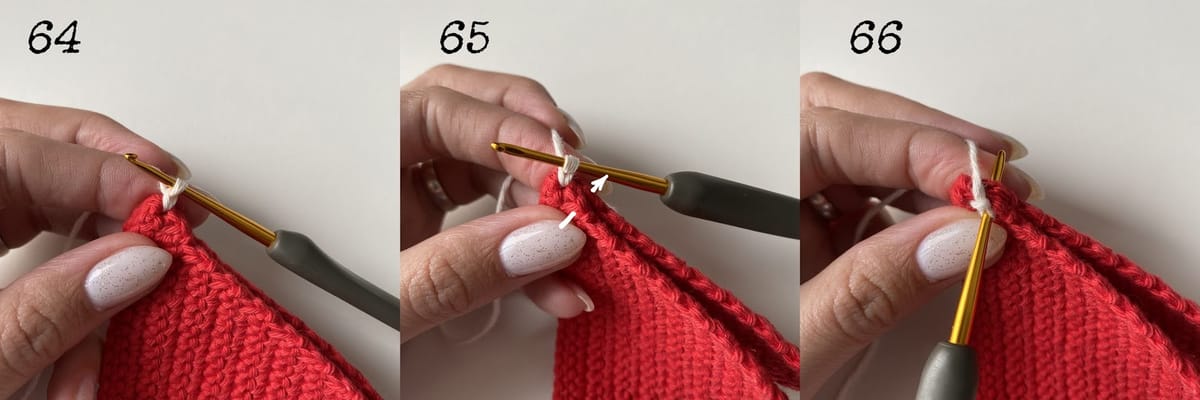
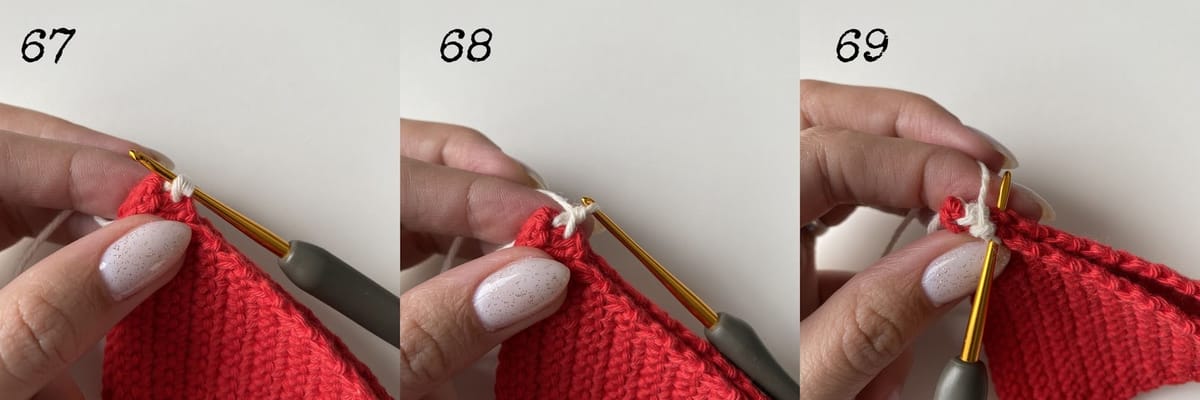
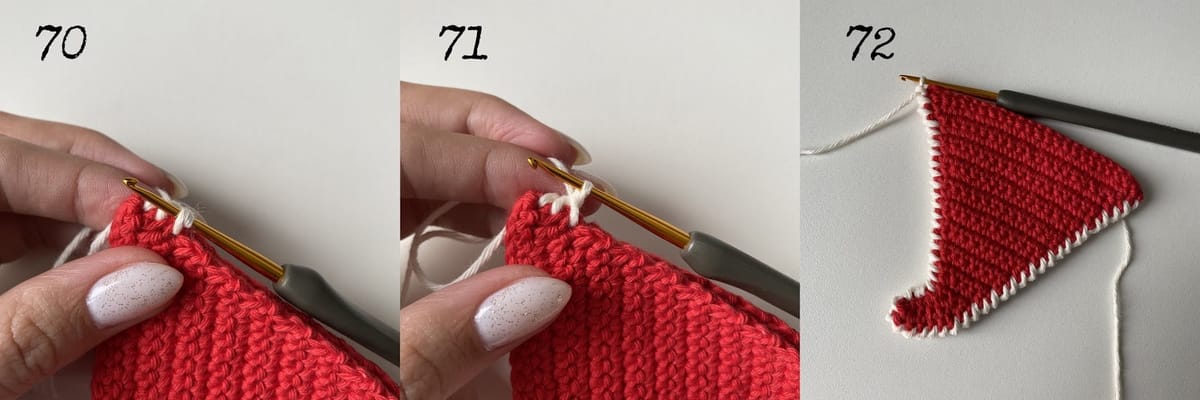
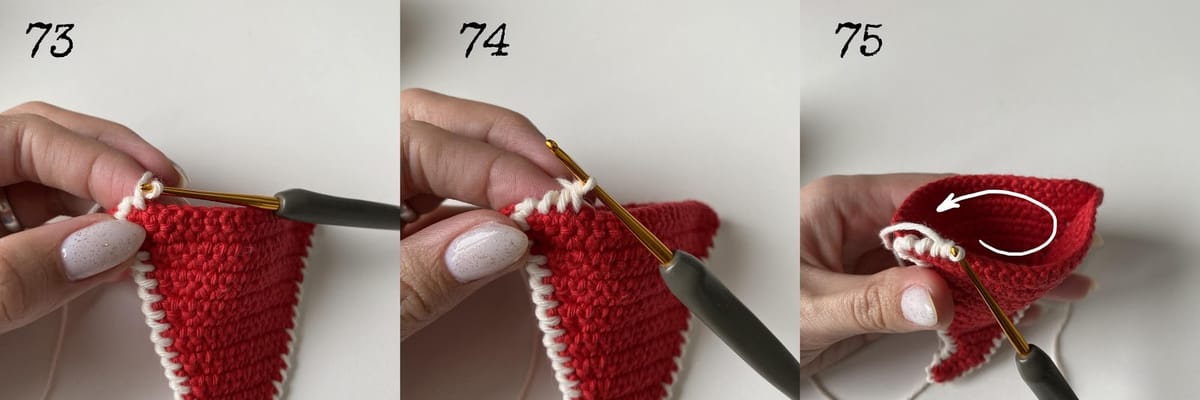
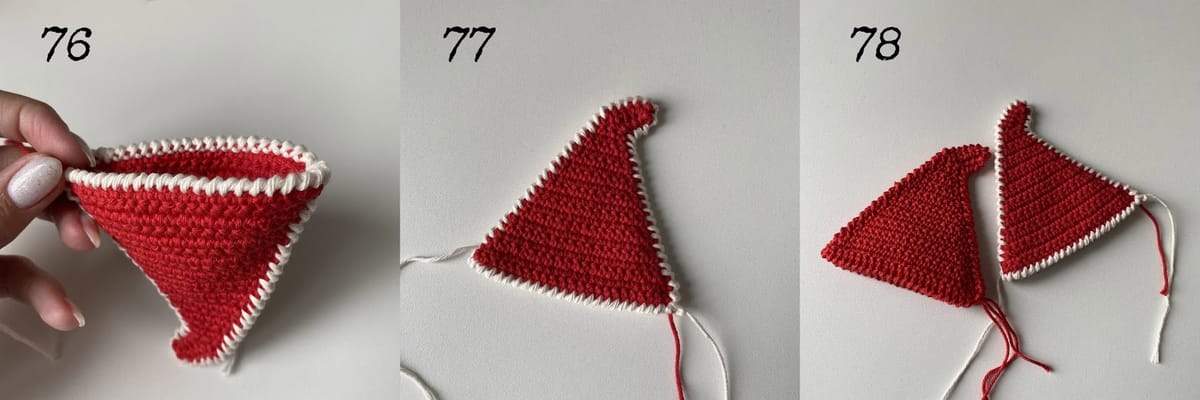
Attach details together with reverse sc around, using cream color yarn for the gnome with a grey body, using red yarn for the gnome with a red body (pic.61-78). Weave in yarn ends.
Nose
Crochet with yellow yarn.
Ch 4.
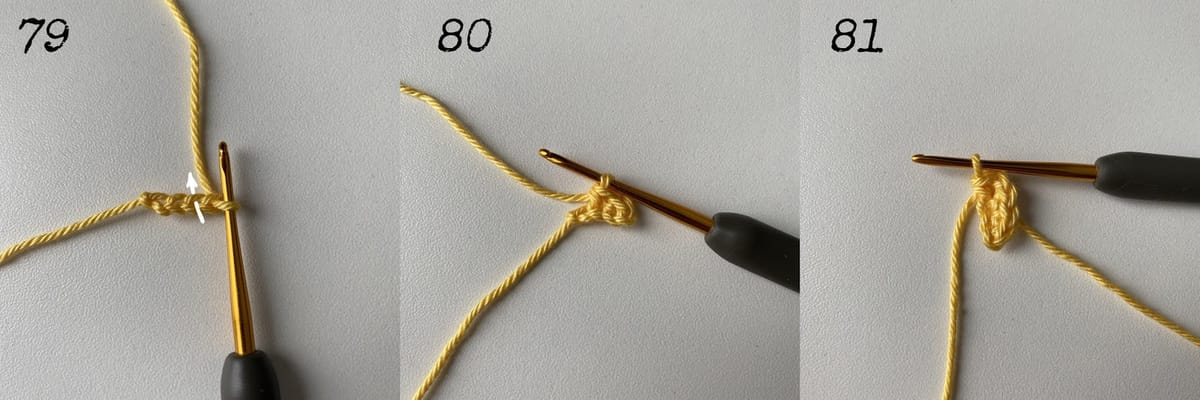
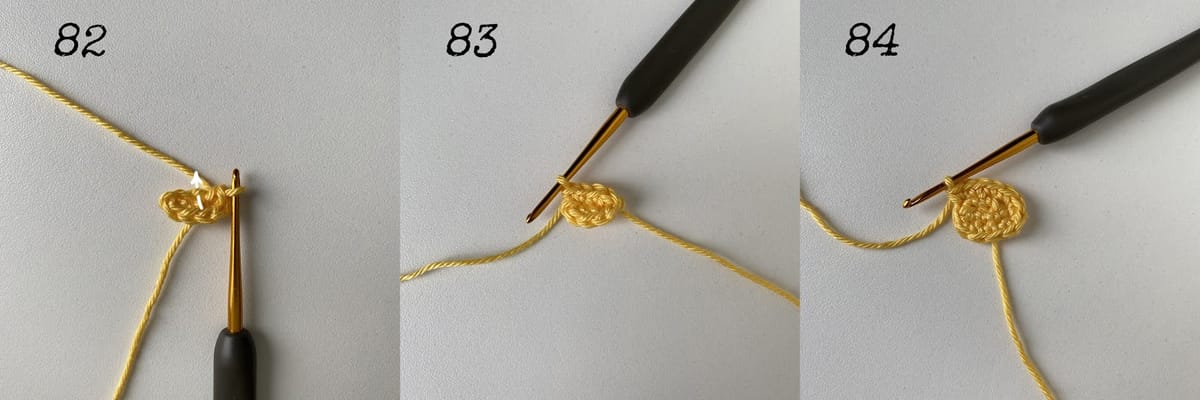
RND 1: start crochet in a second ch from a hook (pic. 79), sc in next 2 ch (pic.80), 3 sc in next ch (pic.81), continue crochet on the other side of foundation chains (pic.82), sc in next st, 2 sc in next st [8] (pic.83)
RND 2: inc in next st, sc in next 2 st, inc in next 2 st, sc in next 2 st, inc in next st [12] (pic.84)
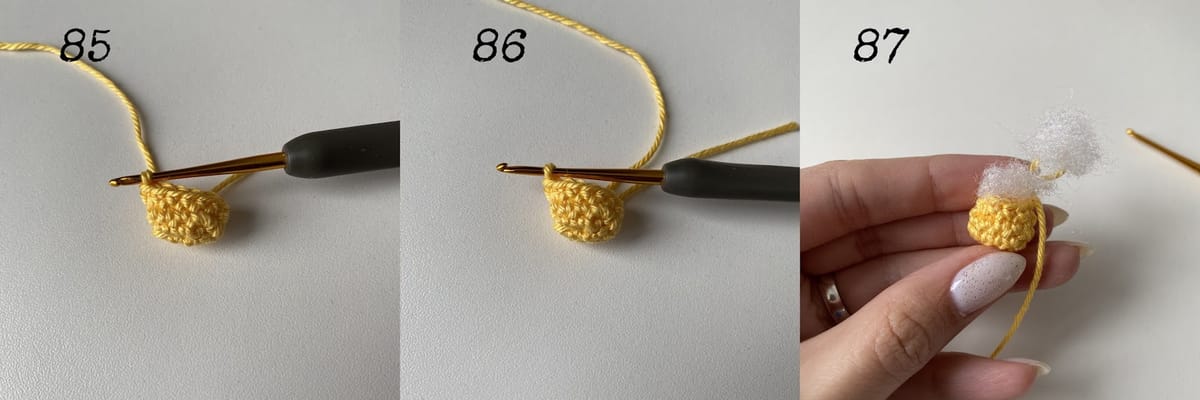
RND 3: sc in next 12 st [12] (pic.85-86)
RND 4: dec, sc in next 2 st, dec 2 times, sc in next 2 st, dec [8]
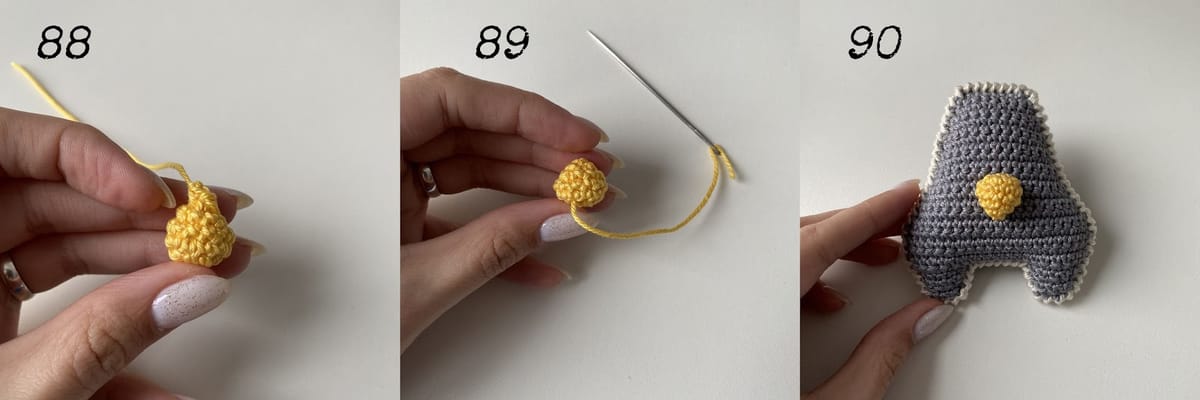
Stuff the detail. (pic.87)
RND 5: dec 4 times [4] (pic.88)
Fasten off, leave a long tail for sewing.
Then sew the nose between rounds 12-15 of the body. (pic.89-90)
Beard
Crochet with cream yarn.
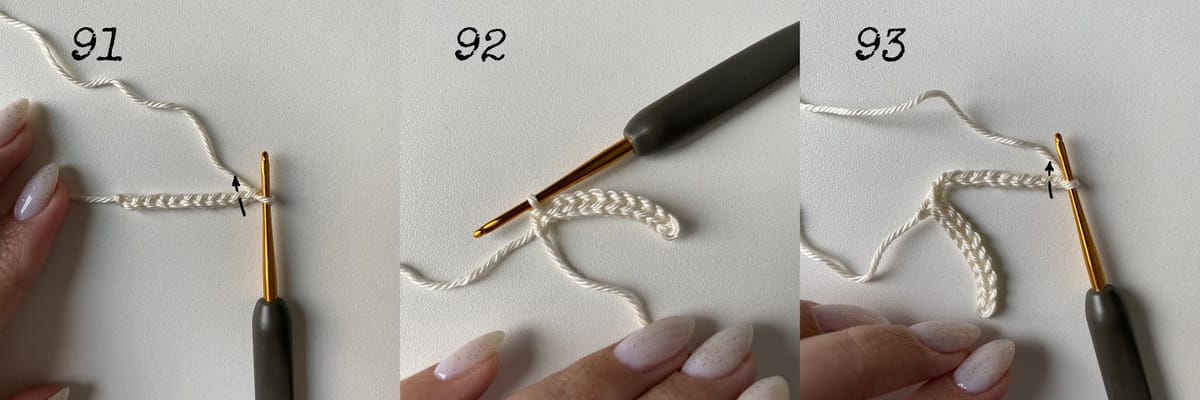
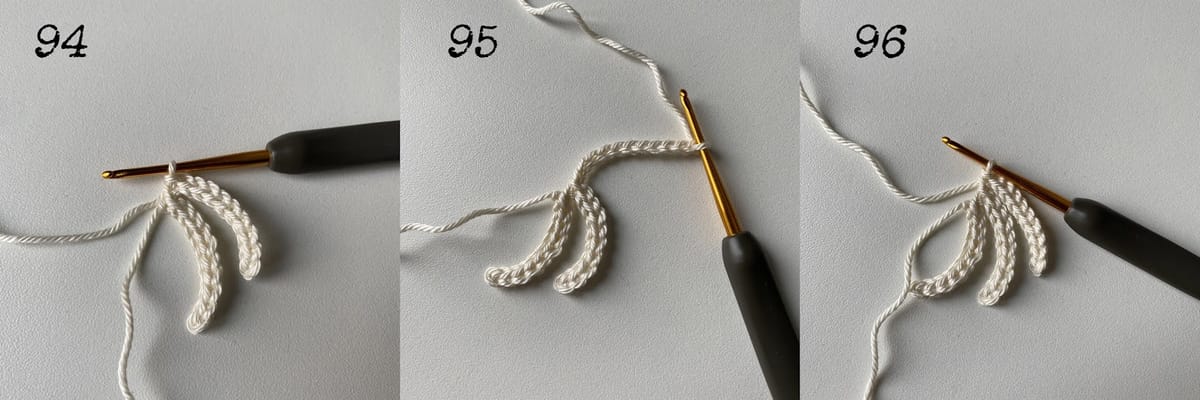
For the beard, we will be branching off in chains to create beard strands.
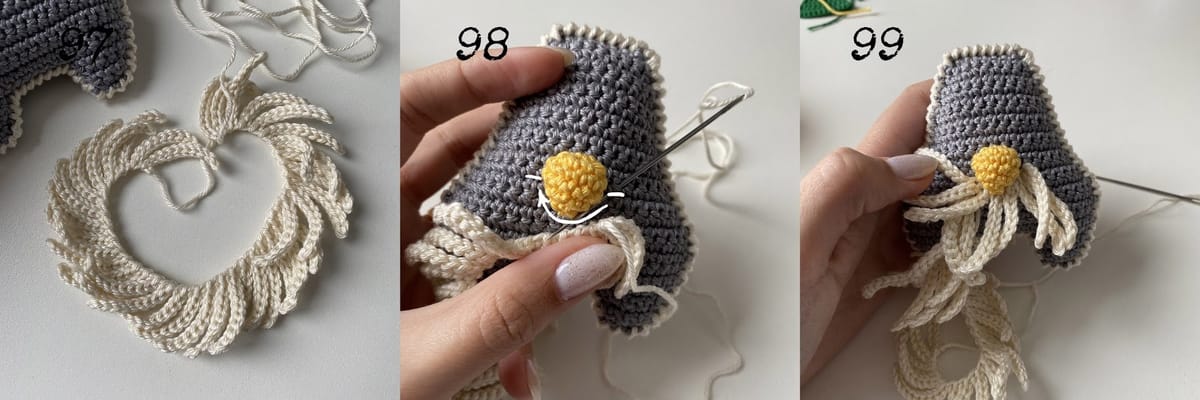
STRAND 1-36: ch 11, start crochet in the second ch from a hook, sl st in next 10 ch (pic.91-97)
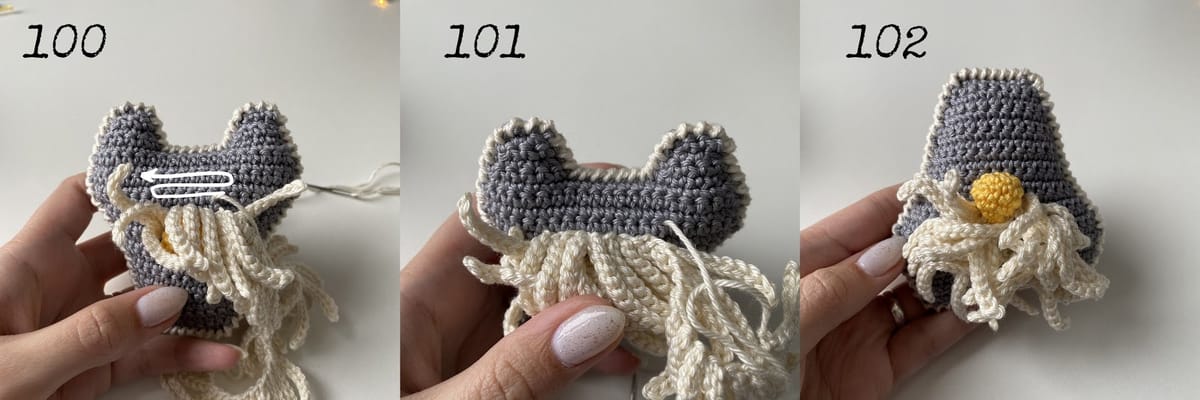
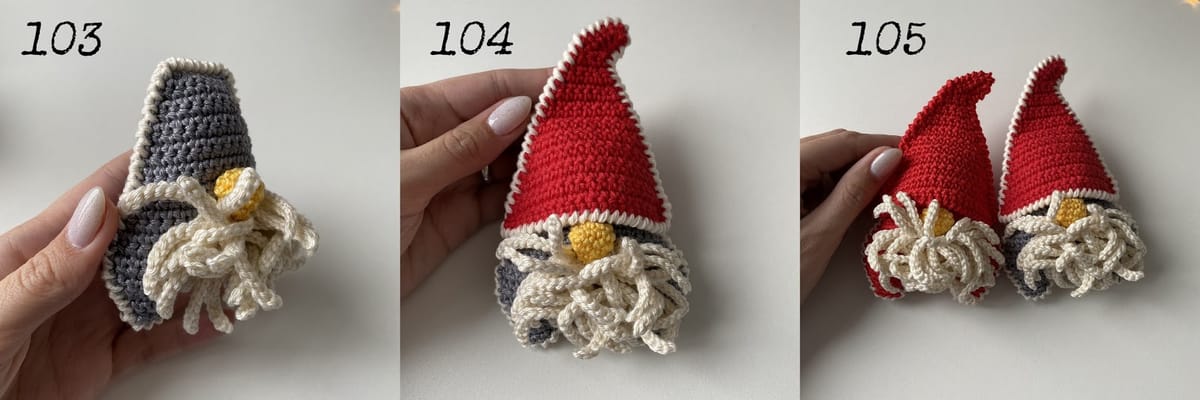
Then sew the beard to the body. (pic.98-103)
Now sew the hat. (pic.104-105)
Share your finished toys on Instagram with #knittedstorybears or tag me @knittedstorybears
If you have any questions feel free to ask in comments or contact form below.
My links:
FREE PATTERNS ↠ all free patterns
INSTAGRAM ↠ https://www.instagram.com/knittedstorybears/
FACEBOOK ↠ https://www.facebook.com/knittedstorybears
RAVELRY ↠ https://www.ravelry.com/designers/vira-velmozhna
YOUTUBE ↠ https://www.youtube.com/channel/UCVf-I2z0TVqyTv17T2XSvZw?view_as=subscriber
Comments
Your name and comment are shown publicly under this pattern. See the privacy policy.
Comments couldn't load right now. Please try again later.